> For the complete documentation index, see [llms.txt](https://bluebricks.co/docs/llms.txt). Markdown versions of documentation pages are available by appending `.md` to page URLs; this page is available as [Markdown](https://bluebricks.co/docs/getting-started/connect-your-cloud/how-to-connect-azure.md).
# Connecting to Azure
Connecting an **Azure Account** to a **Bluebricks Environment** takes up to **5 minutes**.
### Prerequisites
1. Ensure you have a valid subscription id in [Azure](https://portal.azure.com/#home).
### Step 1: Create an environment with an Azure cloud
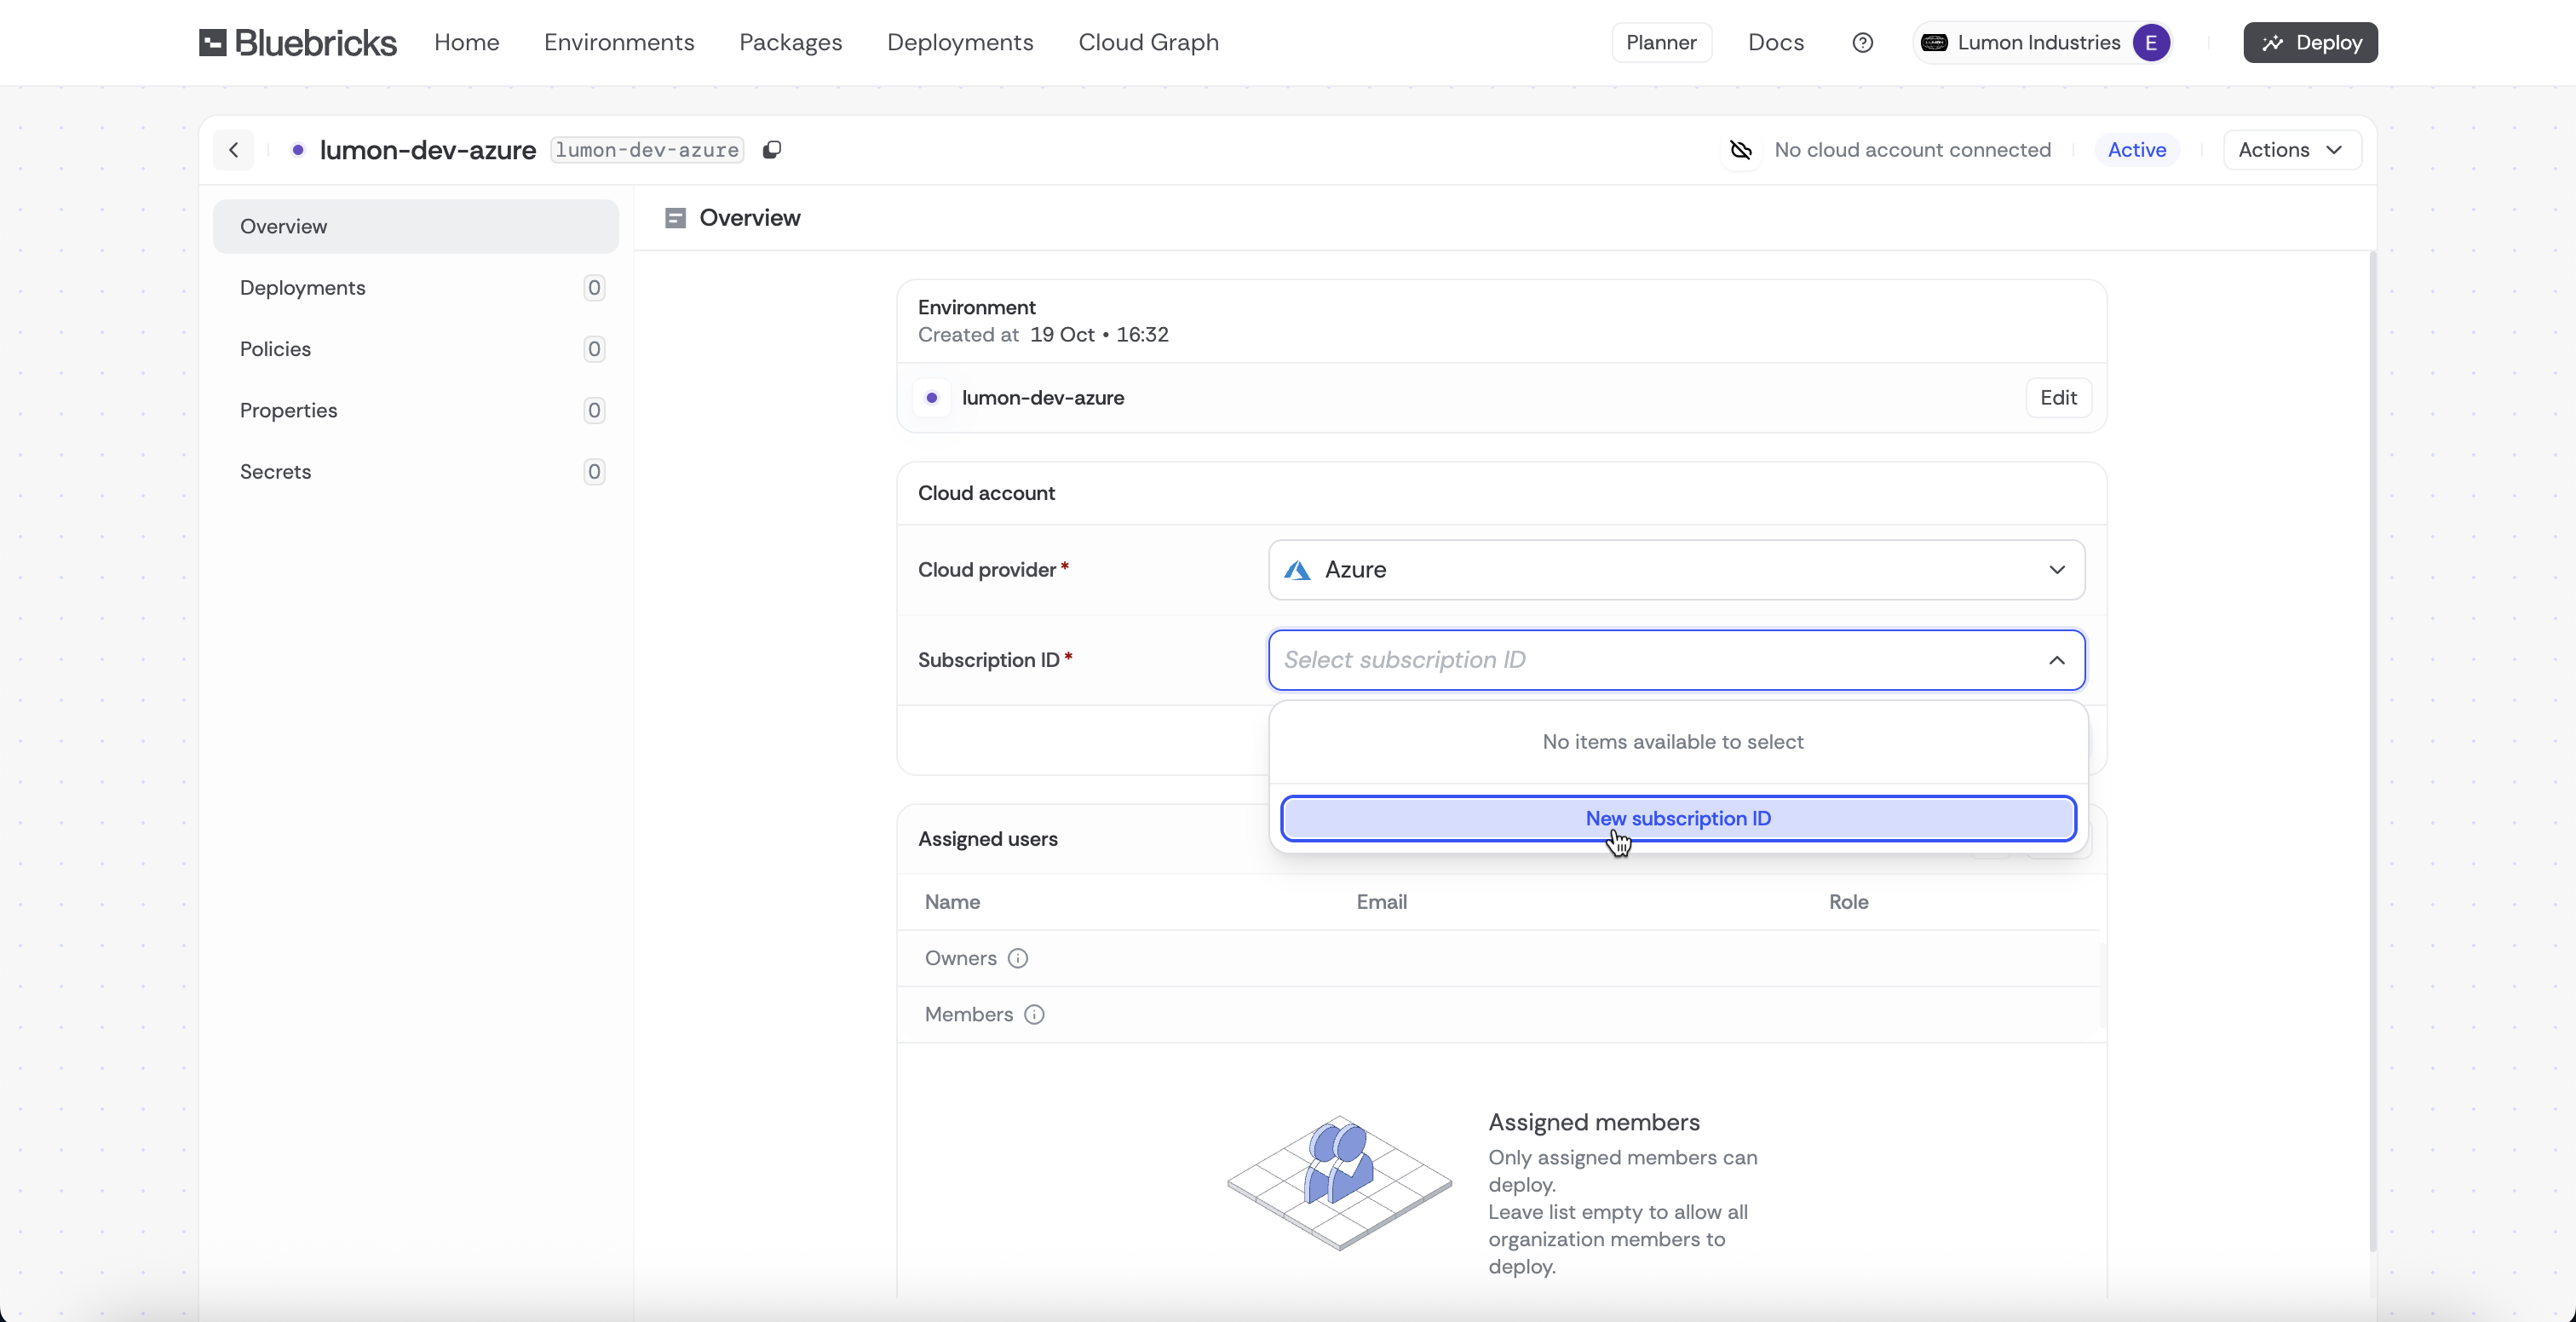
1. Go to the Collections page
2. Click **"Create collection"** and give it a name
3. Select **Azure** as the **Cloud Provider**
4. Choose "**New subscription ID**" or an existing subscription ID.
4. If creating a **New Subscription**, keep the page open and go to Azure Portal.
### Step 2: Create an Azure Service Principal with OIDC
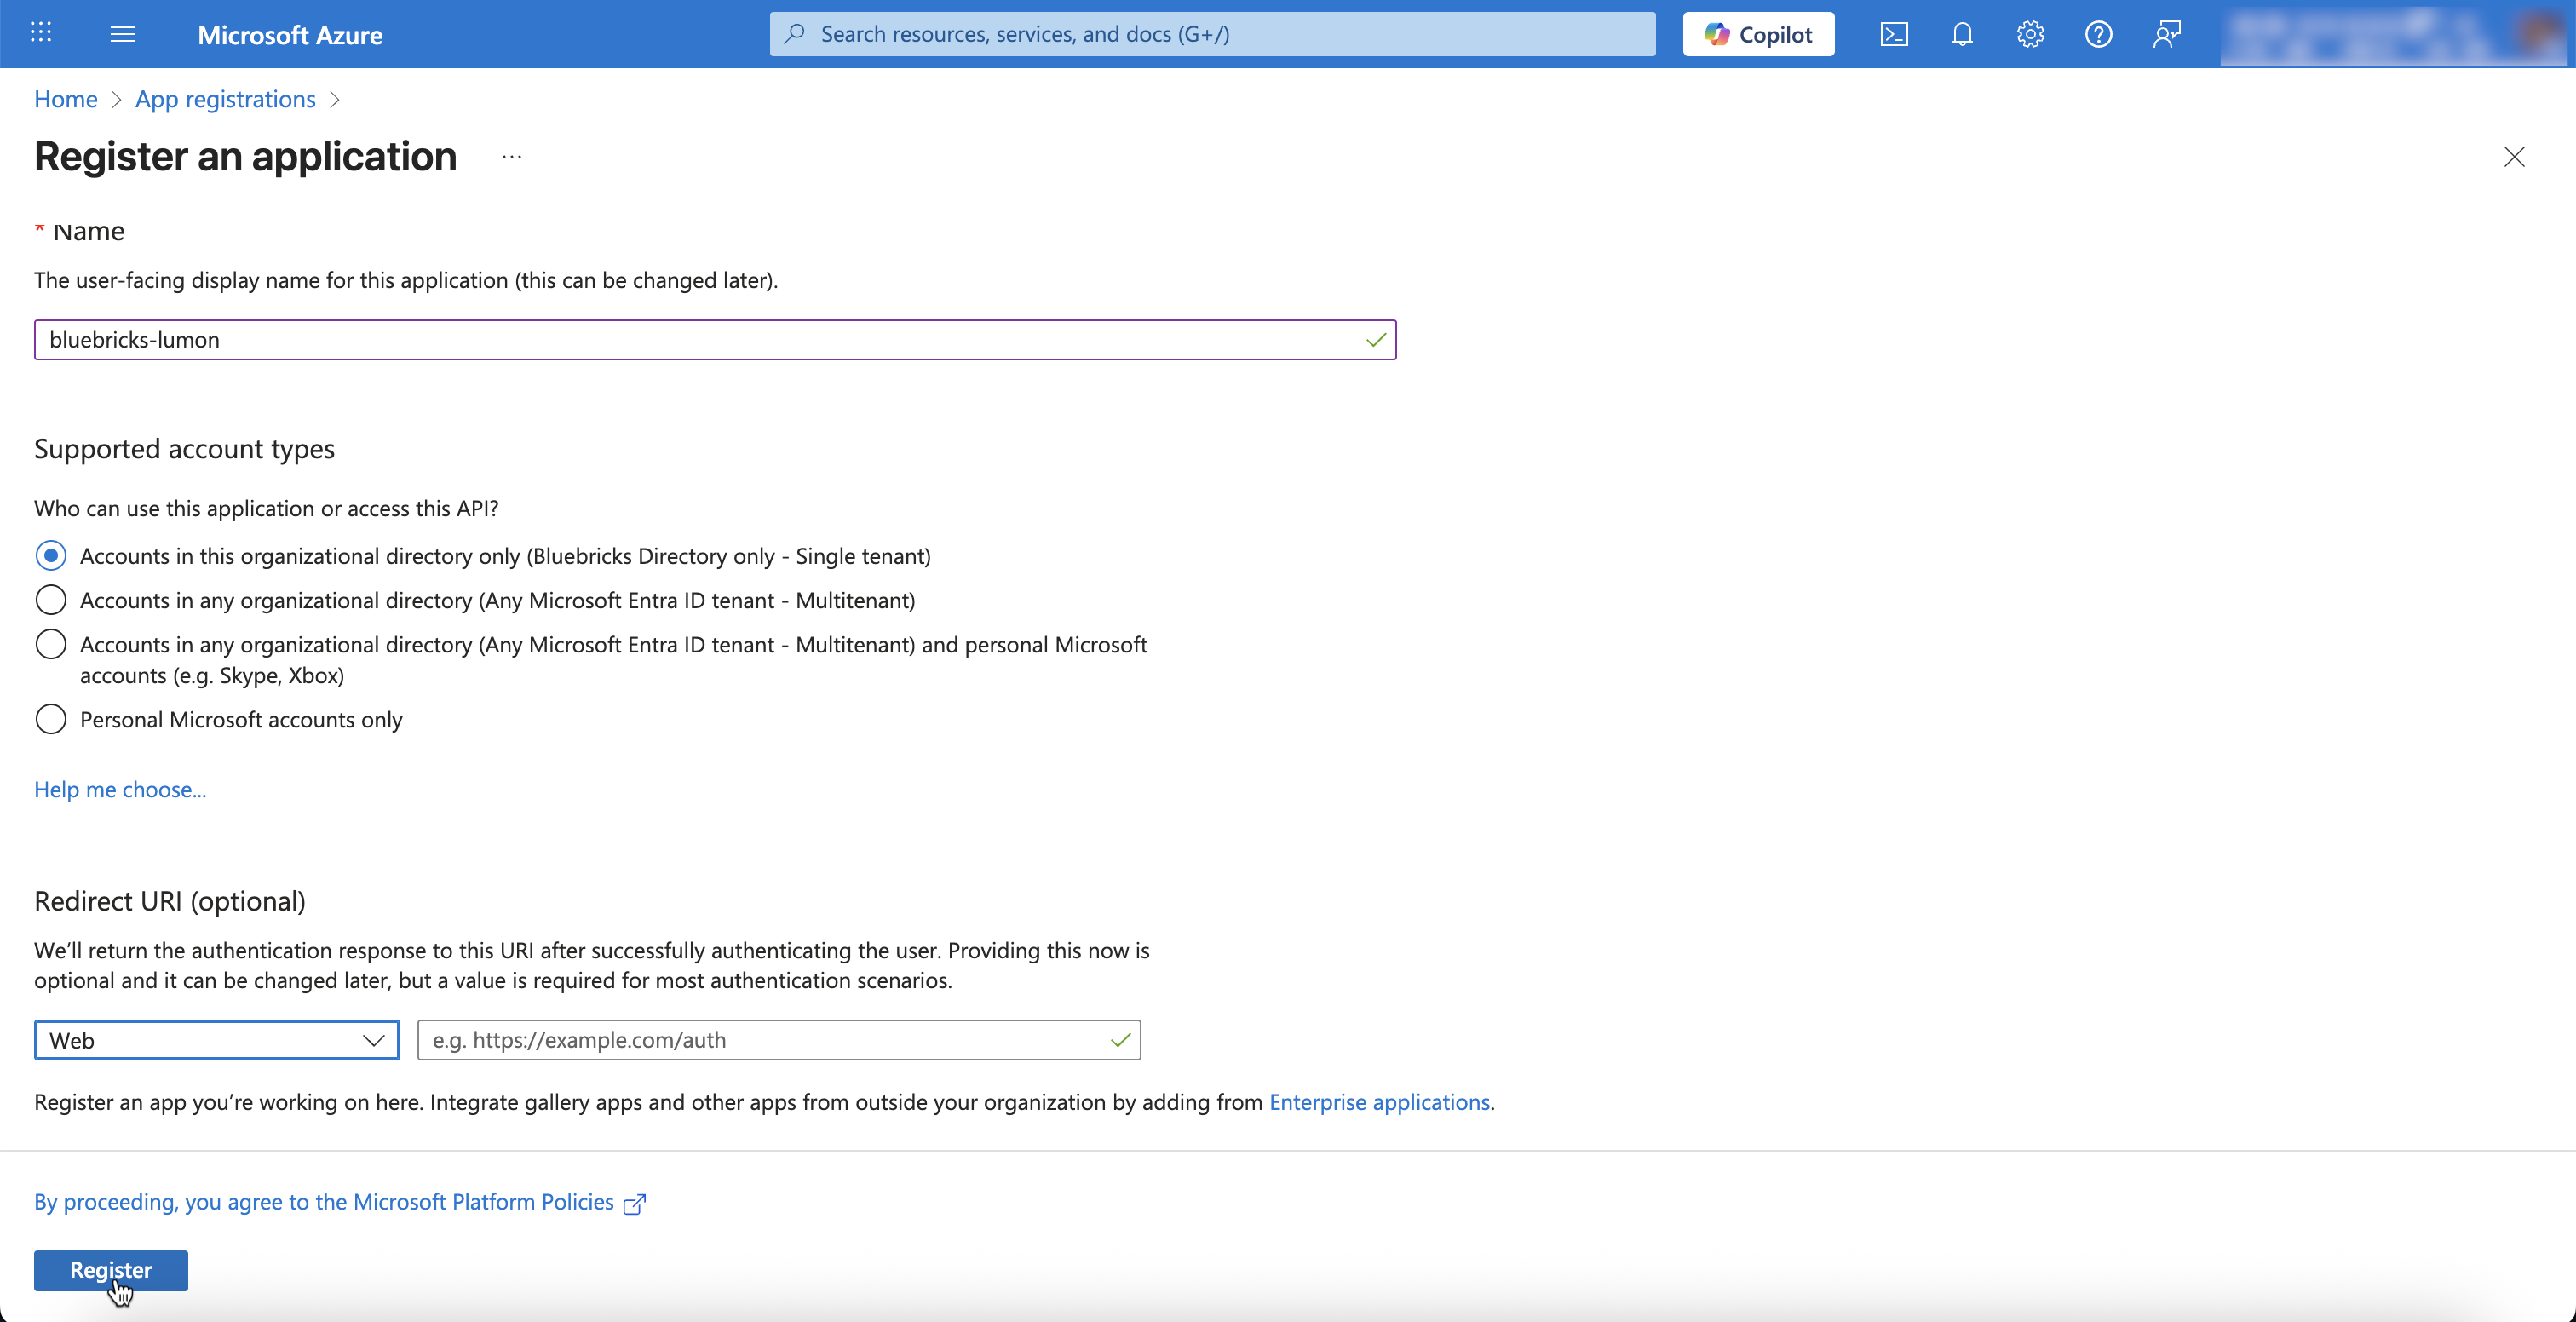
1. Navigate to "App Registration" and select "New Registration"
1. Give a Name
2. Choose "Accounts in this organizational directory only (Single Tenant)"
3. Select "Web" as the Redirect URI Platform and leave the value blank
4. Register the app
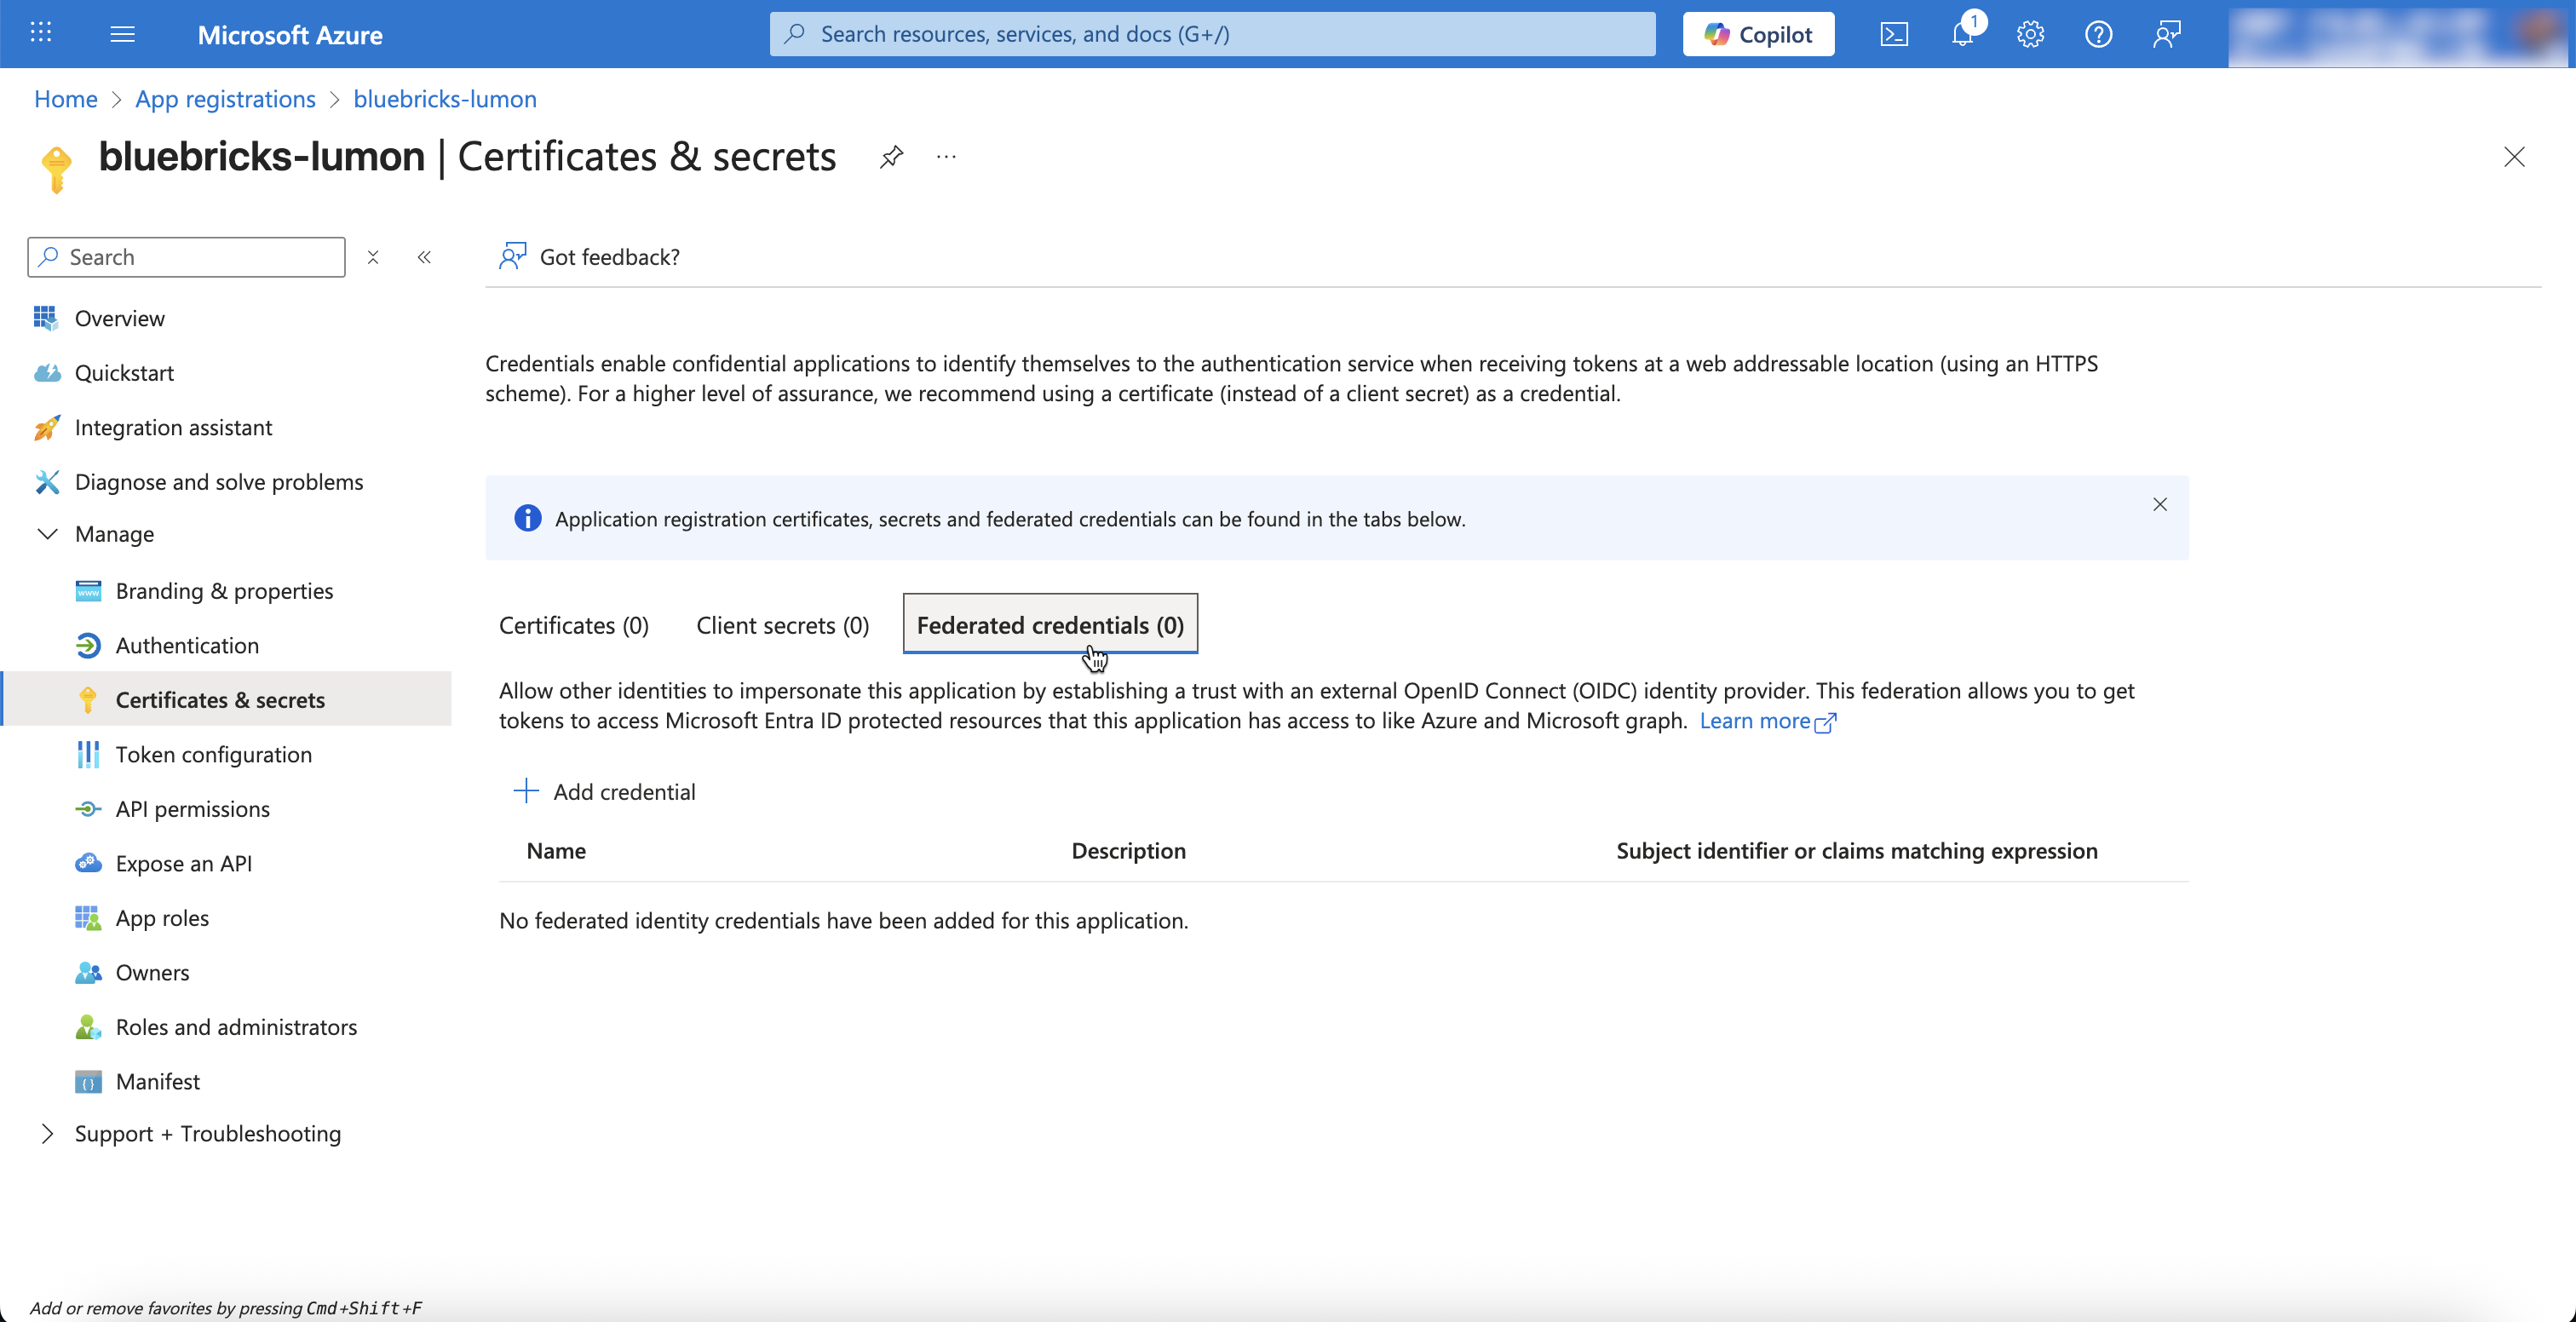
2. Click the app you just create and go to to "Certificates & Secrets" under "Manage"
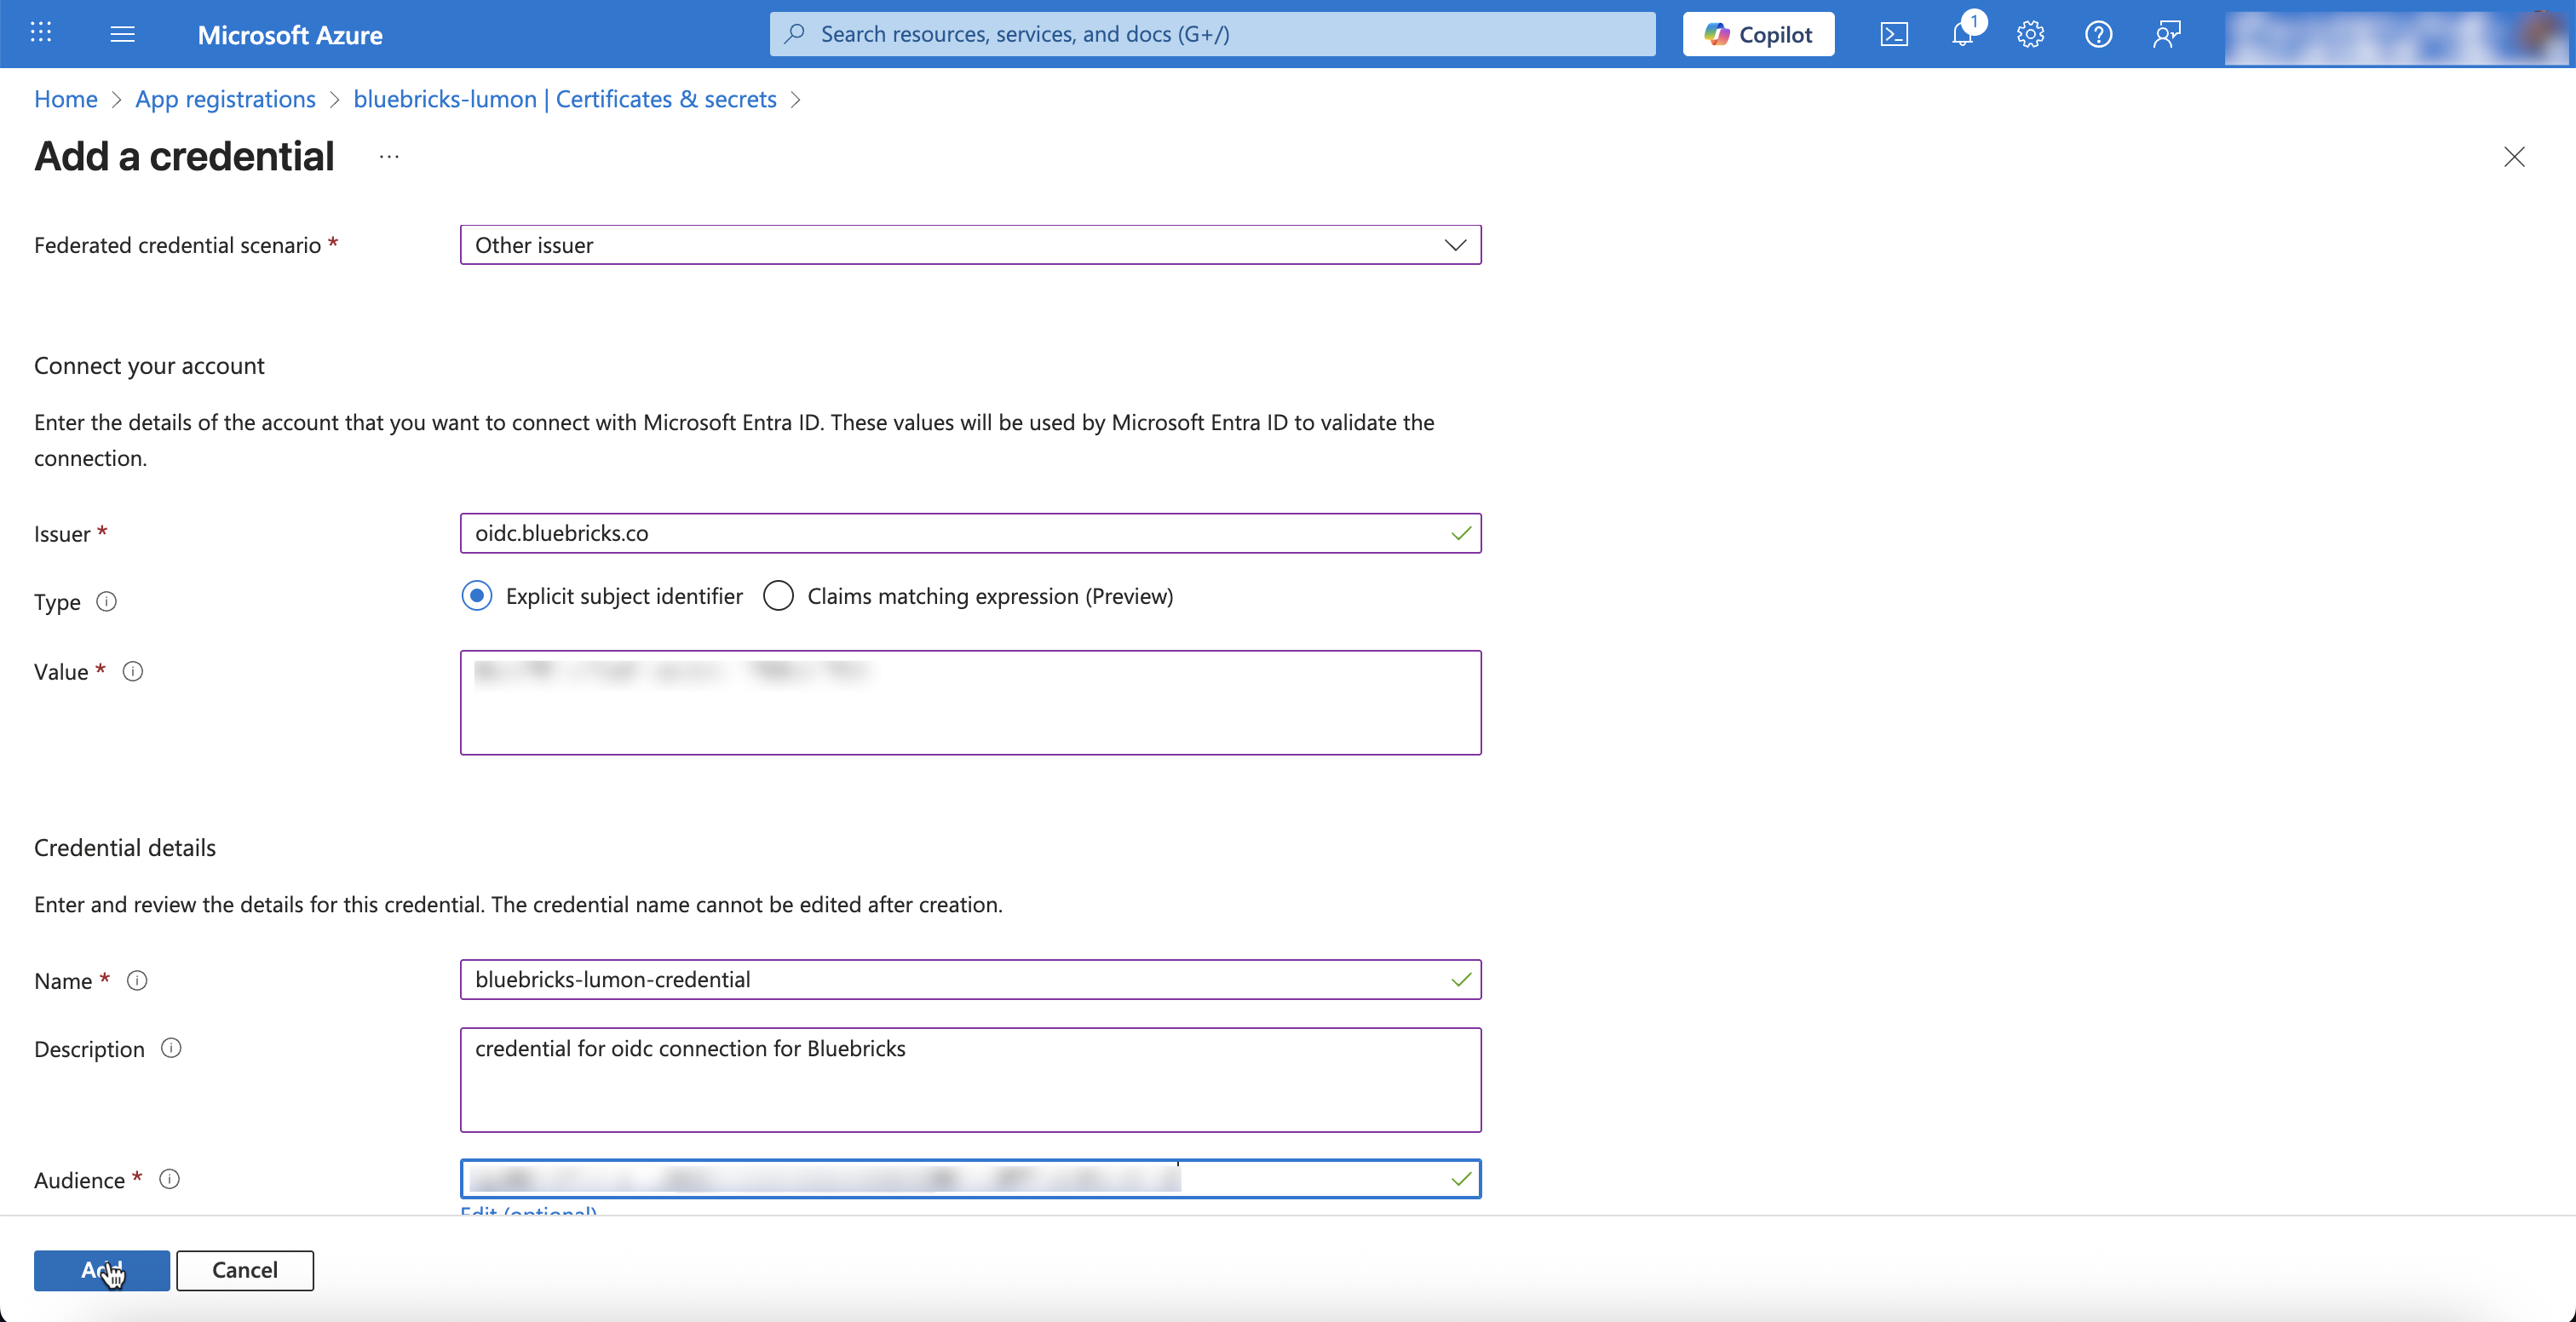
3. Go to the "Federated Credentials" tab select "Add credential"
1. Select "Other Issuer" as the Federated credential scenario
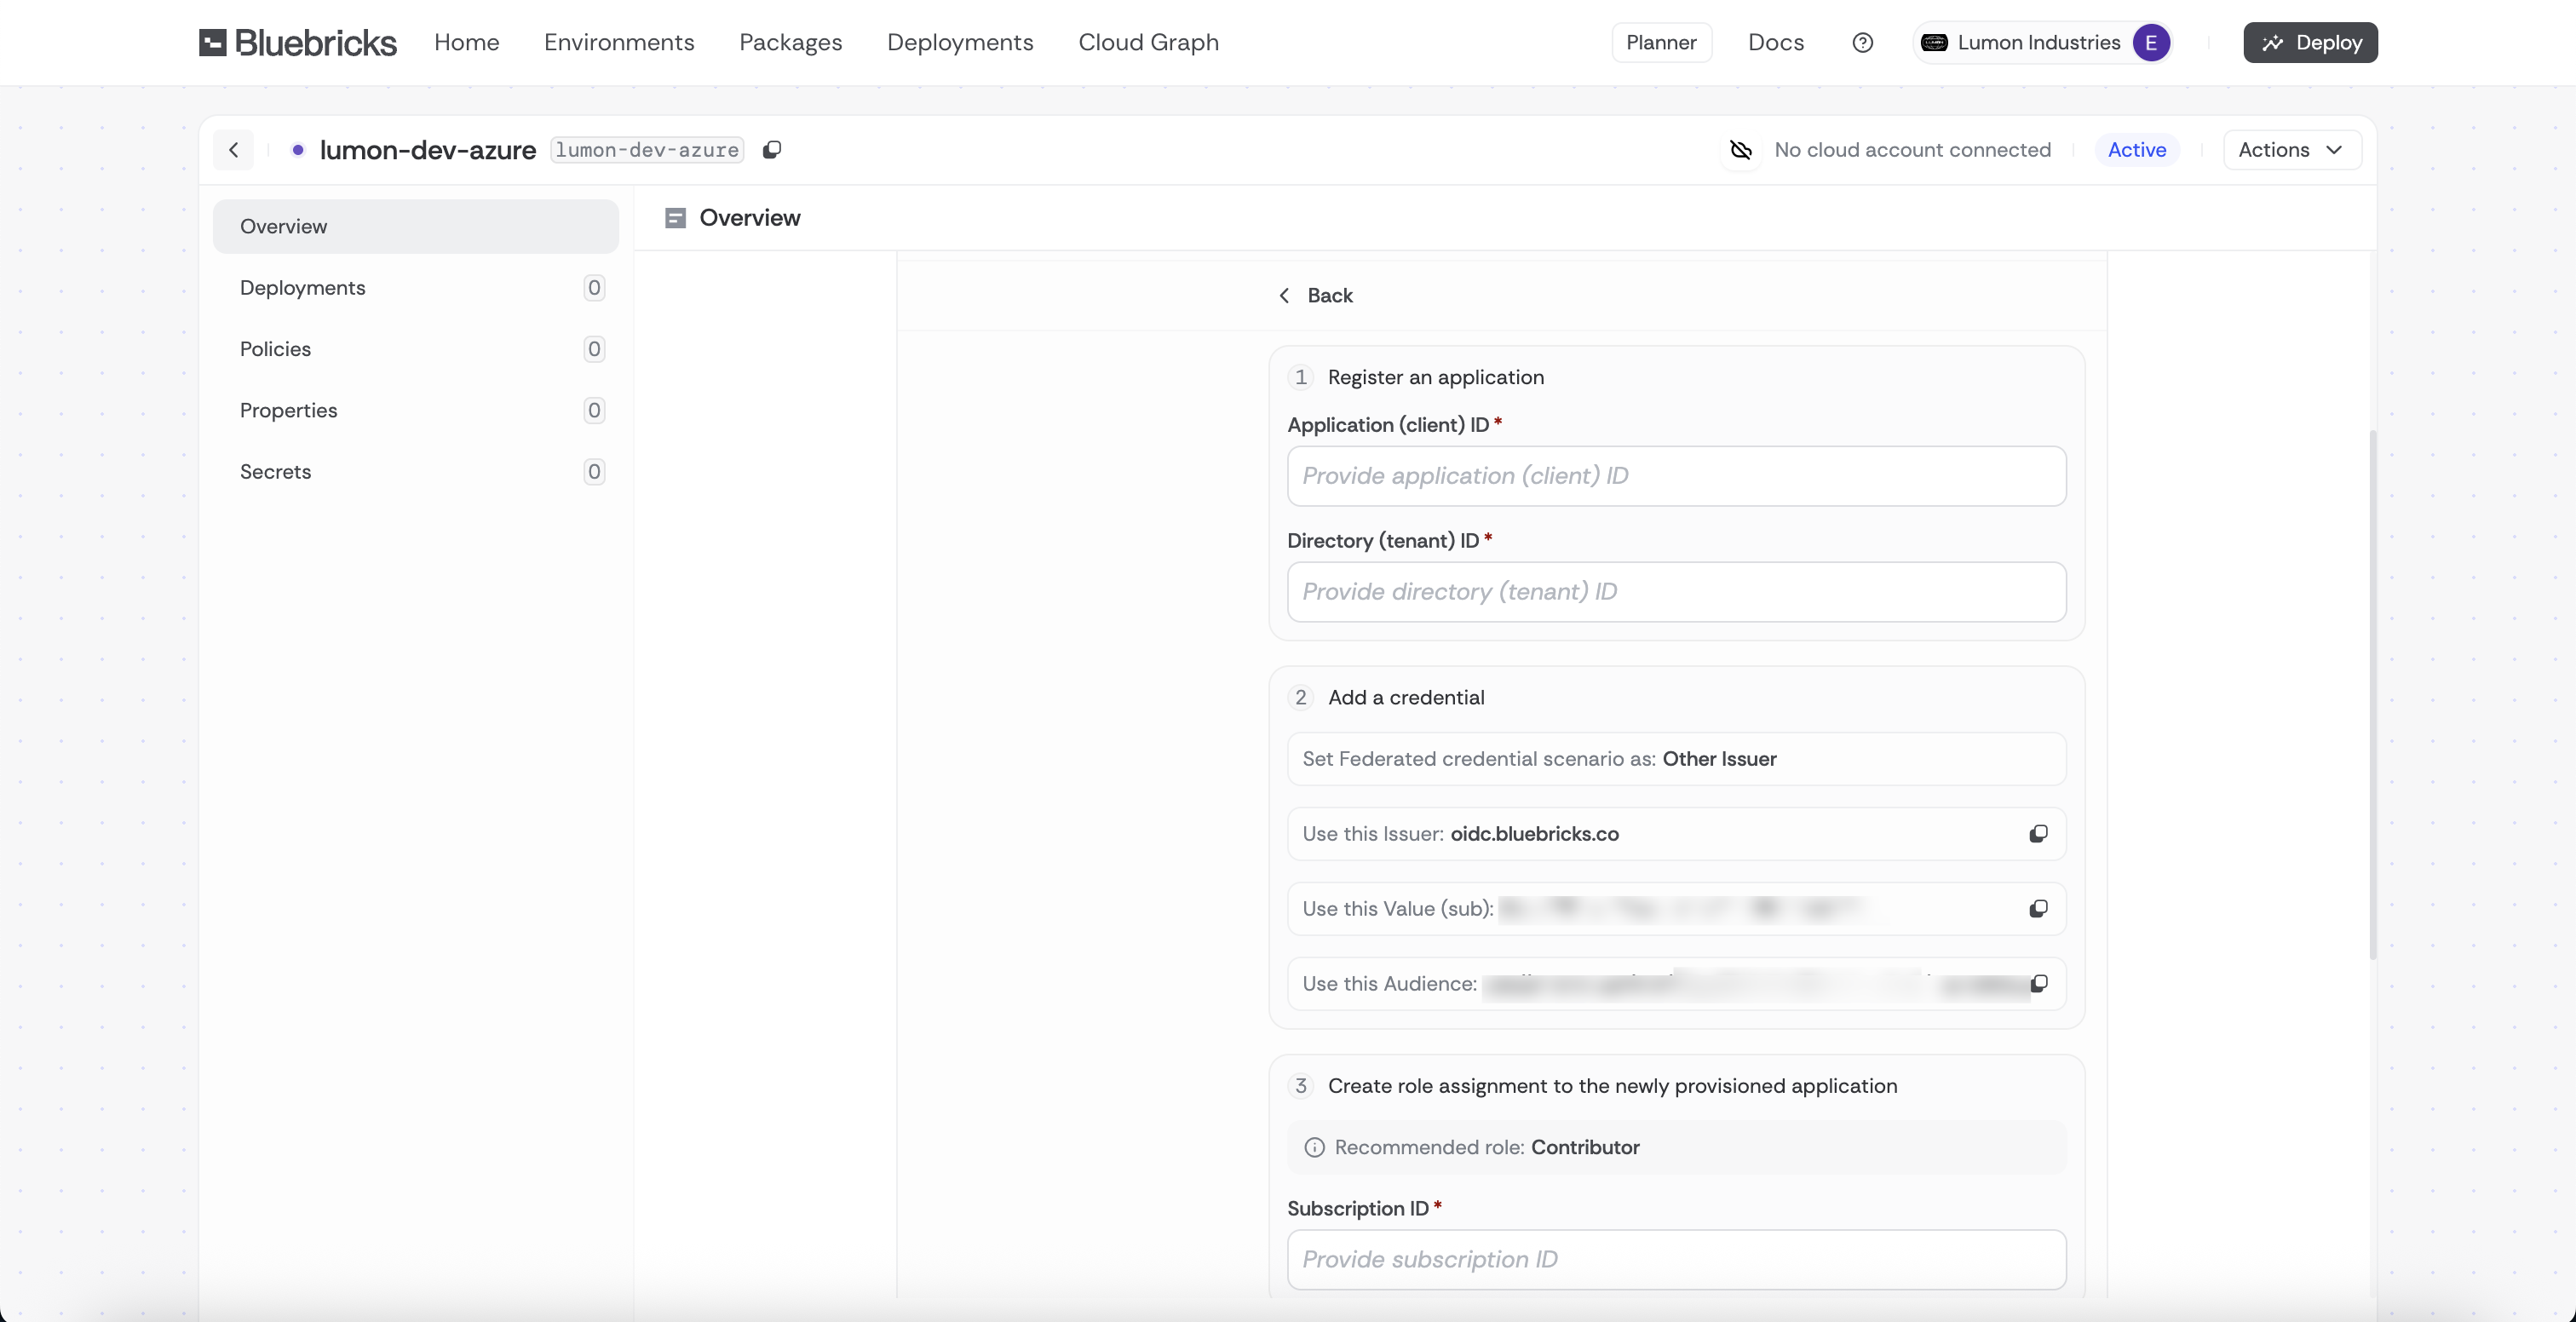
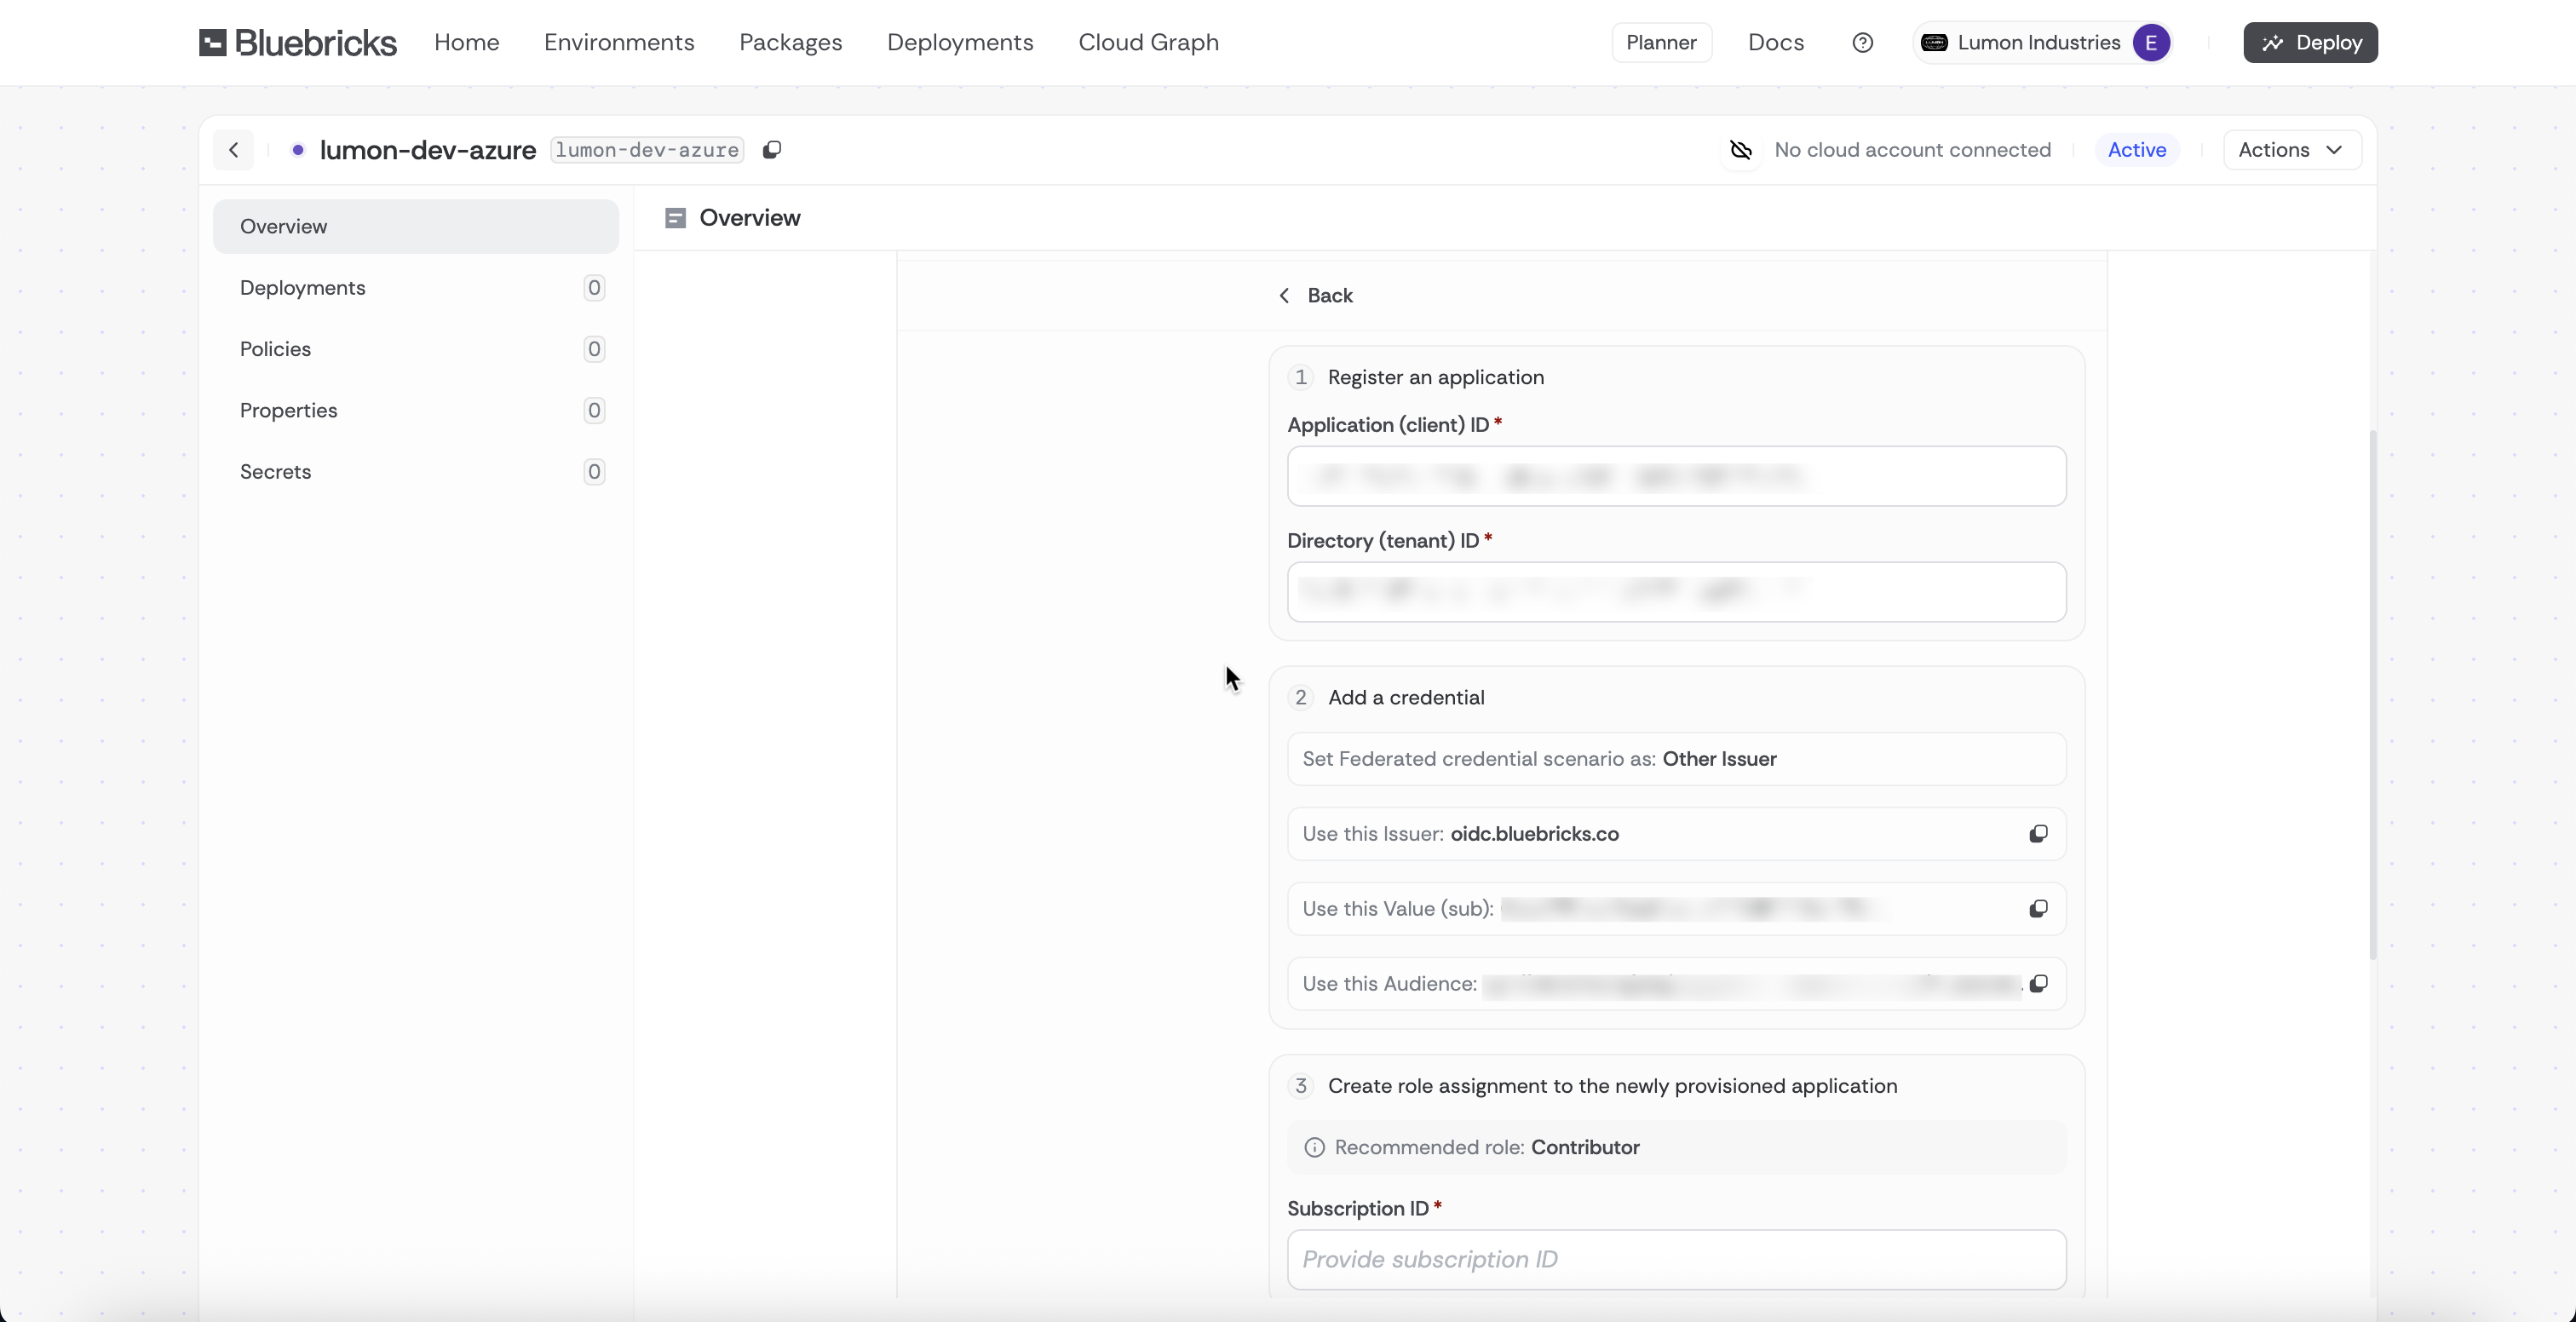
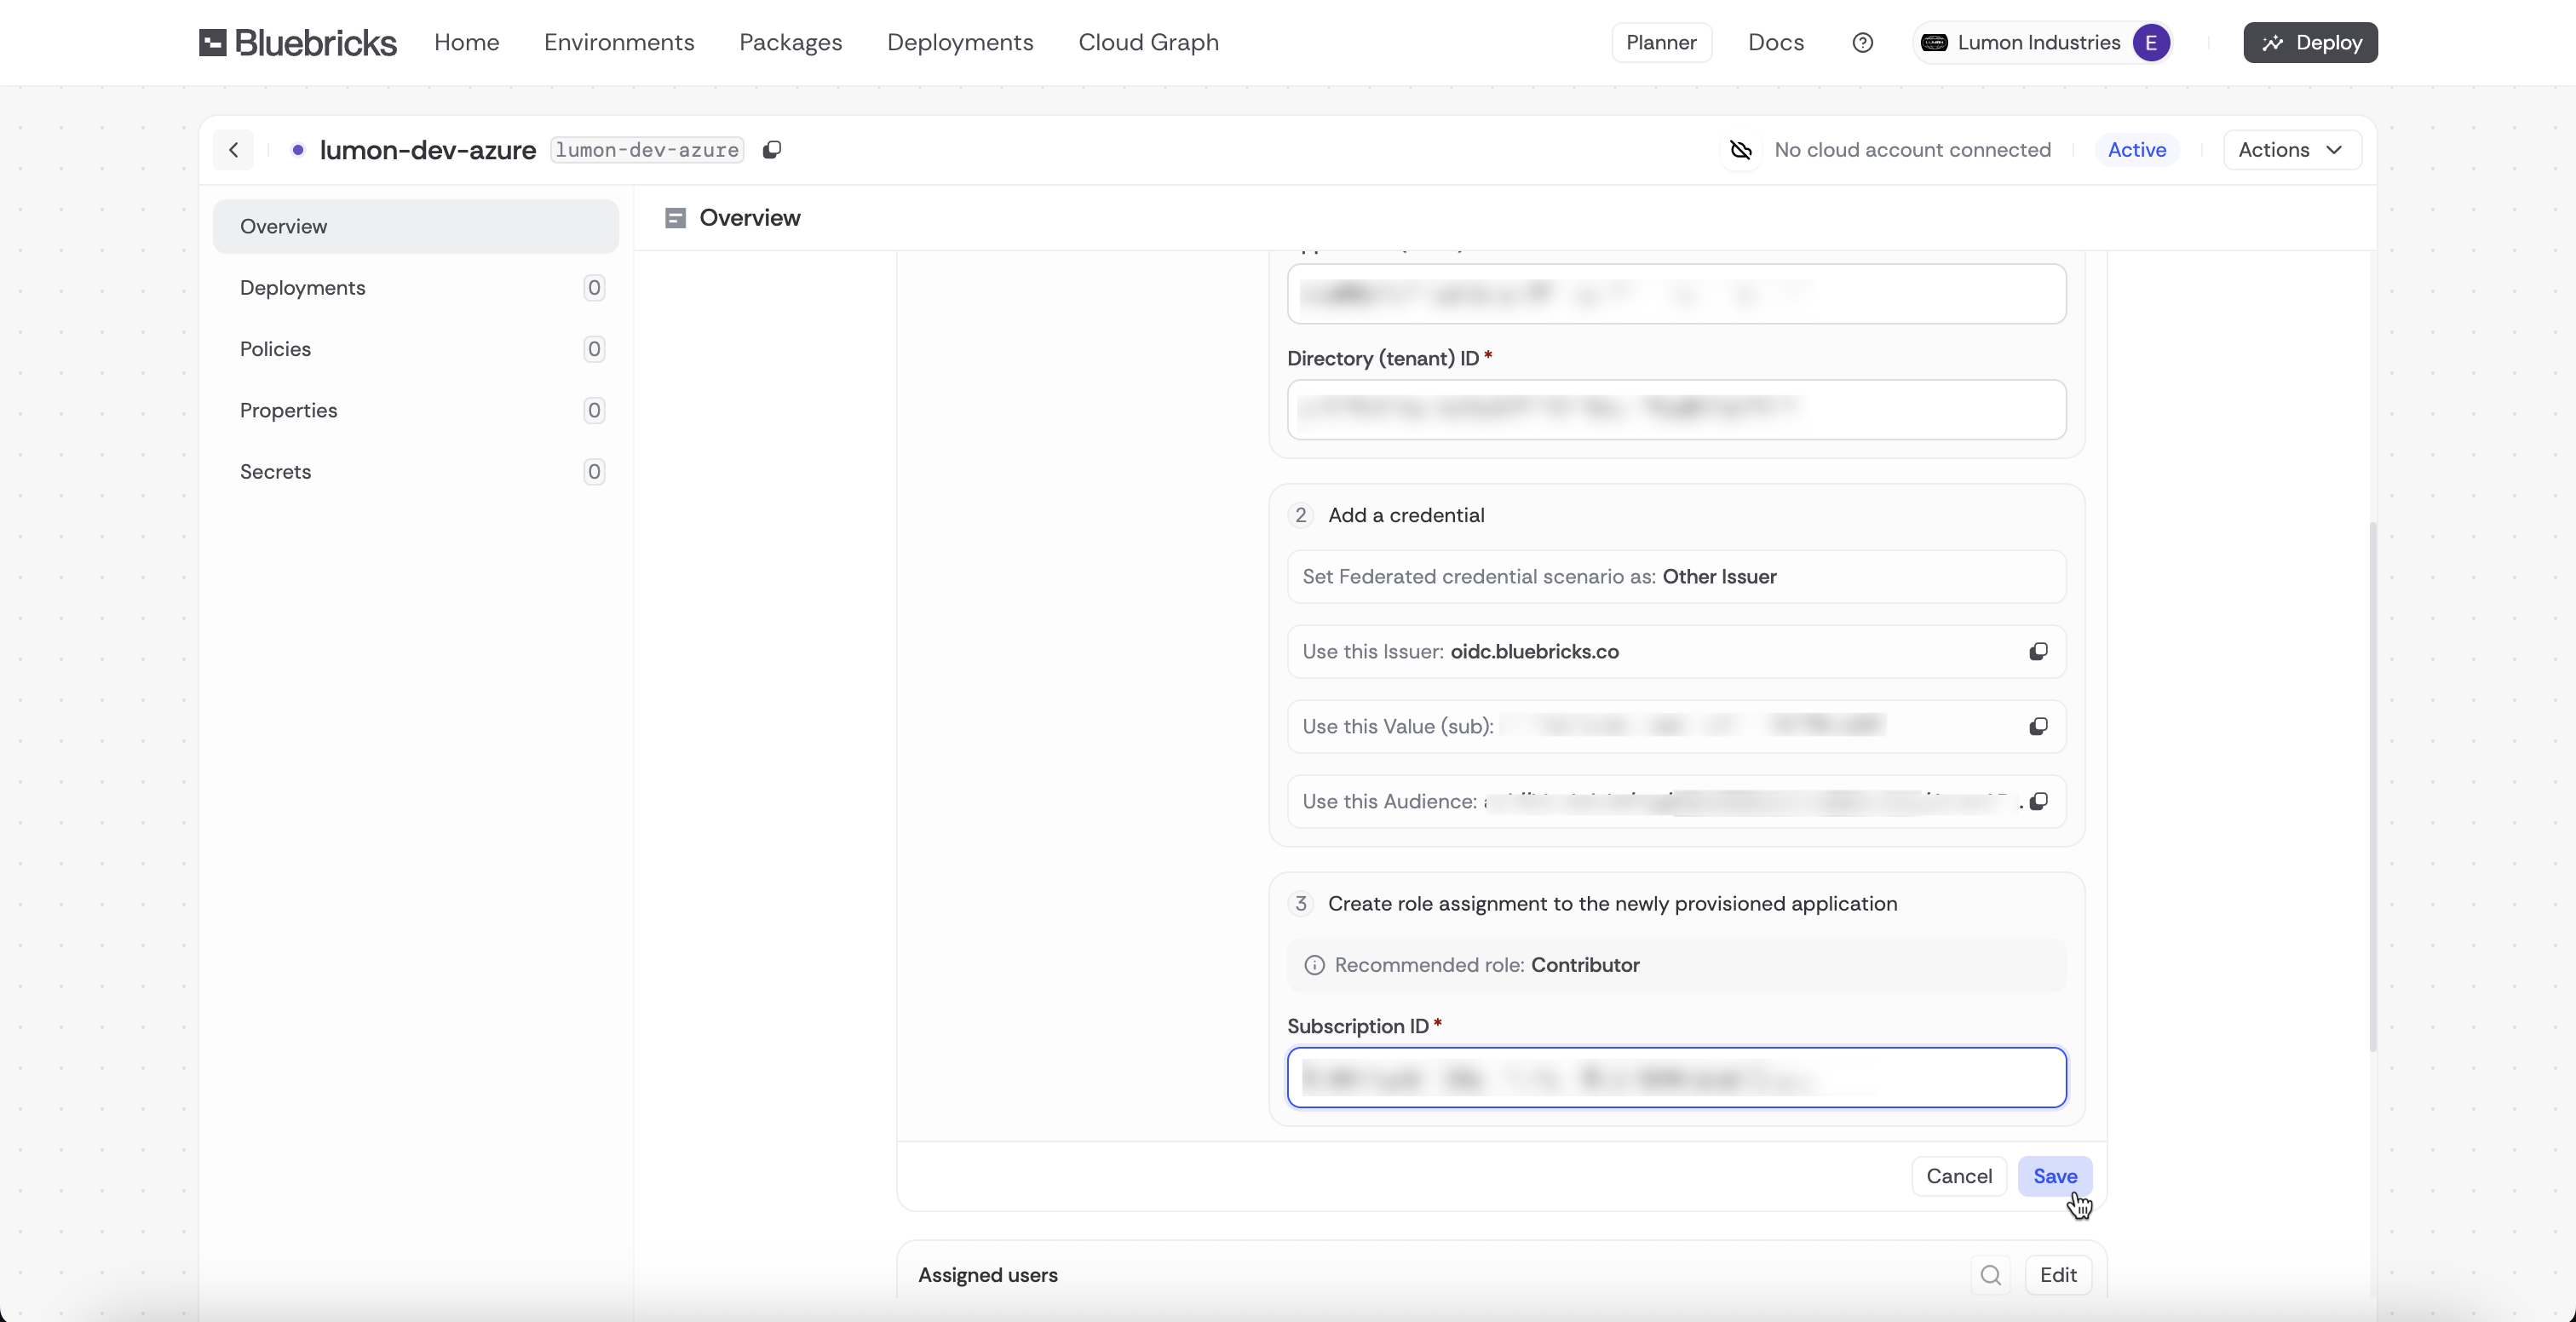
2. Copy the "Issuer" URL from the open environment page in Step 1 as the "Issuer"
3. Choose "Explicit subject identifier"
4. Copy the "Value" from the open environment page in Step 1 as the "Value"
5. Give the Credential a name
6. Copy the "Audience" from the open environment page in Step 1 as the "Audience"
7. Add the Credential
Bluebricks Environment Page
Azure Federated Credential page
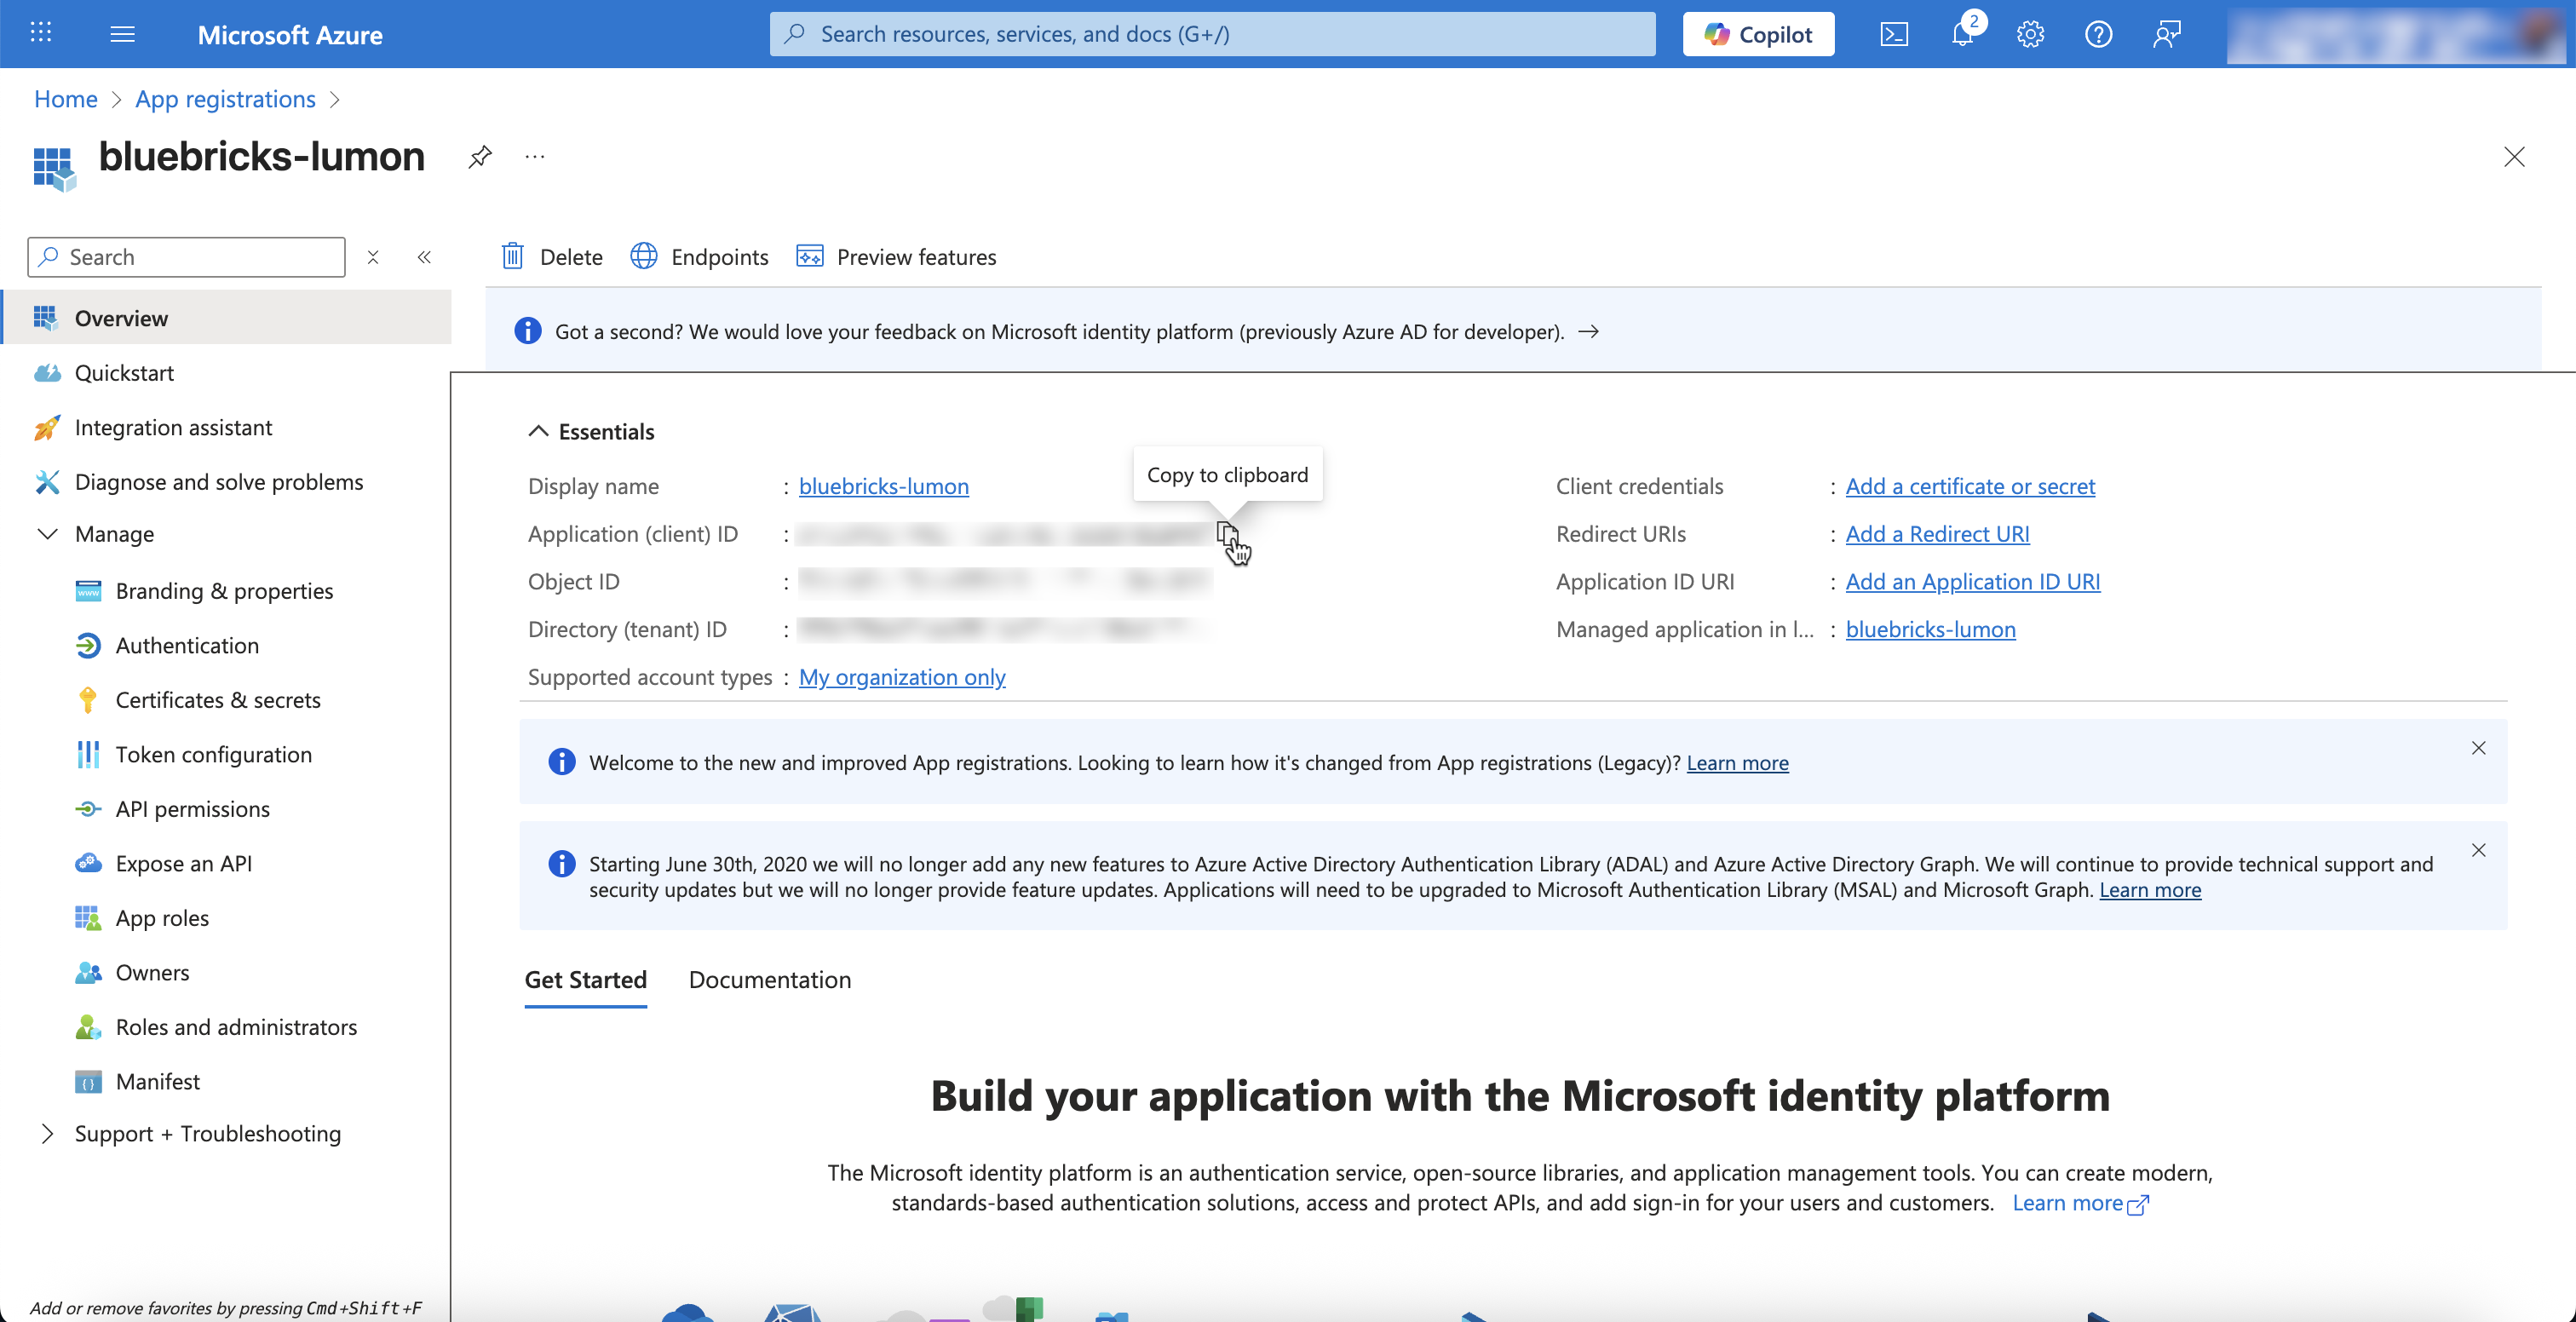
4. Go to the "Overview" section of the App and copy following into environment page on Bluebricks:
1. Application (client) ID
2. Directory (tenant) ID
Azure Application Overview
Bluebricks Environment Page
### Step 3: Create role assignment to the newly provisioned application
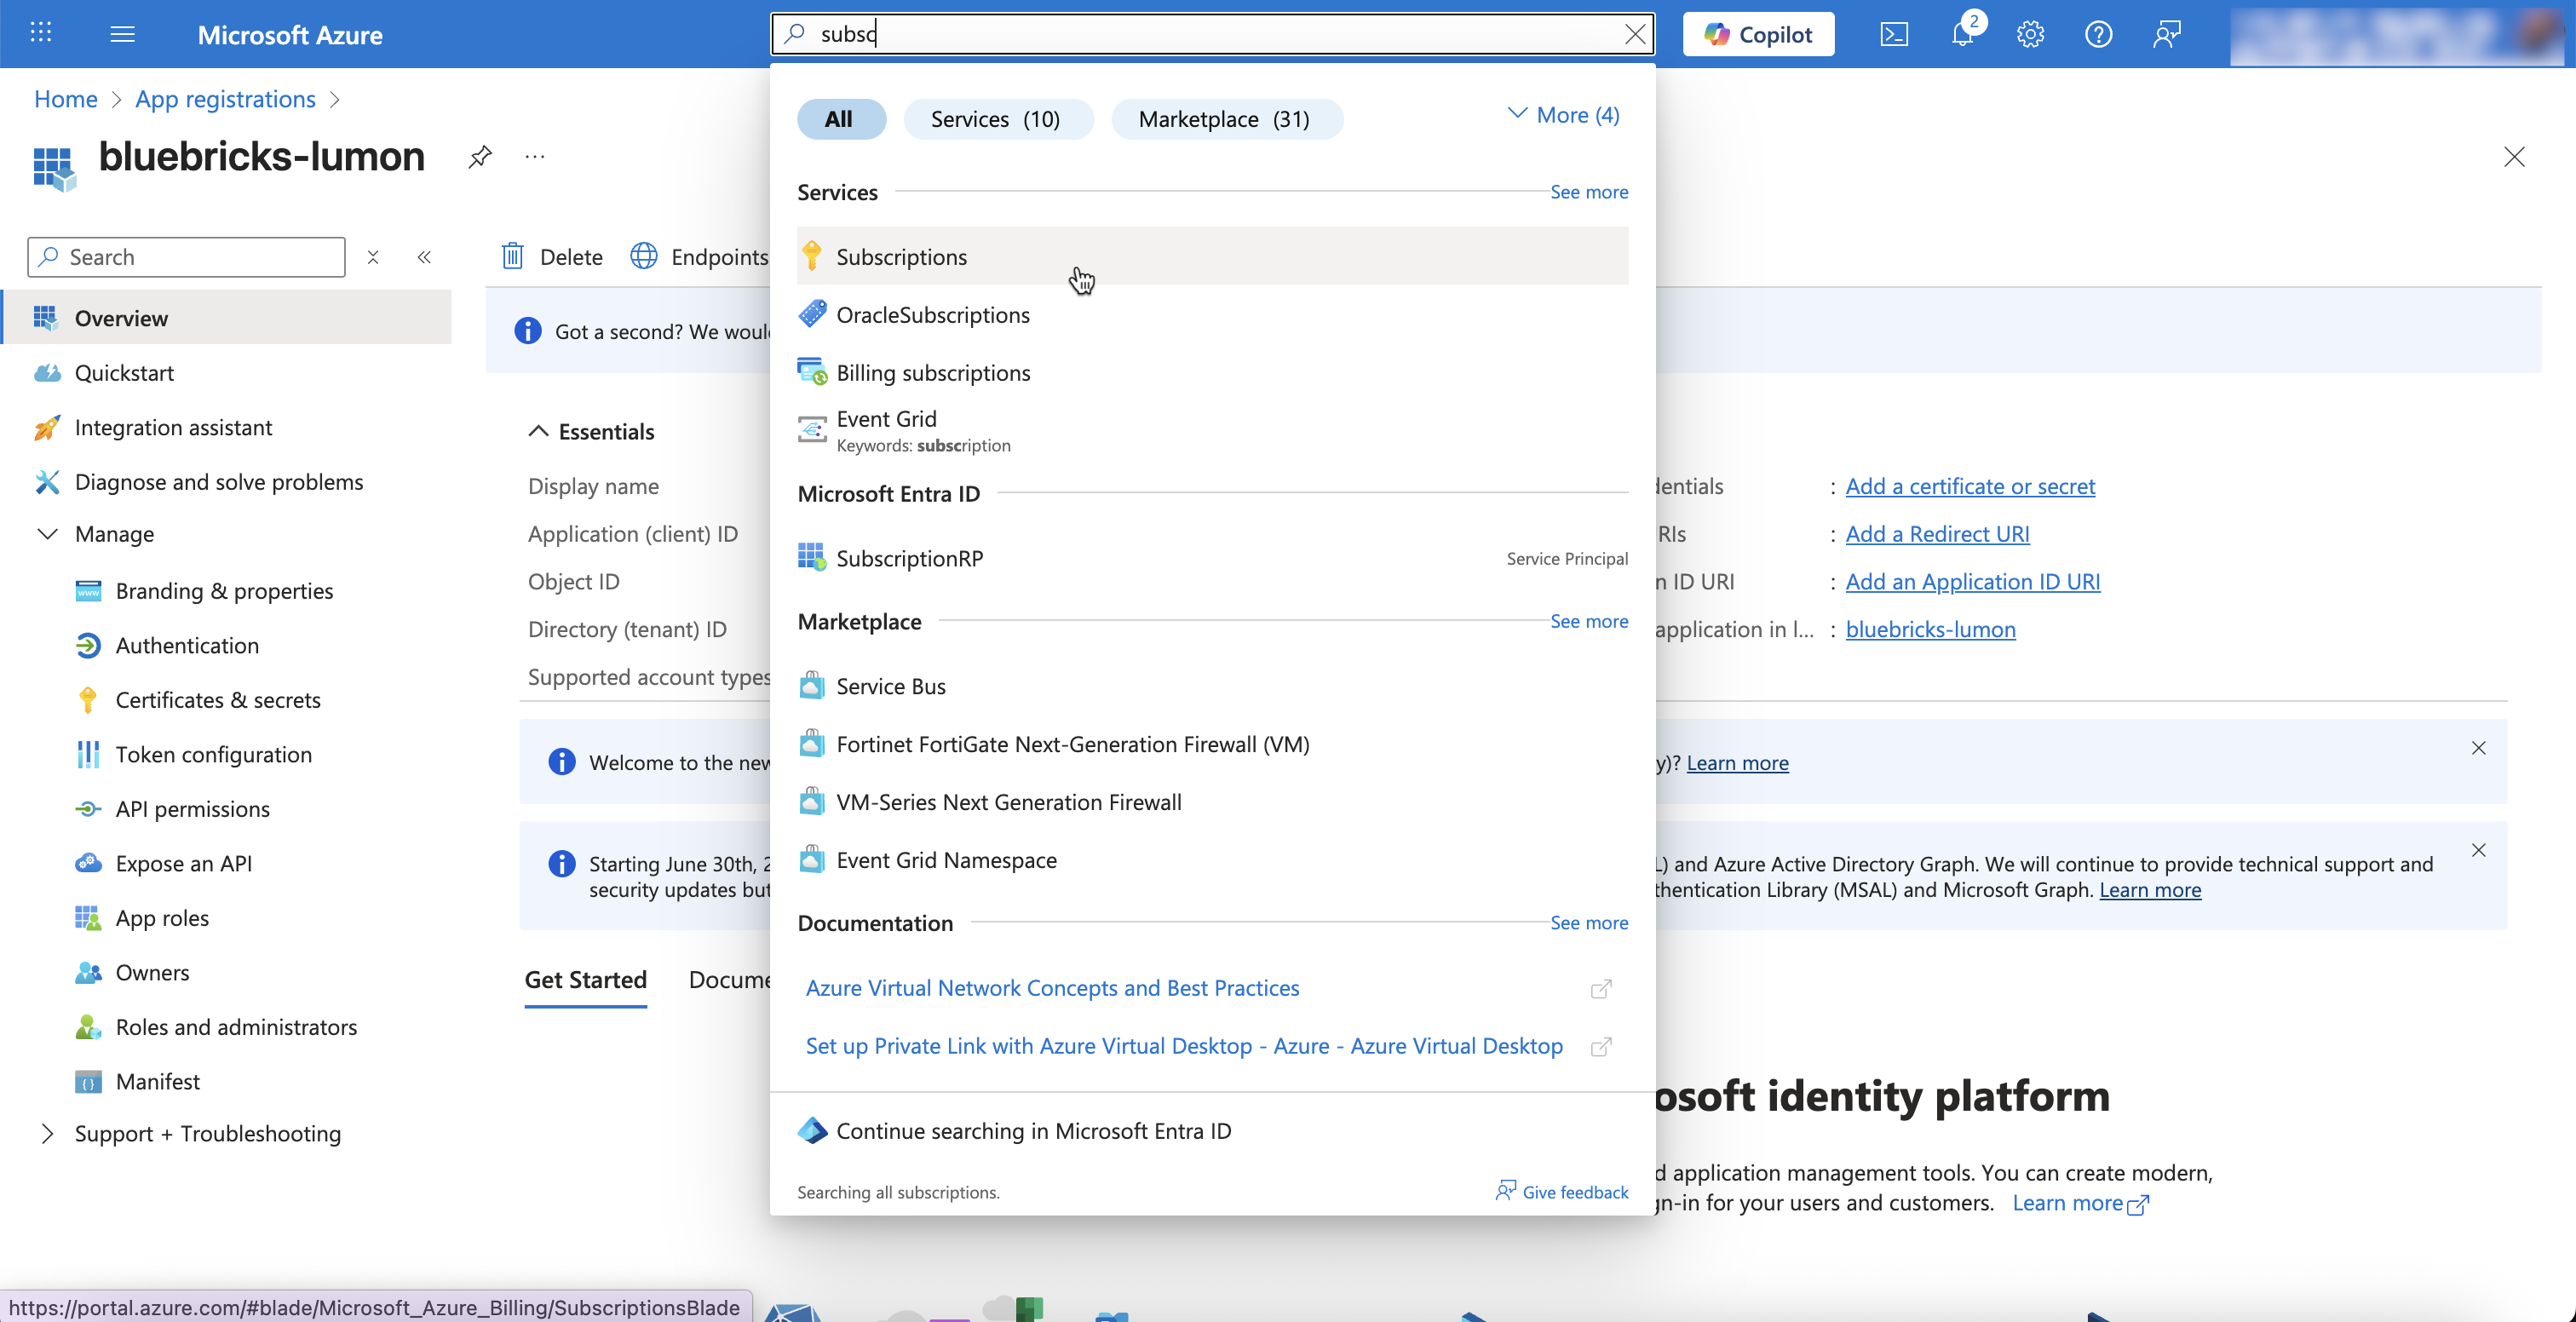
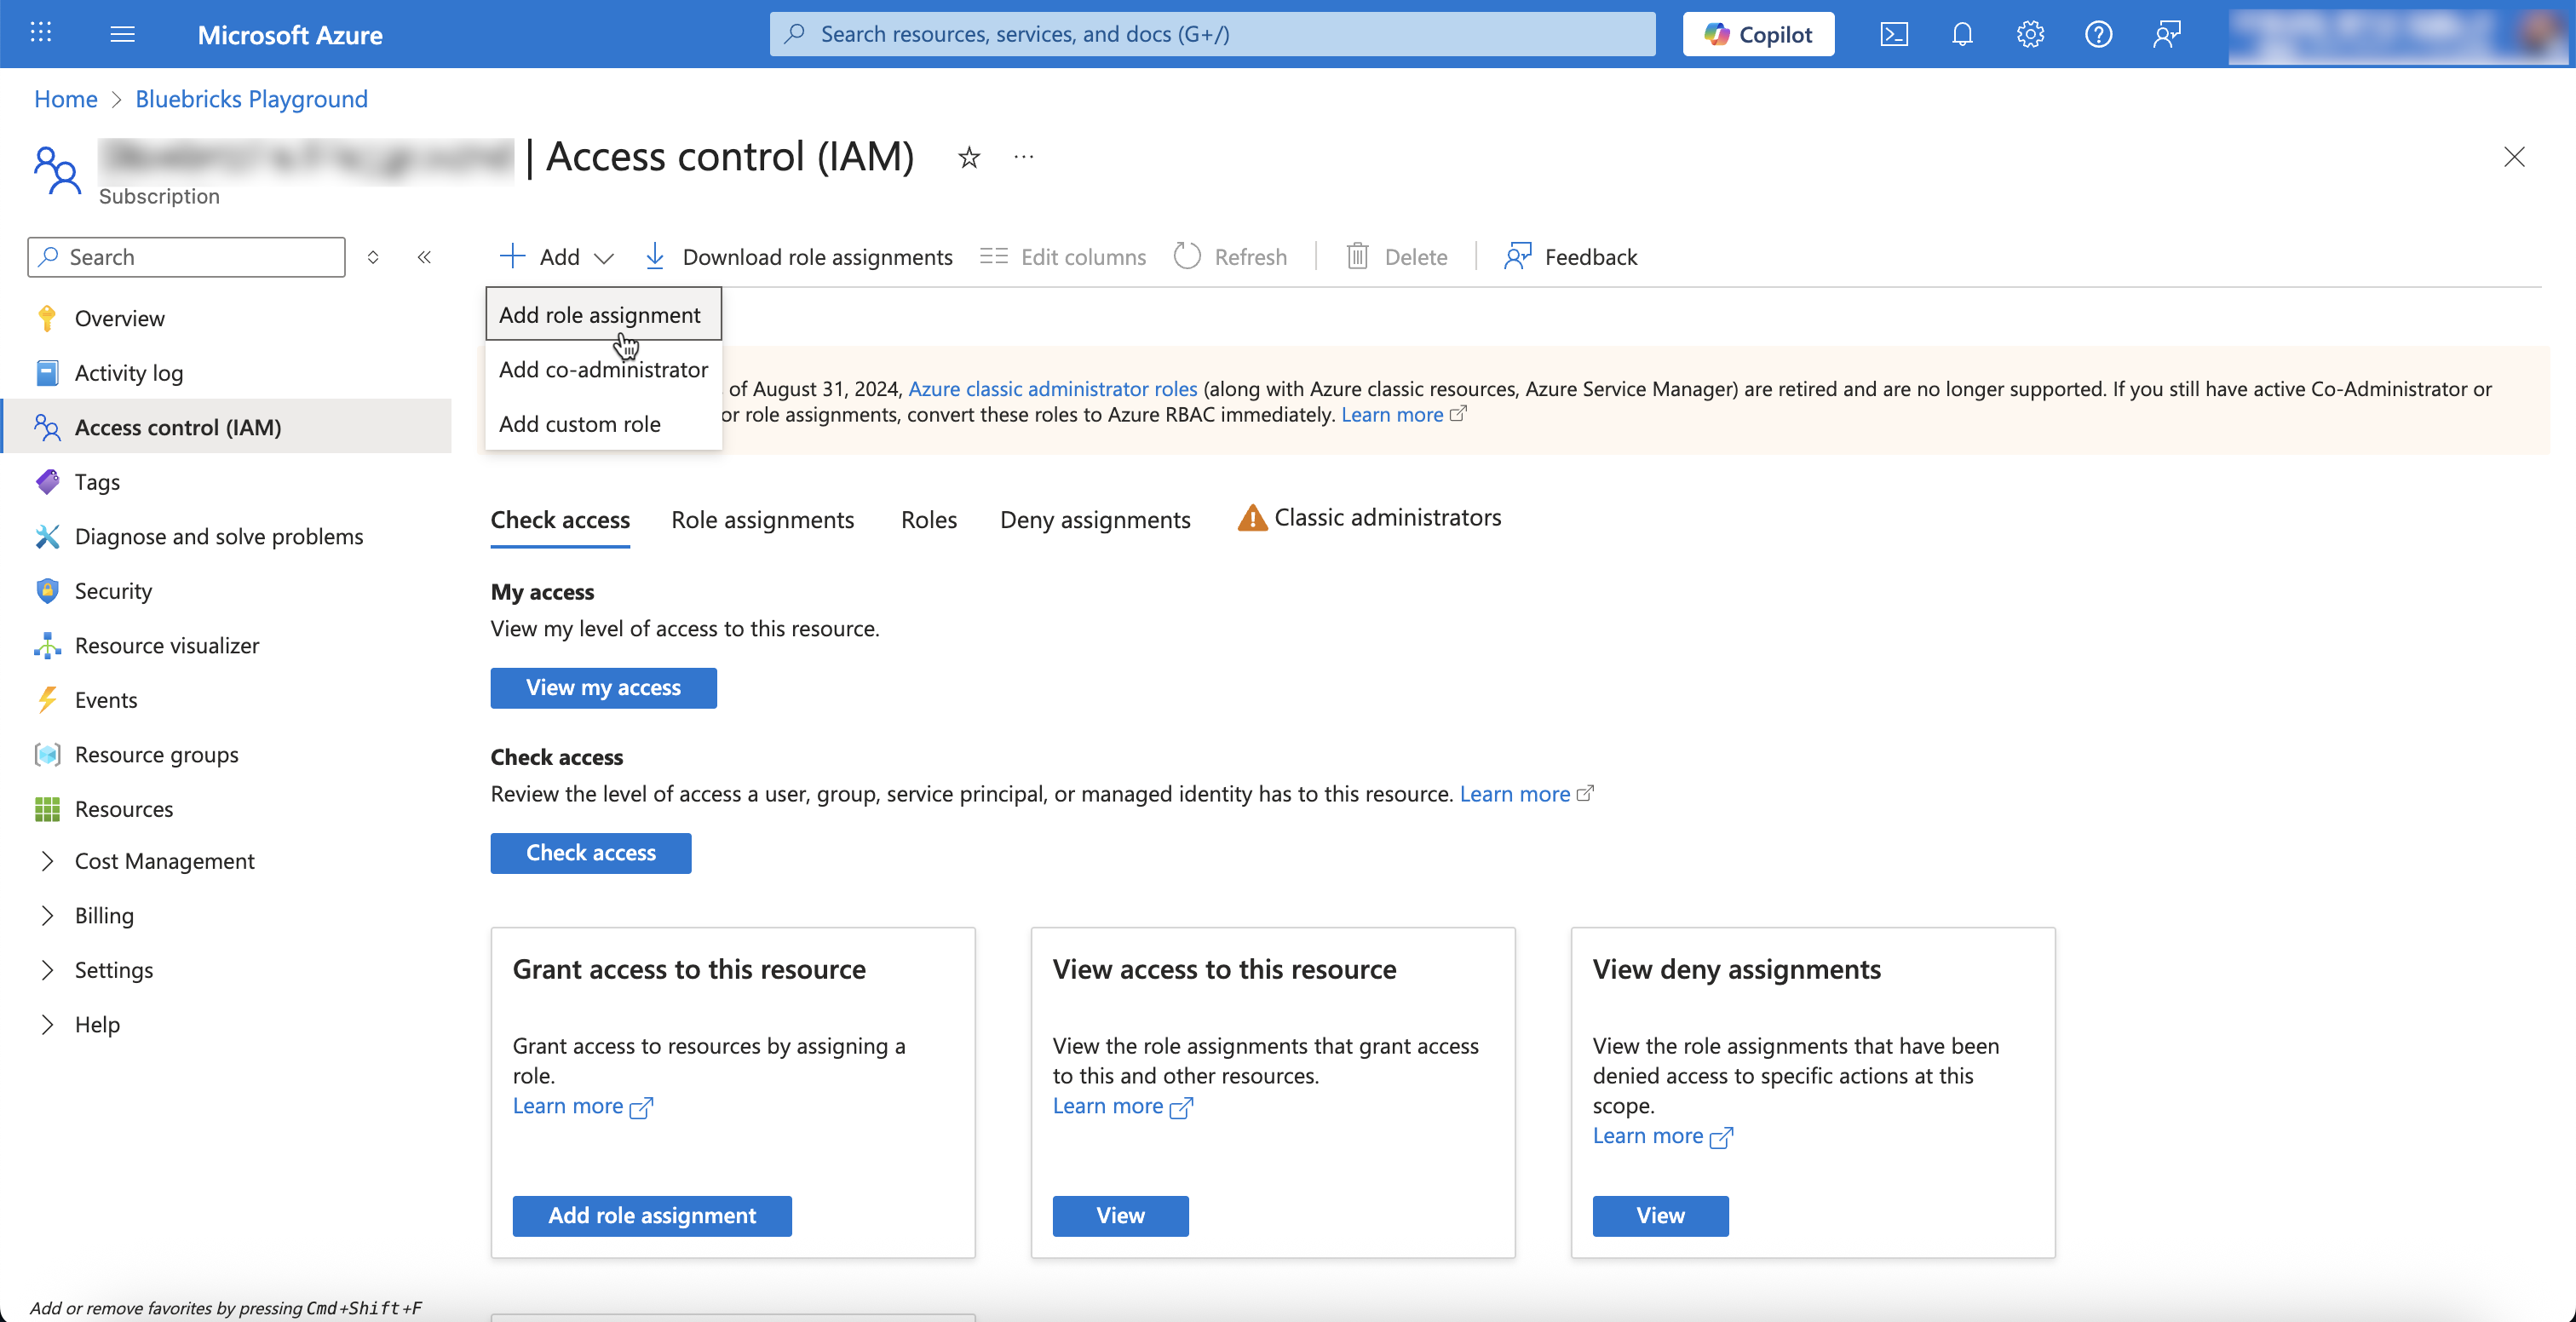
1. Navigate to "Subscriptions" and choose the subscription you want to connect to Bluebricks\\
2. Choose "Access Control (IAM)"
3. Choose "Add" and then "Add [Role Assignment](https://learn.microsoft.com/en-us/azure/role-based-access-control/role-assignments-portal)"
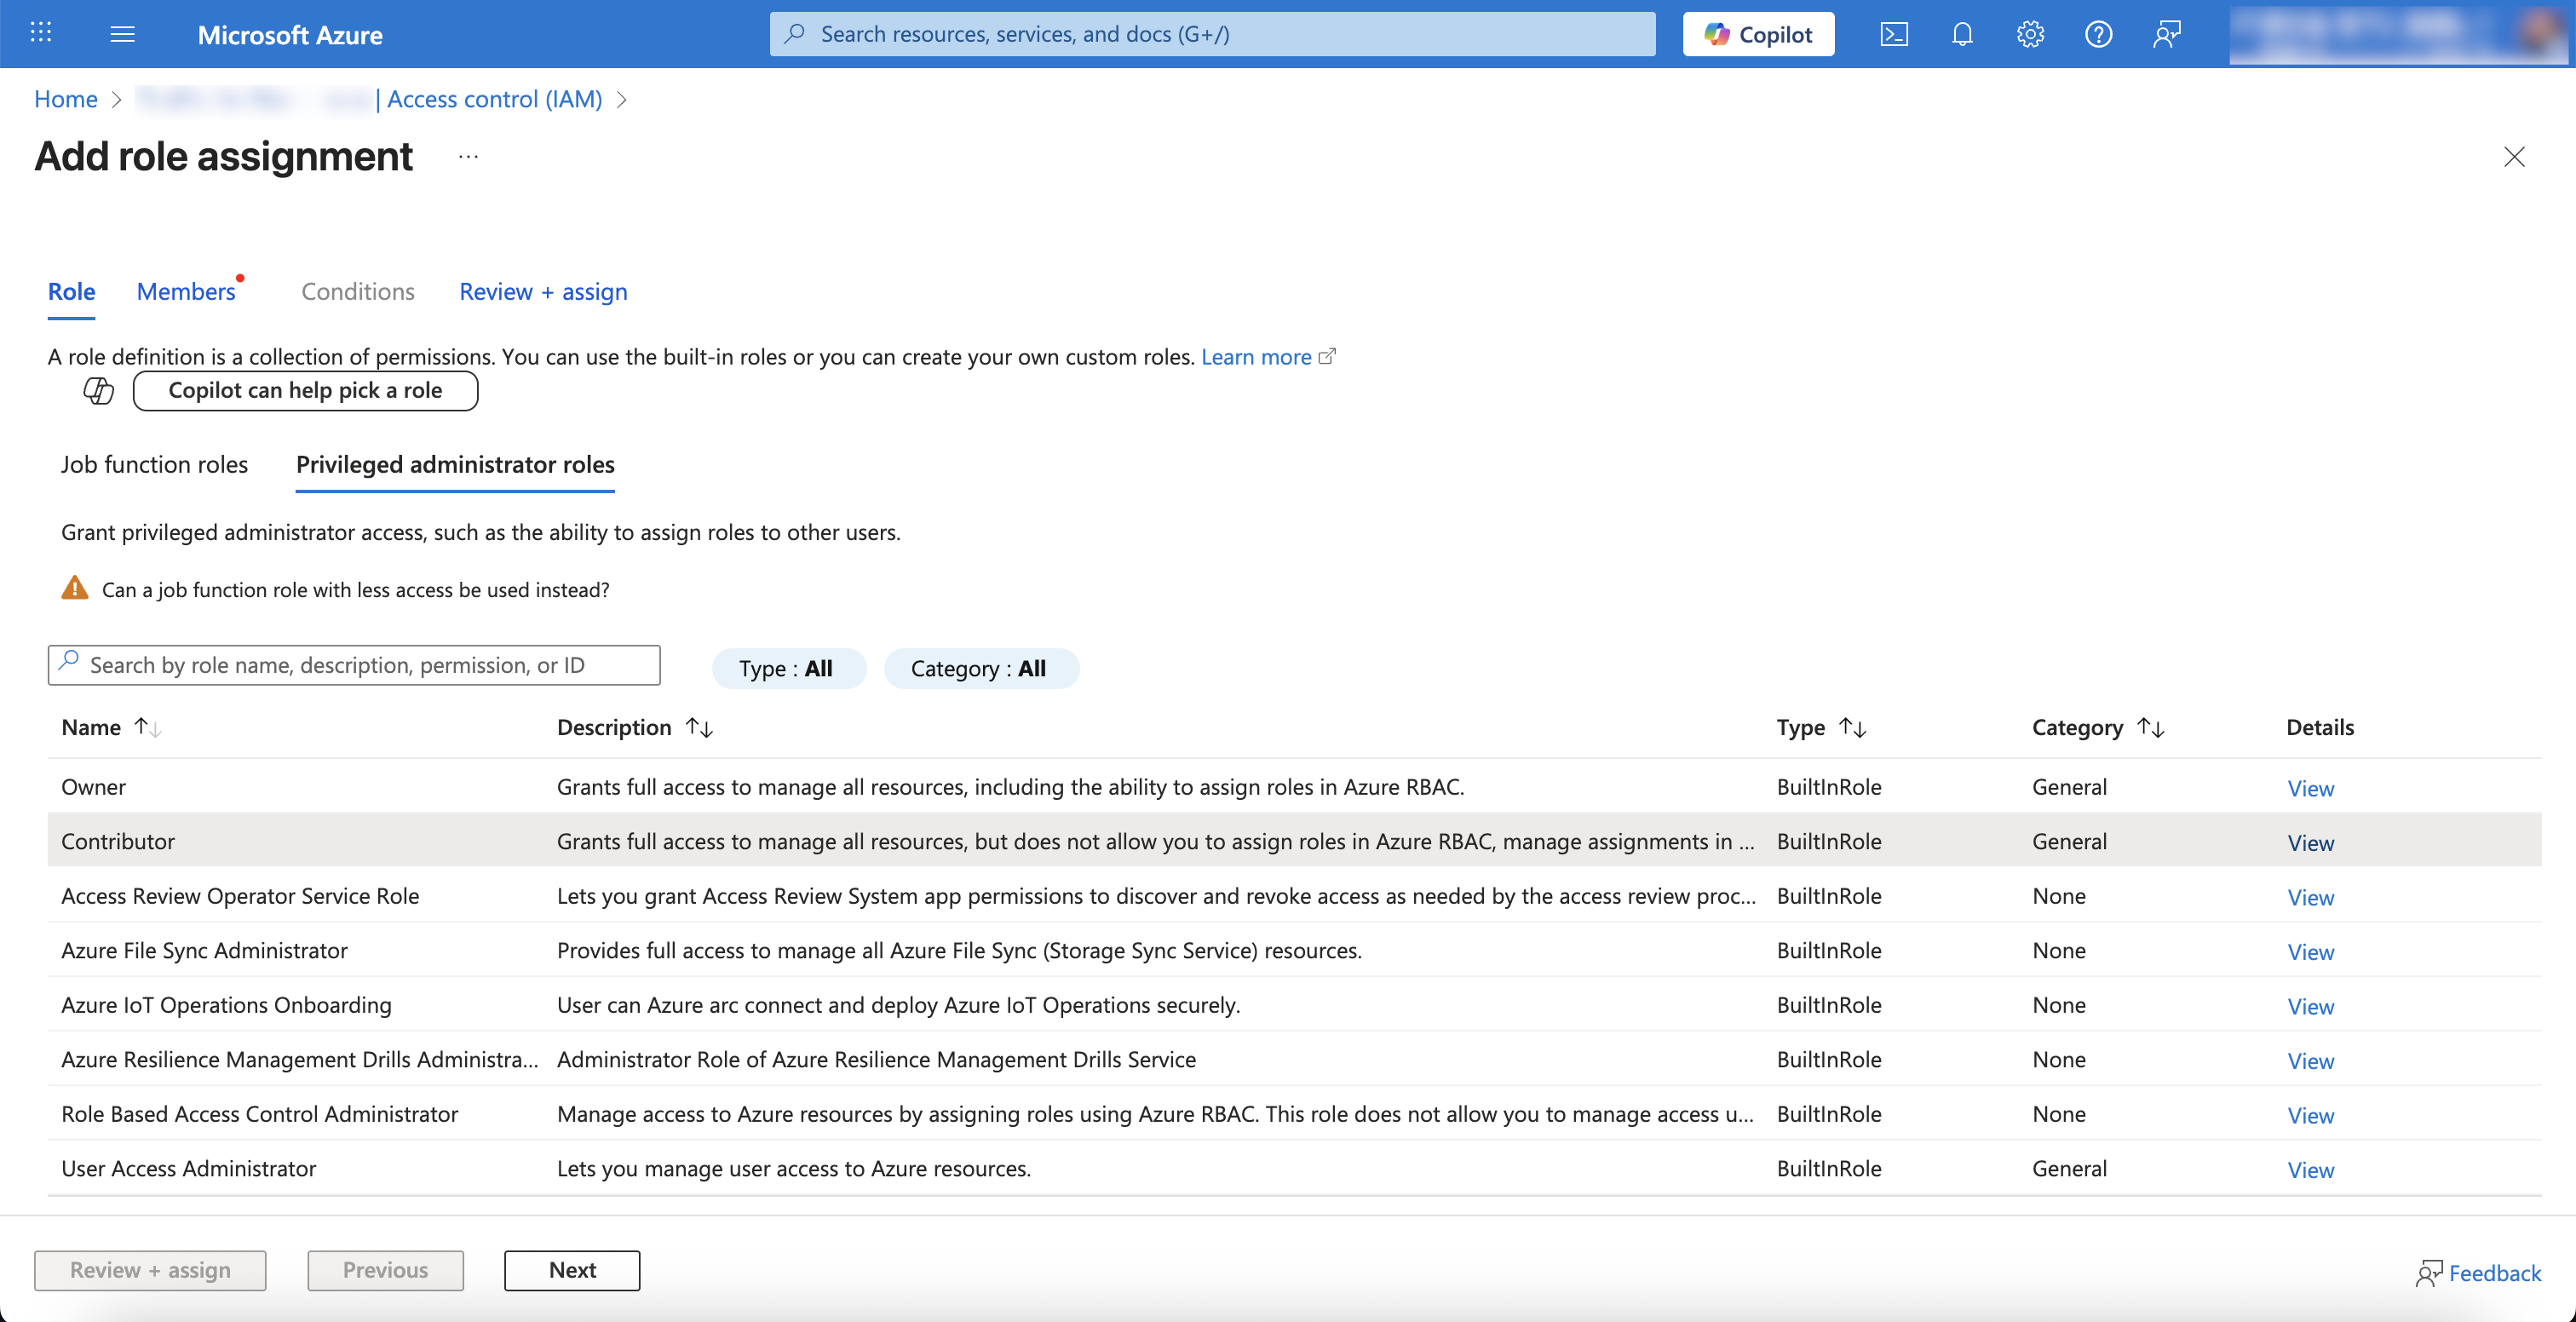
4. Choose the [appropriate Role](https://learn.microsoft.com/en-us/azure/role-based-access-control/built-in-roles/privileged#contributor) to allow Bluebricks to create Resources in Azure (We recommend `contributor` under "Privileged administrator roles")
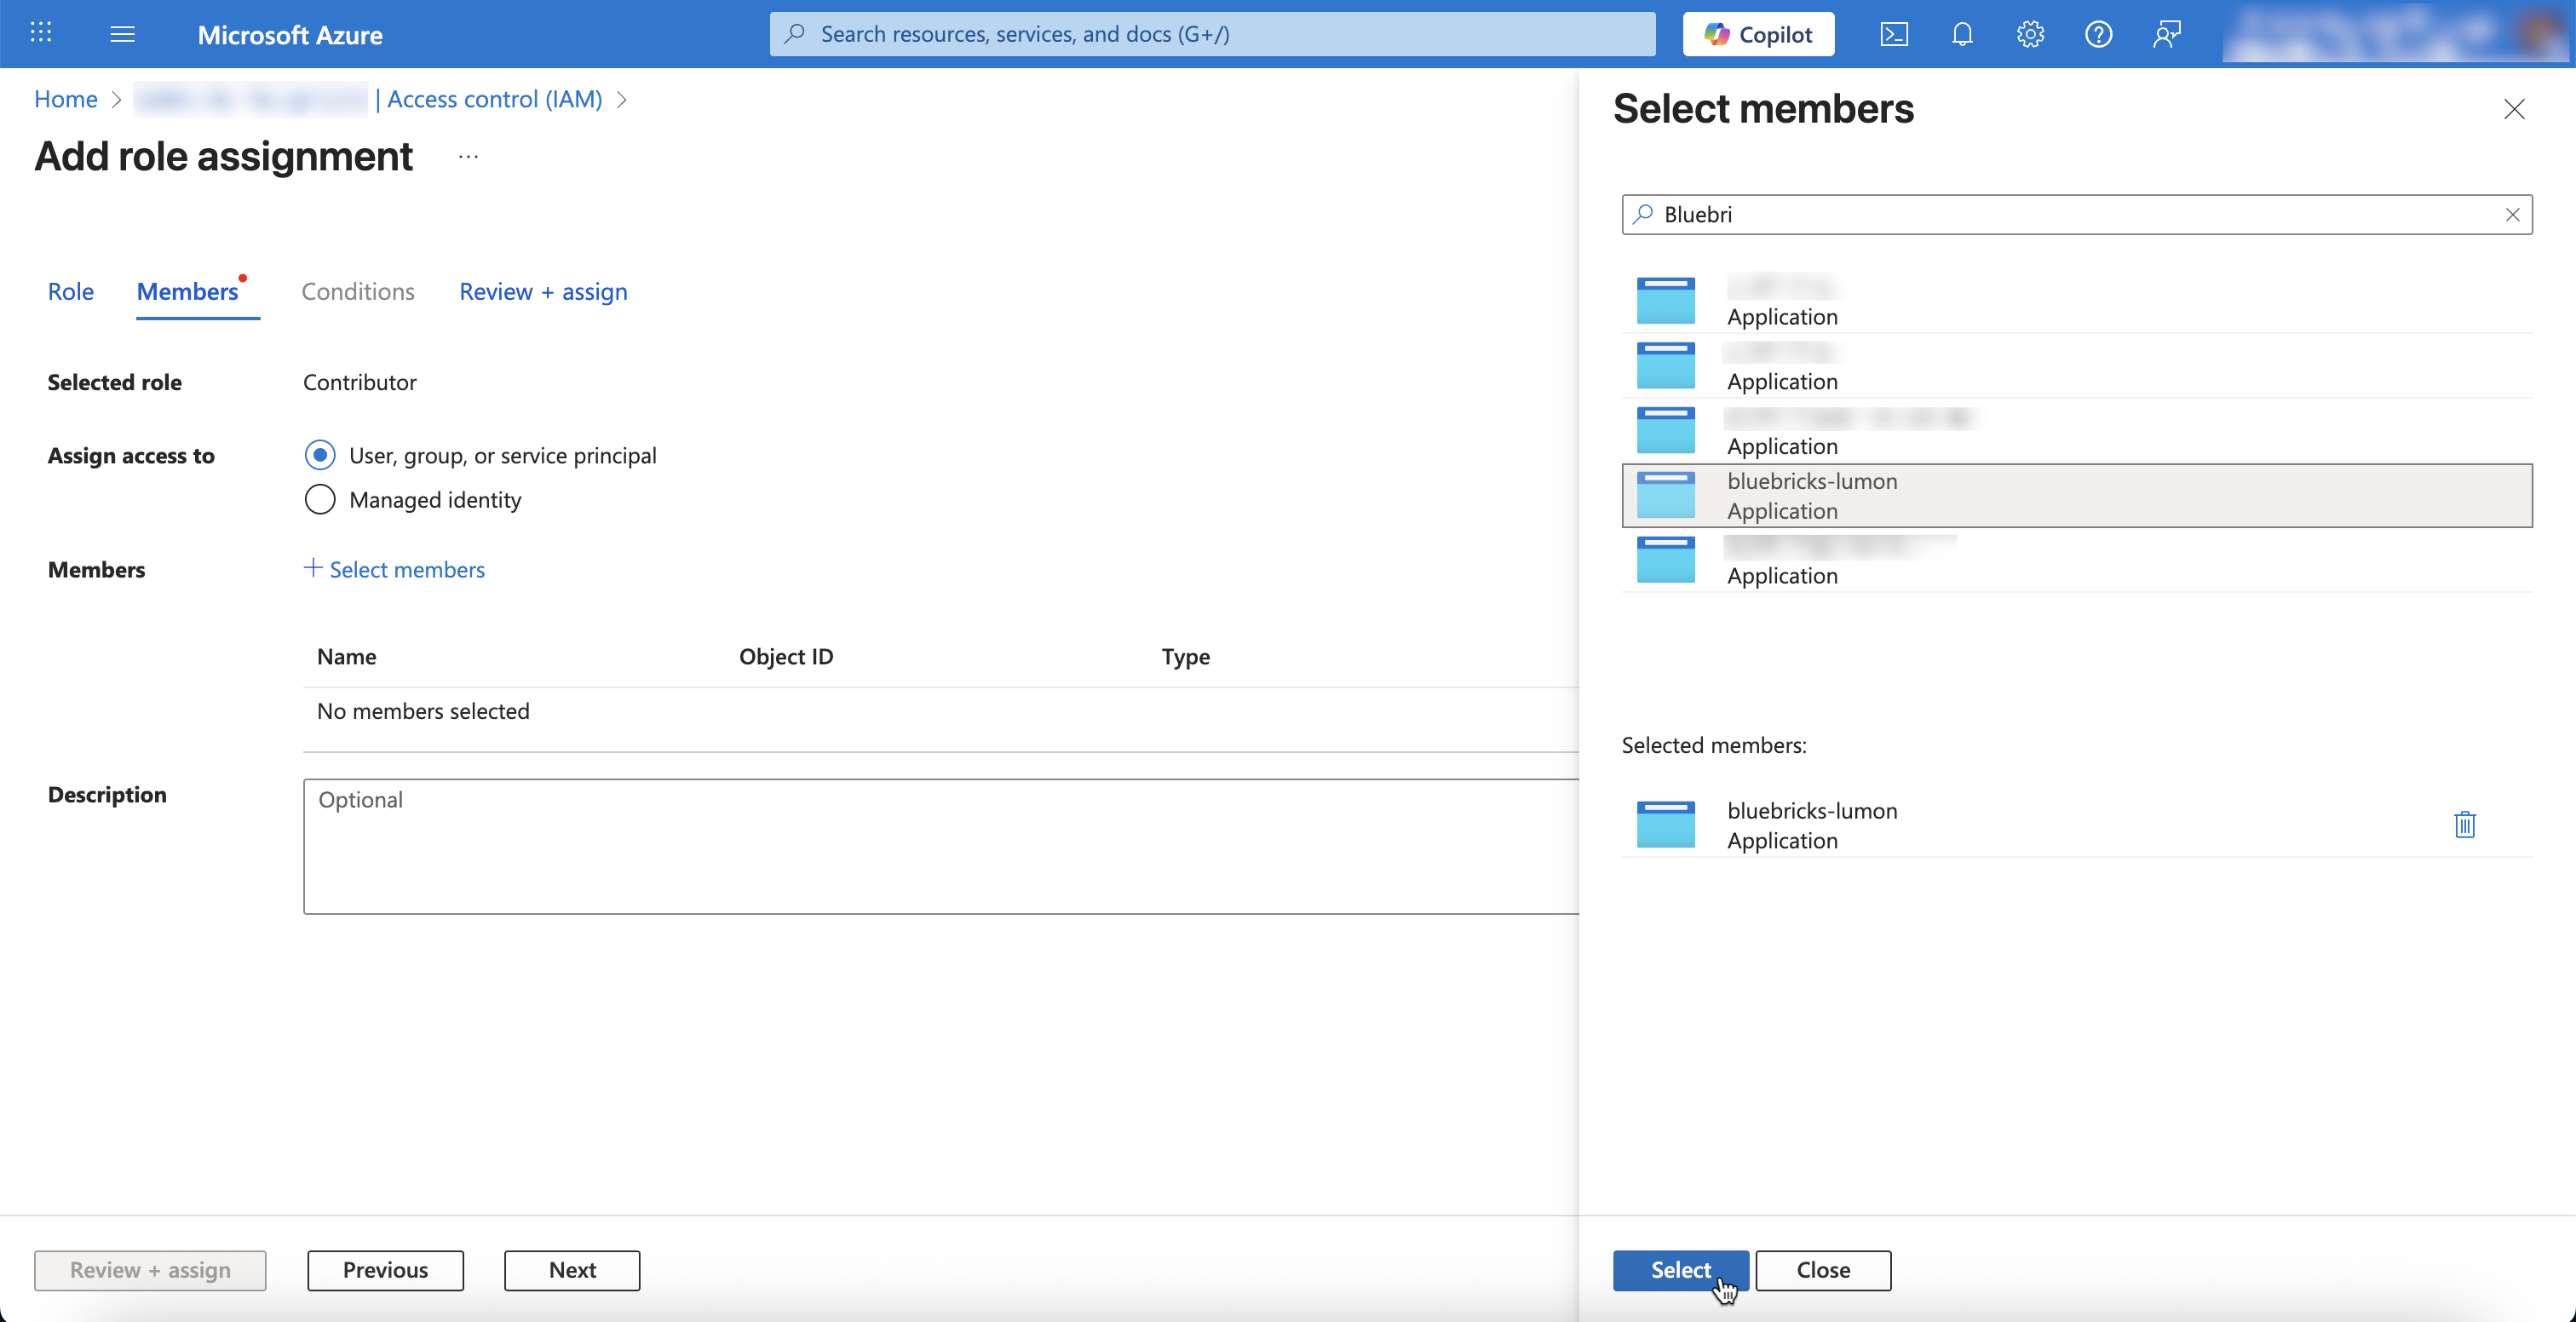
5. Go to Members and search and select the Name of the service principal created in Step 2.
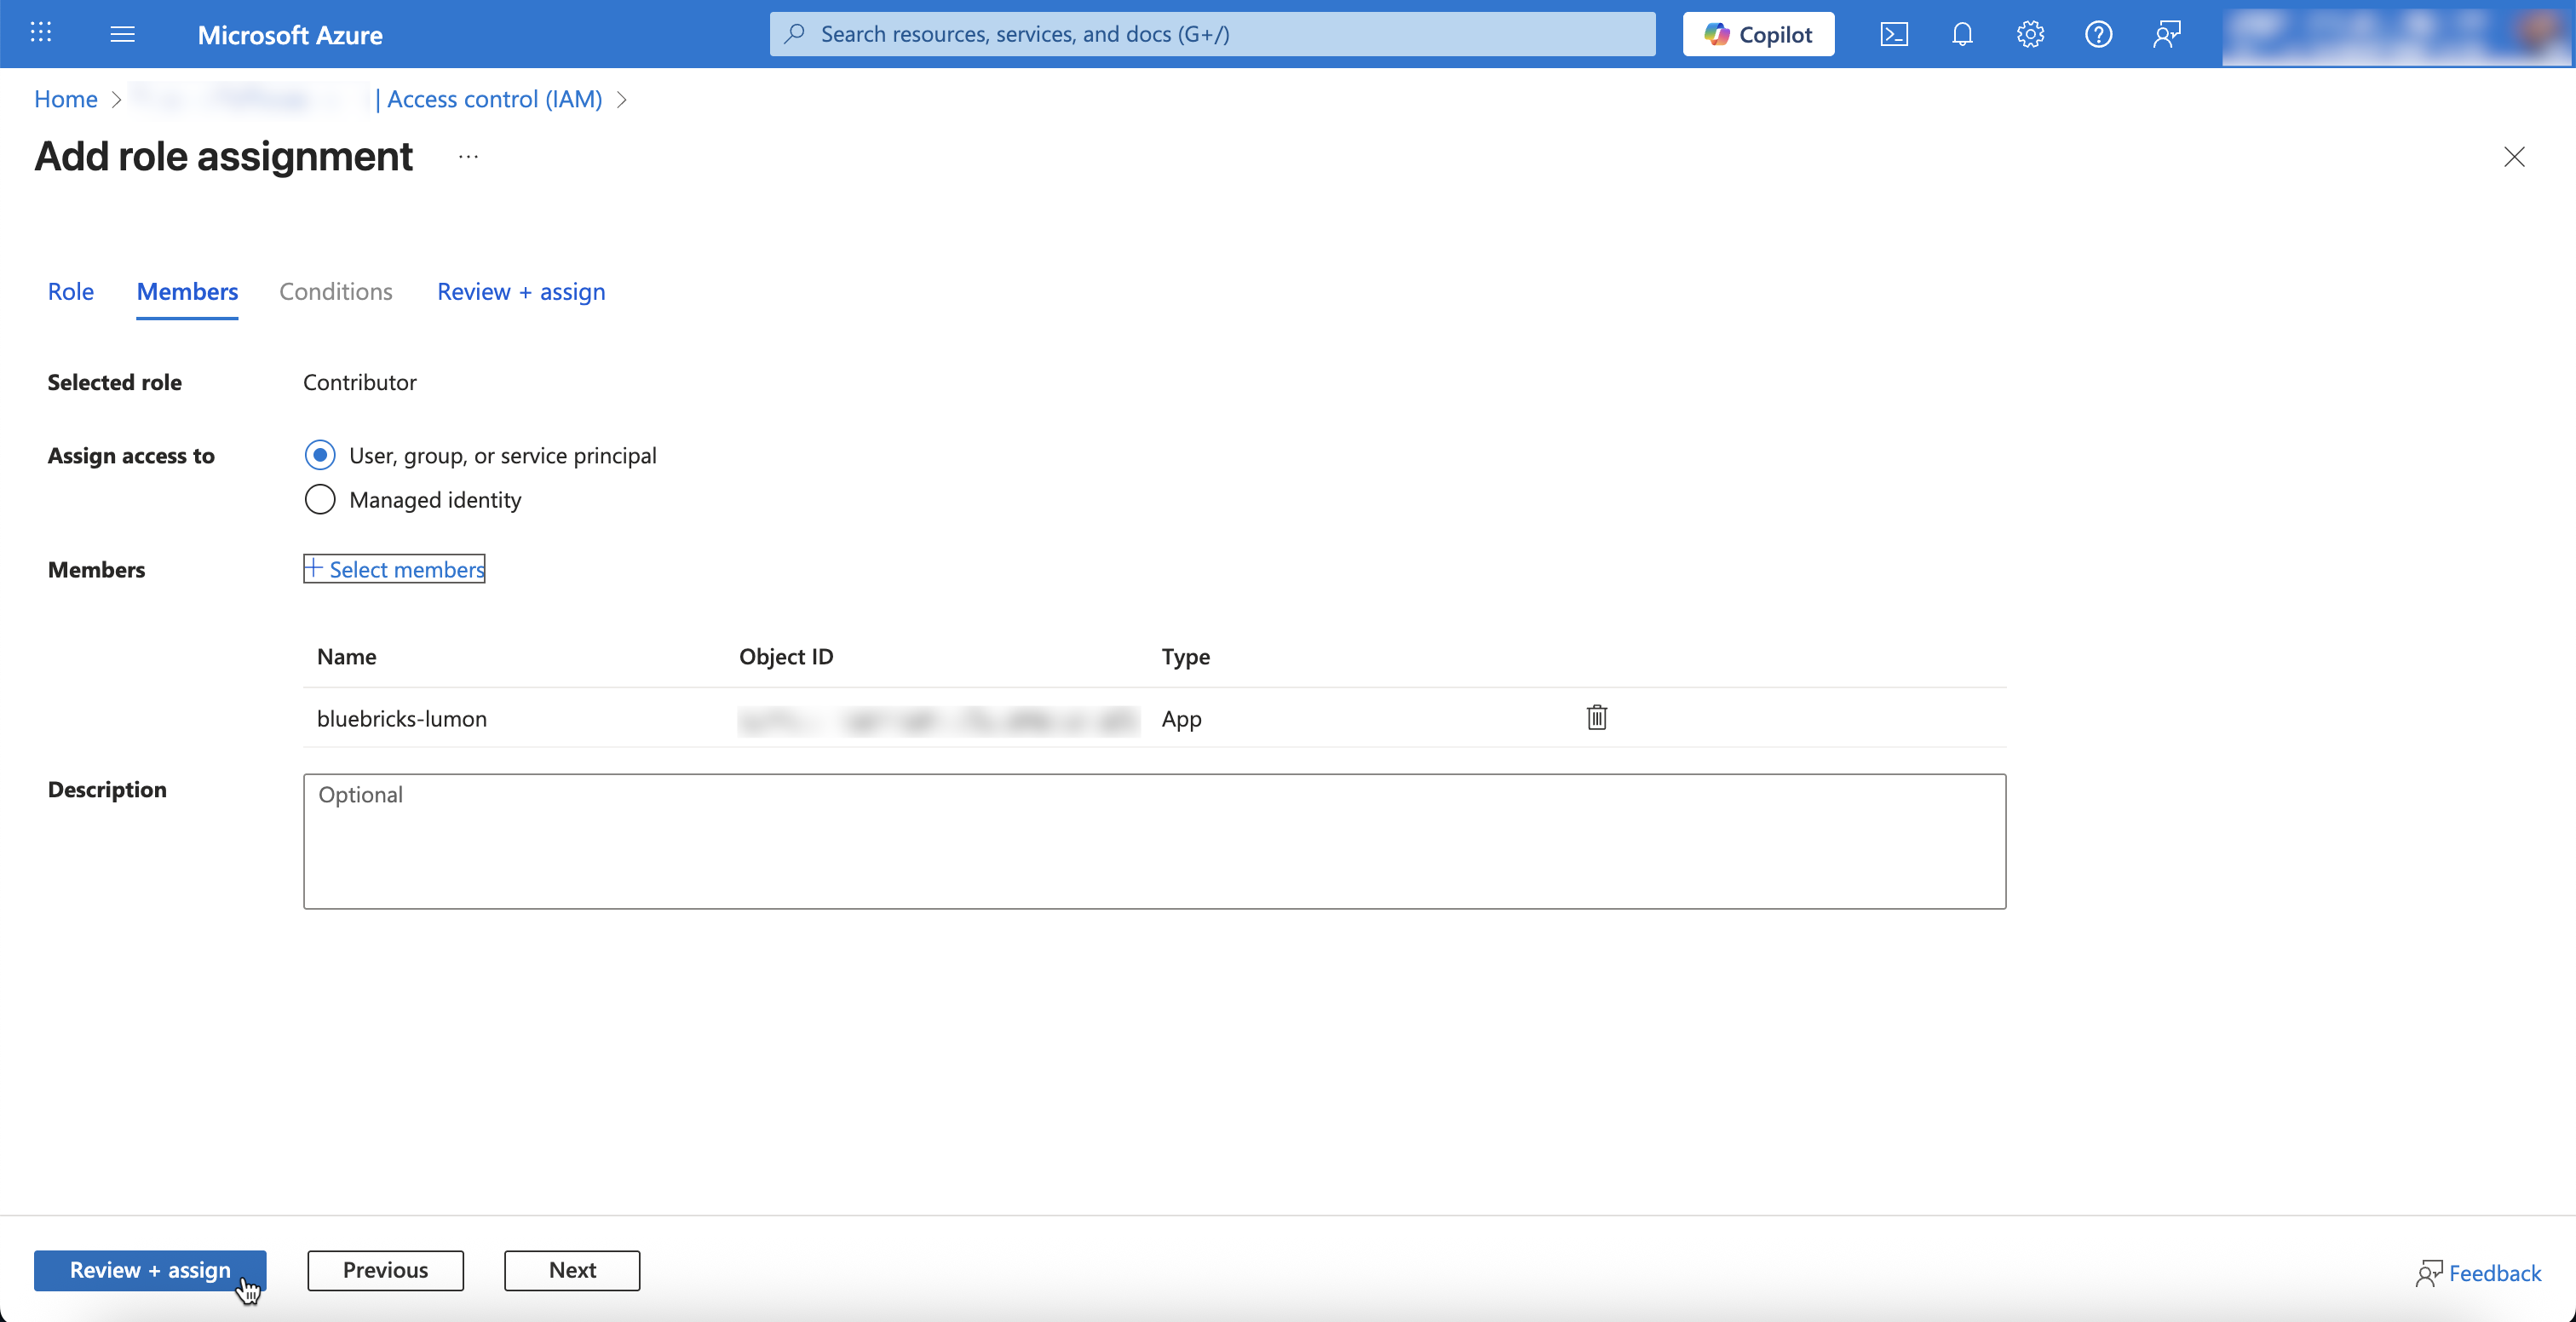
6. Press Review and Assign
### Step 4: Save the Cloud Connection on Bluebricks
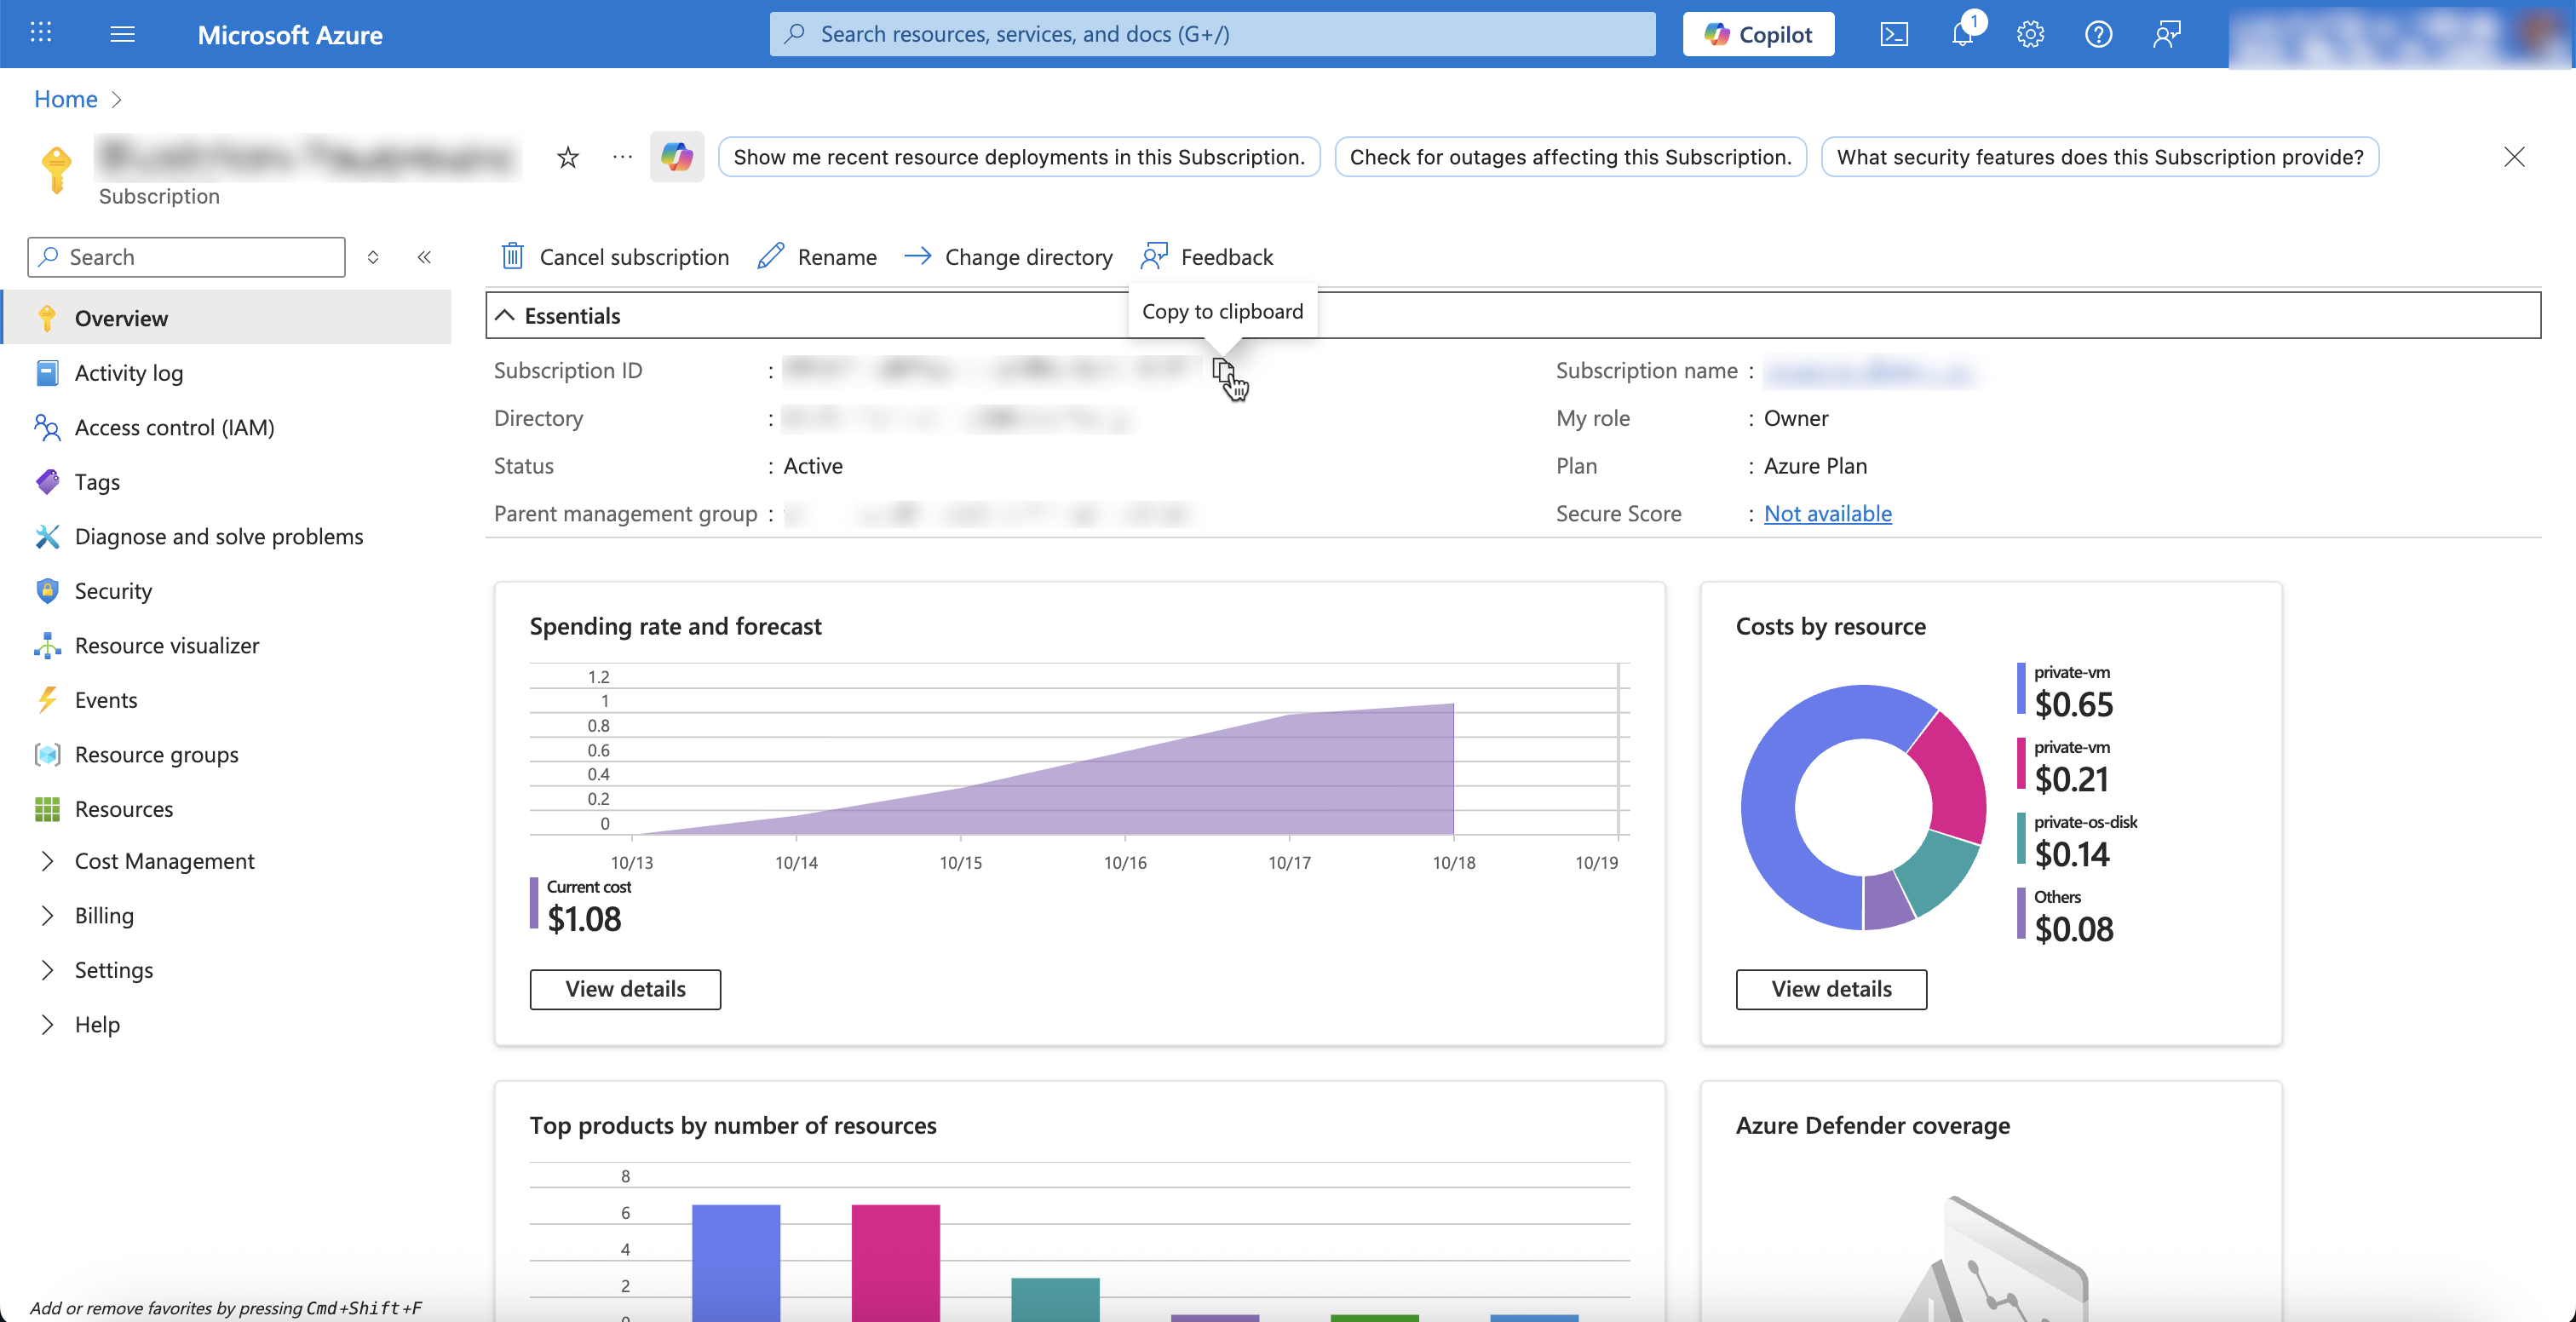
1. Navigate to the "Overview" page of the subscription and copy the "Subscription ID"
2. Go back to the Environment page on Bluebricks and copy the subscription ID
3. Press Save
You Finished connecting your Azure subscription to Bluebricks and you now can create resources on Azure suing Bluebricks.