# Connecting to GCP

## Prerequisites

1. A valid [Google Cloud Project ID](https://cloud.google.com/resource-manager/docs/creating-managing-projects).
2. A [Bluebricks collection](https://bluebricks.co/docs/core-concepts/collections/create-an-environment).

{% hint style="info" %}
Bluebricks uses **workload identity federation** to connect to GCP: no static service account keys are required. Bluebricks creates a dedicated service account per project and authenticates through Google's identity federation.
{% endhint %}

## Step 1: Connect GCP in Bluebricks

### Using the app

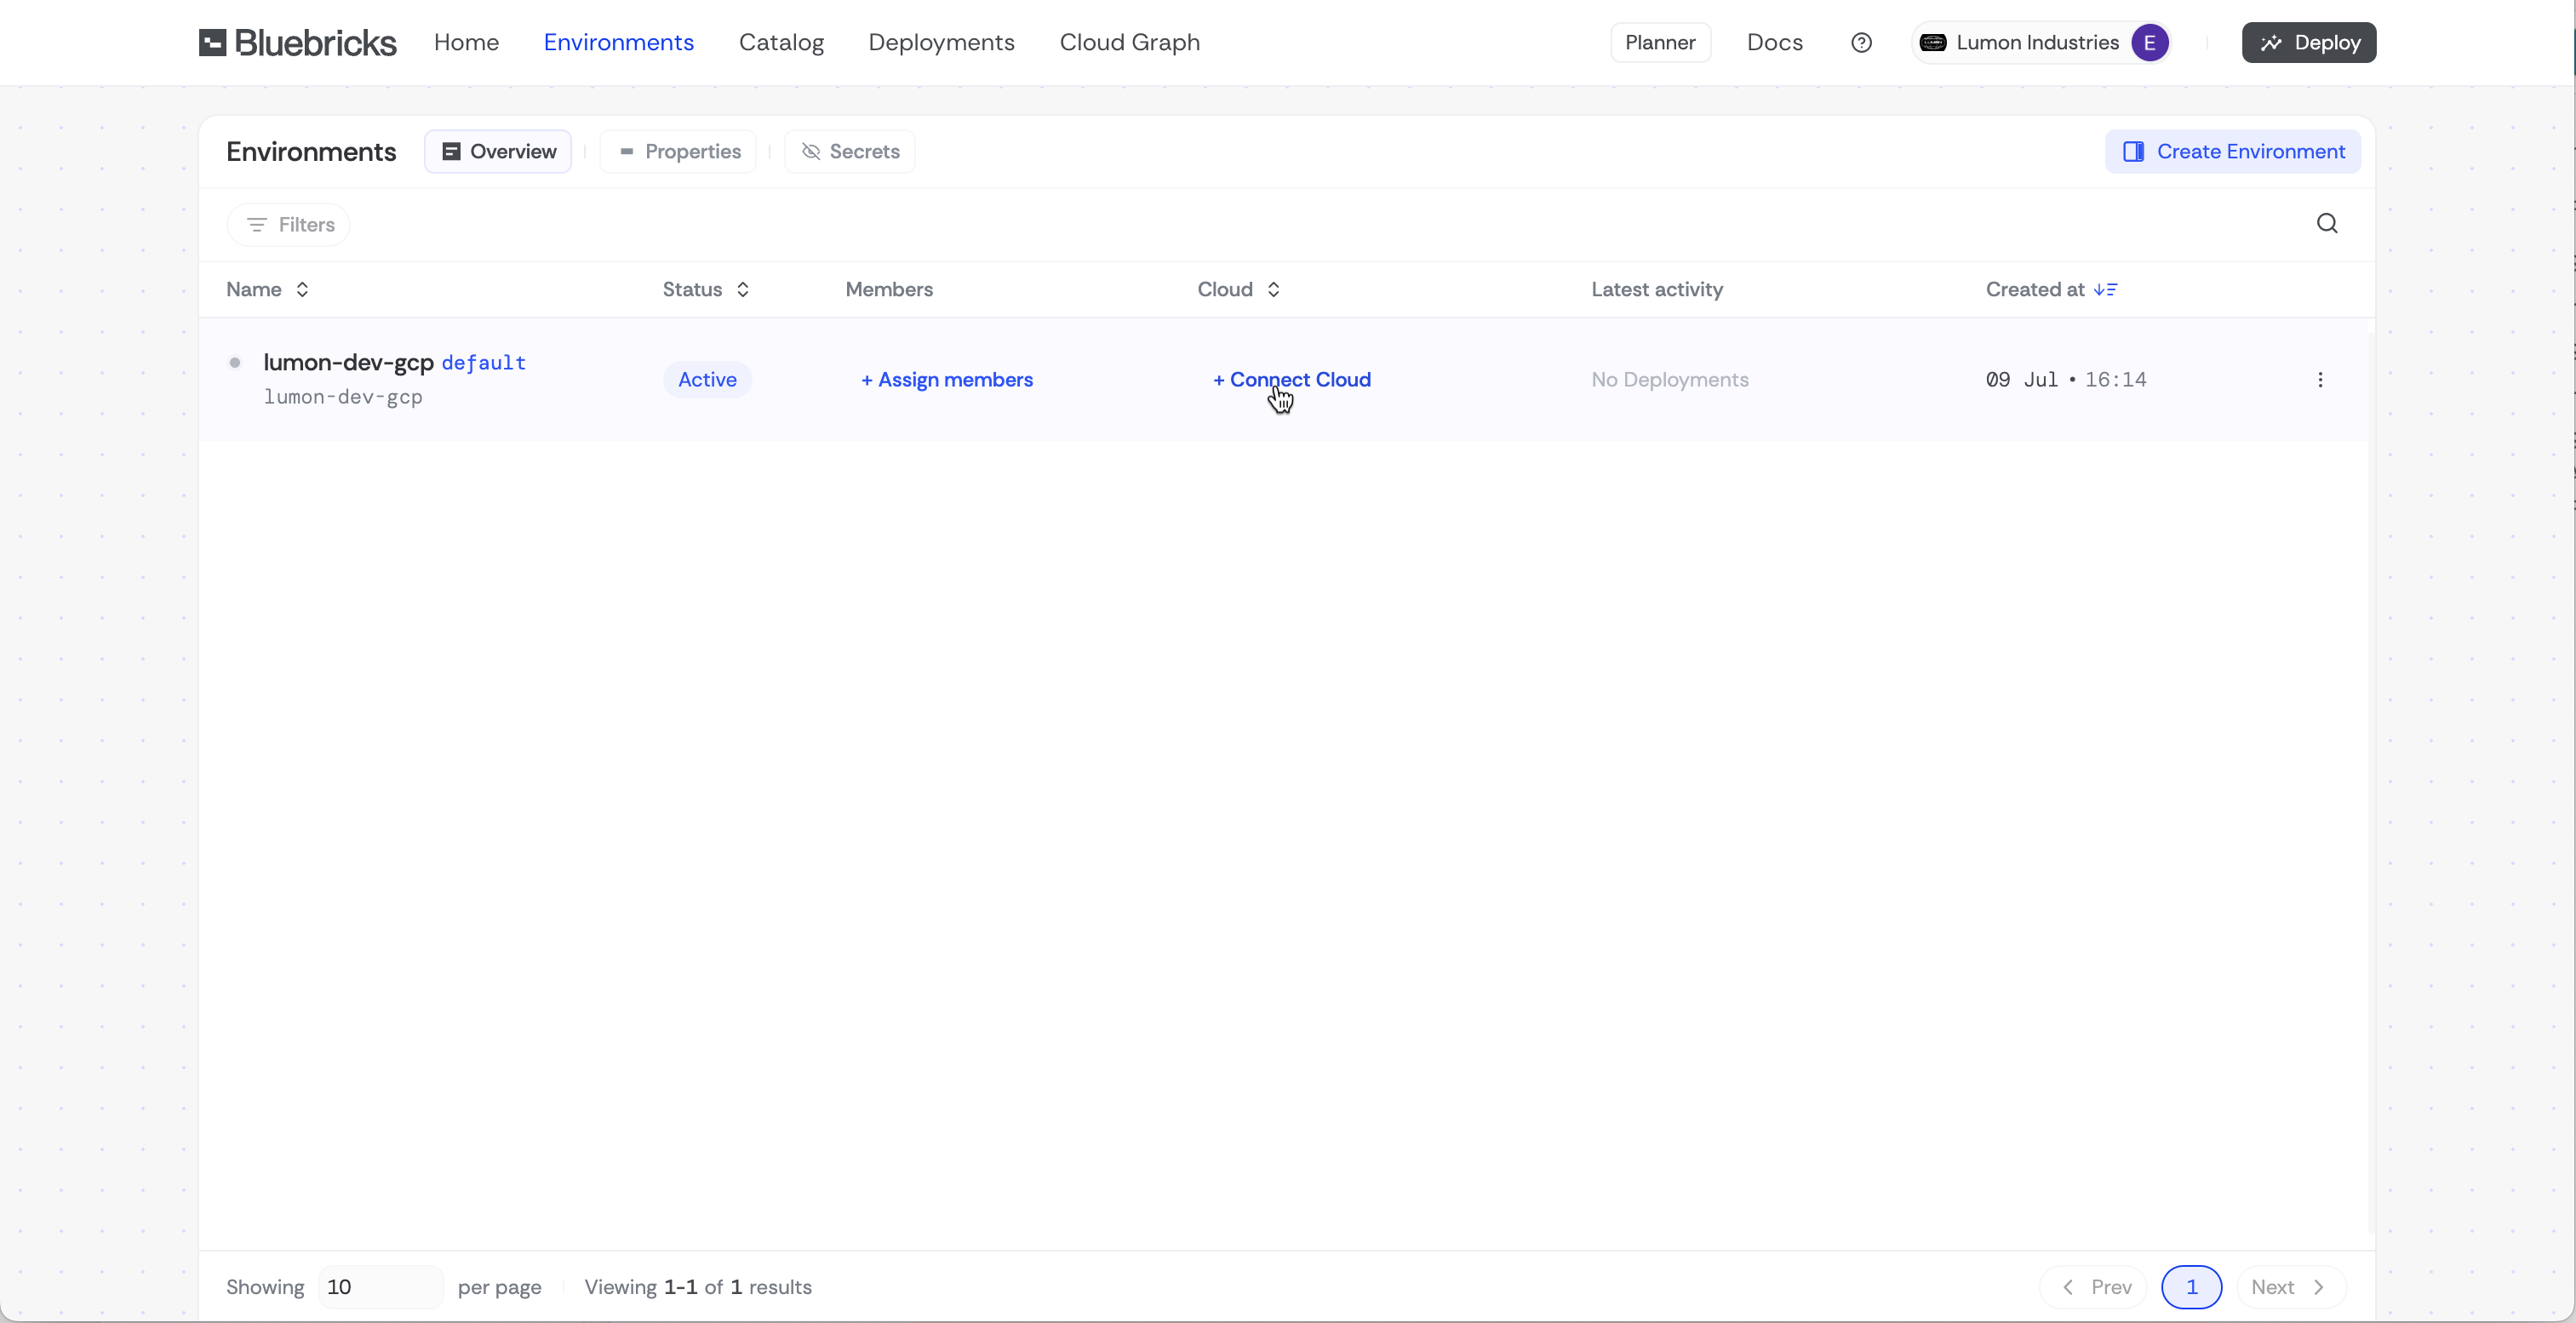
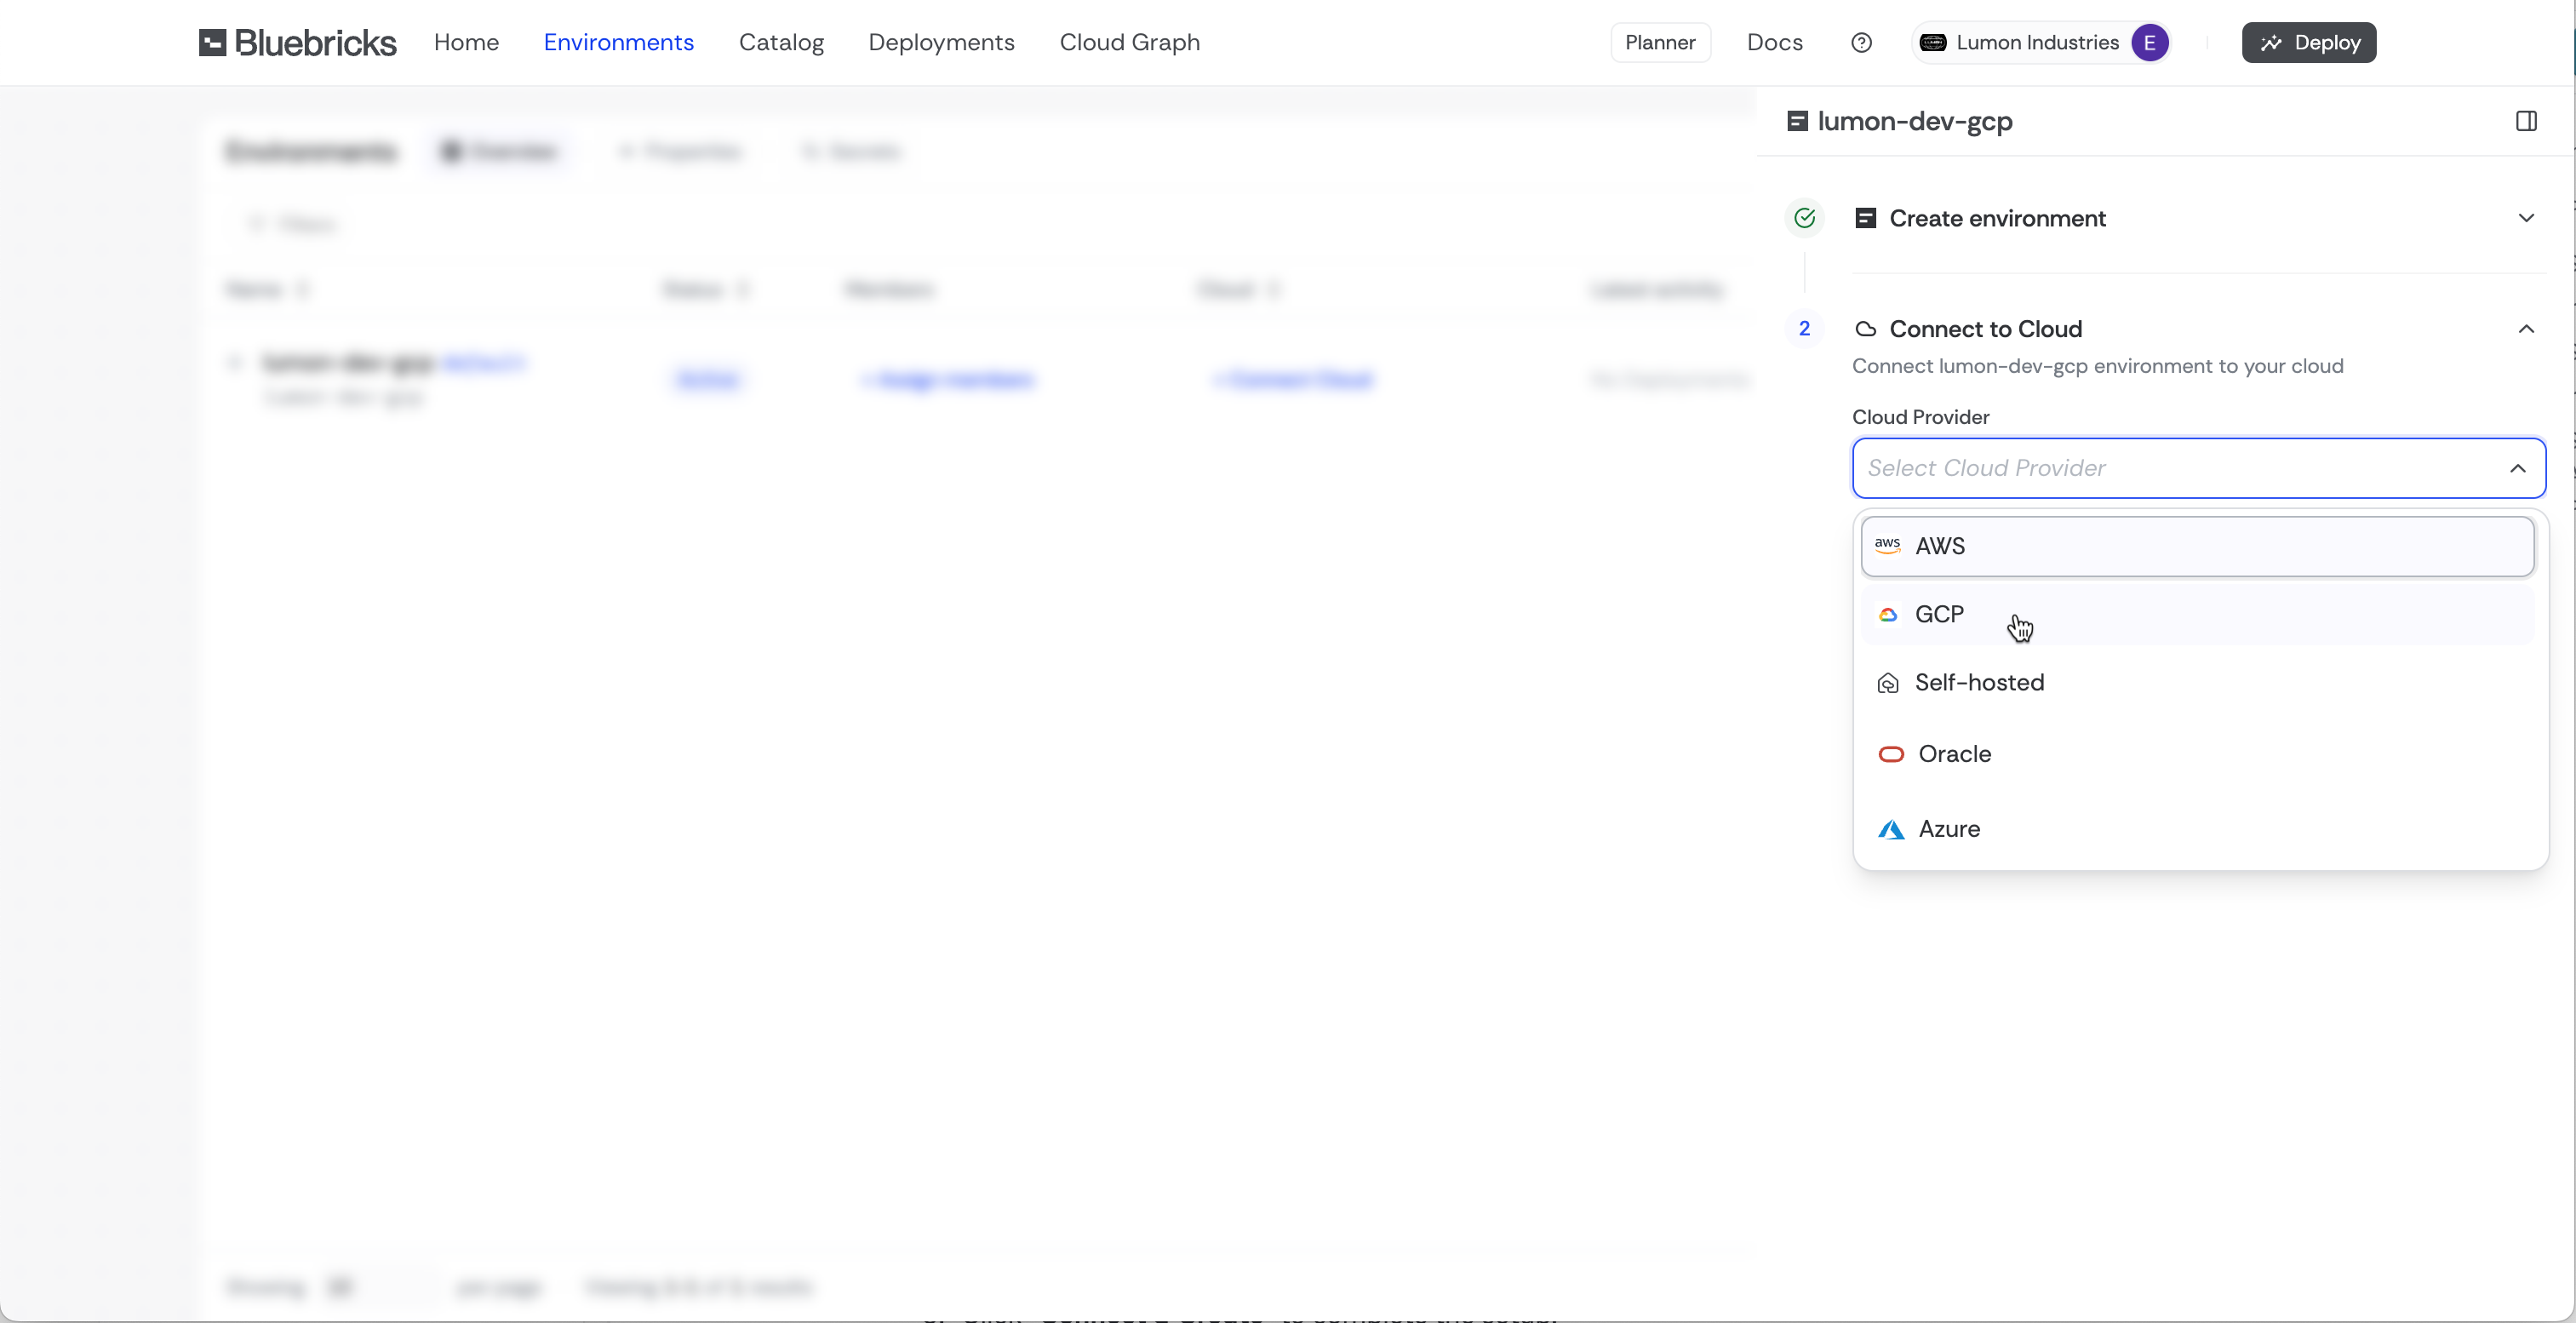
1. Click **"Connect Cloud"** on the collection you want to link to **GCP**

   <figure><img src="https://454695563-files.gitbook.io/~/files/v0/b/gitbook-x-prod.appspot.com/o/spaces%2FL1aVoJ67VgVl8Uv83TuE%2Fuploads%2Fgit-blob-7bdb7e312a9c3a81fa6658d33ff614ebb78ae9d7%2FCleanShot%202025-07-14%20at%2009.00.41%402x.png?alt=media" alt=""><figcaption></figcaption></figure>
2. Select **GCP** as the **Cloud Provider**

   <figure><img src="https://454695563-files.gitbook.io/~/files/v0/b/gitbook-x-prod.appspot.com/o/spaces%2FL1aVoJ67VgVl8Uv83TuE%2Fuploads%2Fgit-blob-dcda5a48db8aeee79d072340af39cdfd035d8862%2FCleanShot%202025-07-14%20at%2009.03.15%402x.png?alt=media" alt=""><figcaption></figcaption></figure>
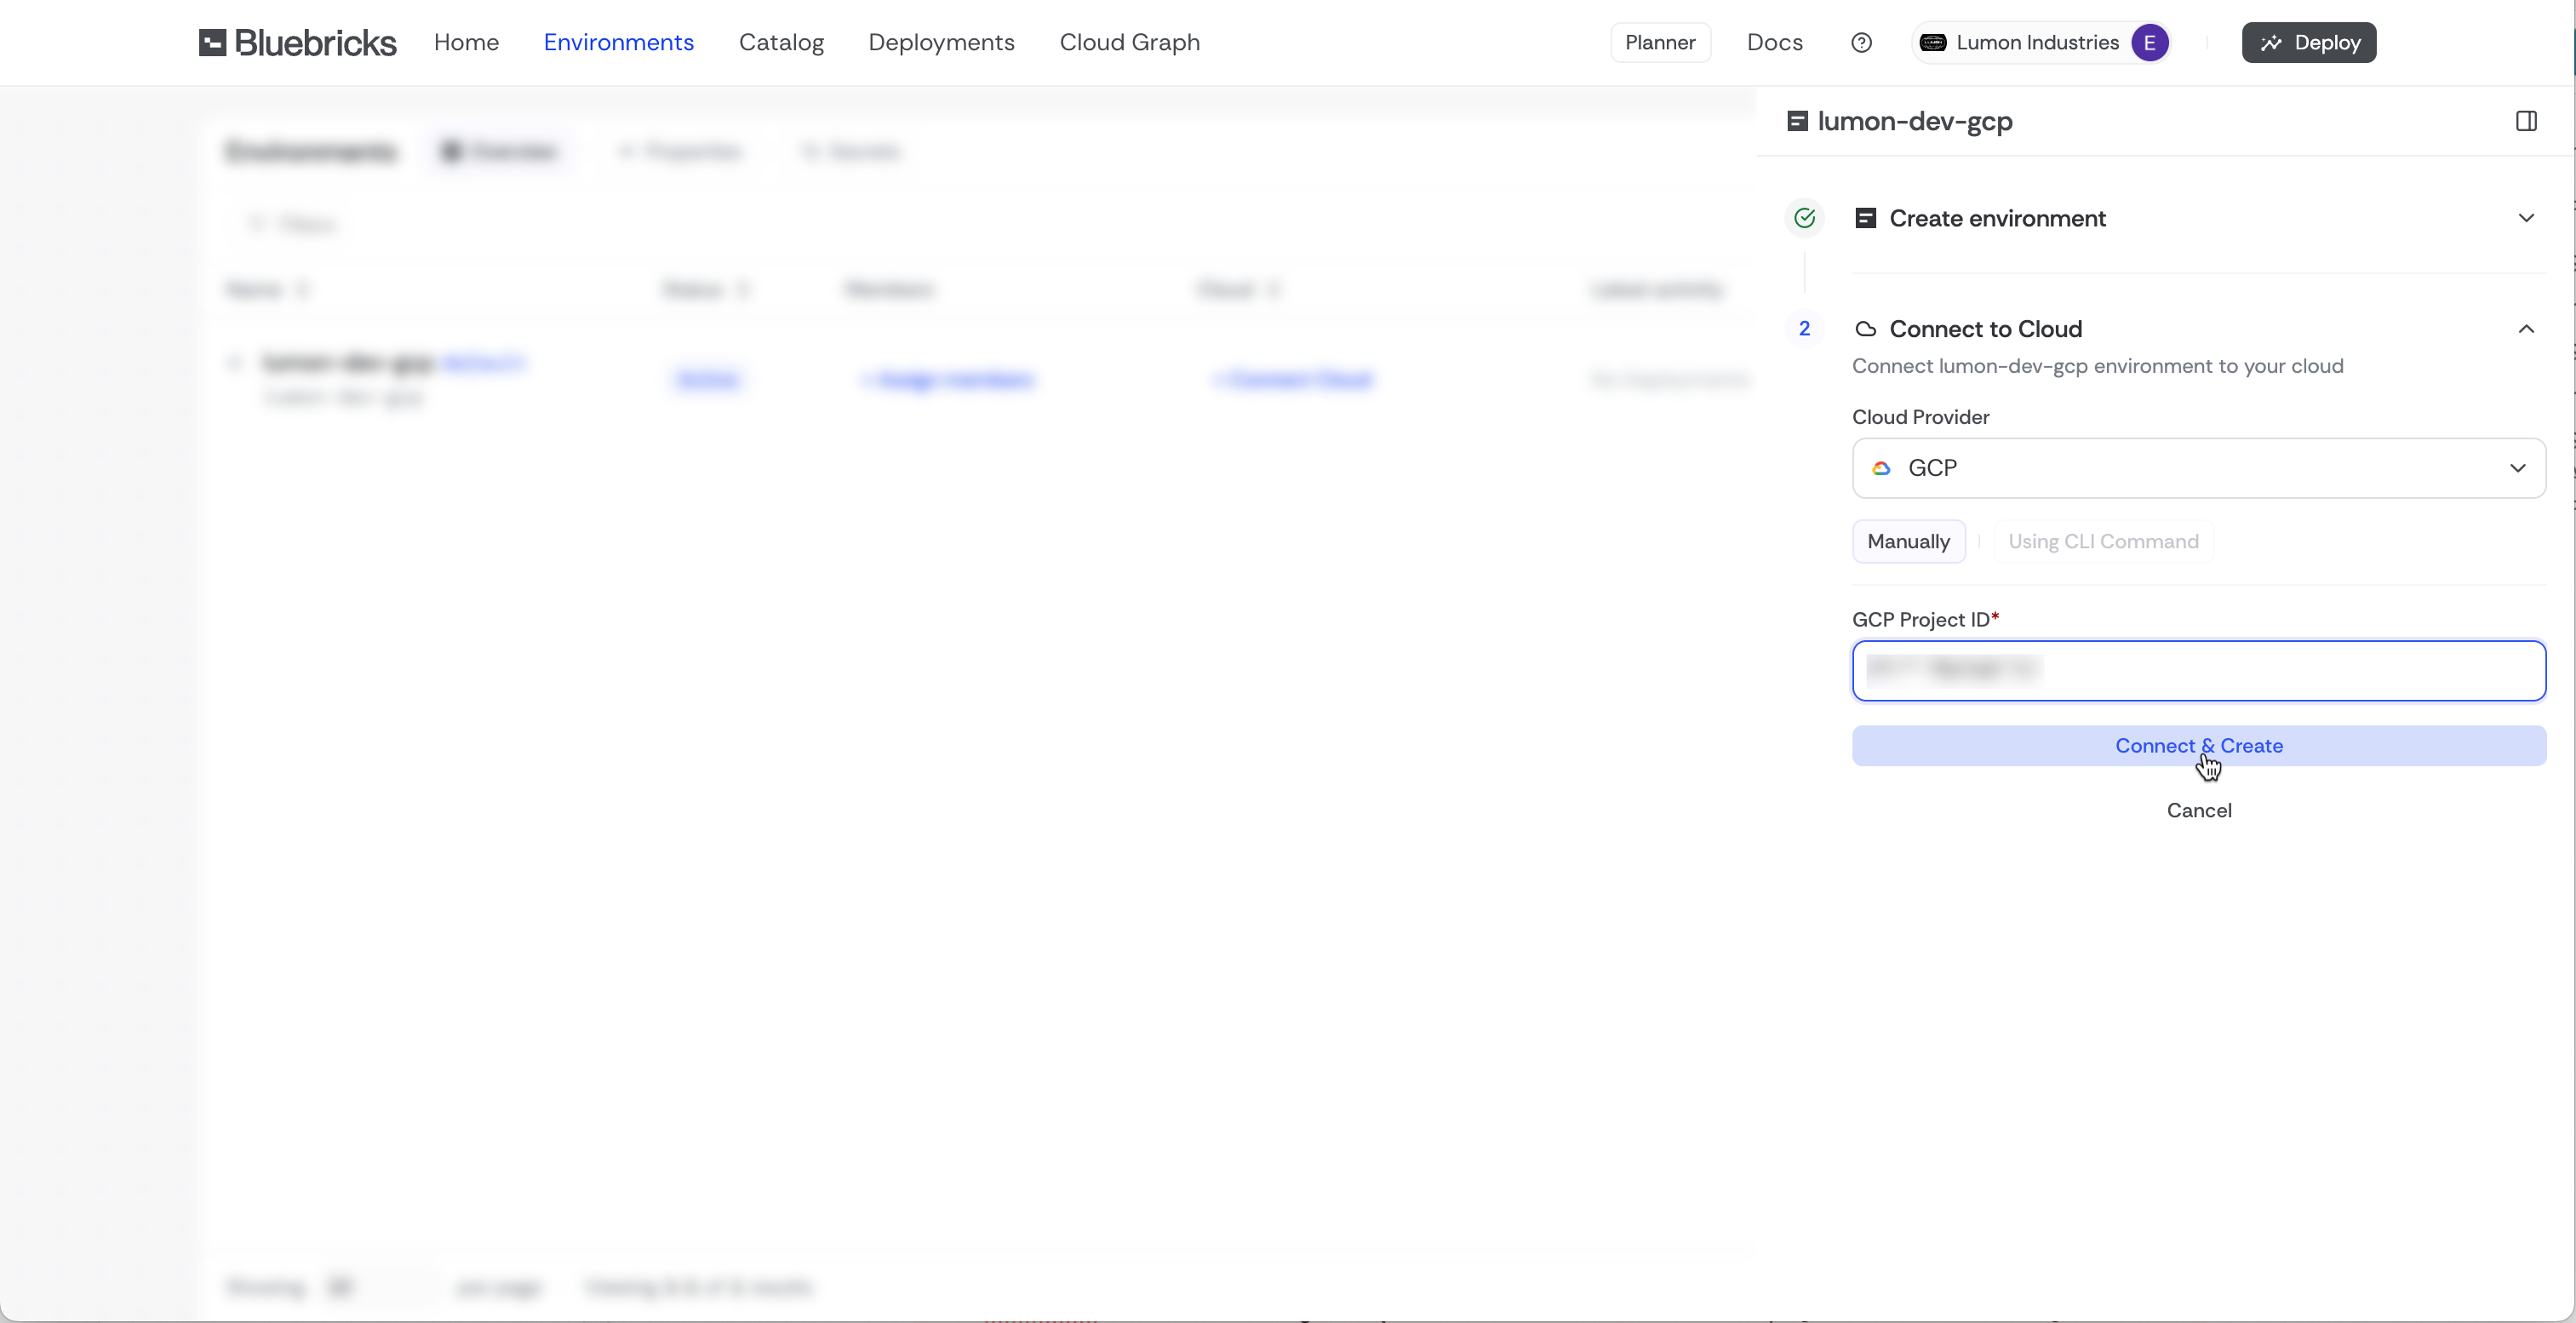
3. Choose an existing **Project ID** or click **"New Project"**
4. If creating a **New Project**, enter the **Google Cloud Project ID**

   <figure><img src="https://454695563-files.gitbook.io/~/files/v0/b/gitbook-x-prod.appspot.com/o/spaces%2FL1aVoJ67VgVl8Uv83TuE%2Fuploads%2Fgit-blob-c58c41810f025fe3a0eeb605980af3f930d8771c%2FCleanShot%202025-07-14%20at%2009.06.08%402x.png?alt=media" alt=""><figcaption></figcaption></figure>
5. Click **"Connect & Create"** to complete the setup

### Using the API

Use the [Cloud Accounts API](https://bluebricks.co/docs/api/reference/cloud-accounts) to create a cloud account. Pass the Google Cloud Project ID as `accountId`.

## Step 2: Grant Service Account Permissions

{% hint style="warning" %}
Bluebricks **recommends** using a **unique Service Account email** for each project to enhance security and enforce granular access control.
{% endhint %}

{% hint style="info" %}
Bluebricks **also recommends** assigning the **Editor** role to the Service Account for the project to ensure it has the required permissions to manage resources effectively.
{% endhint %}

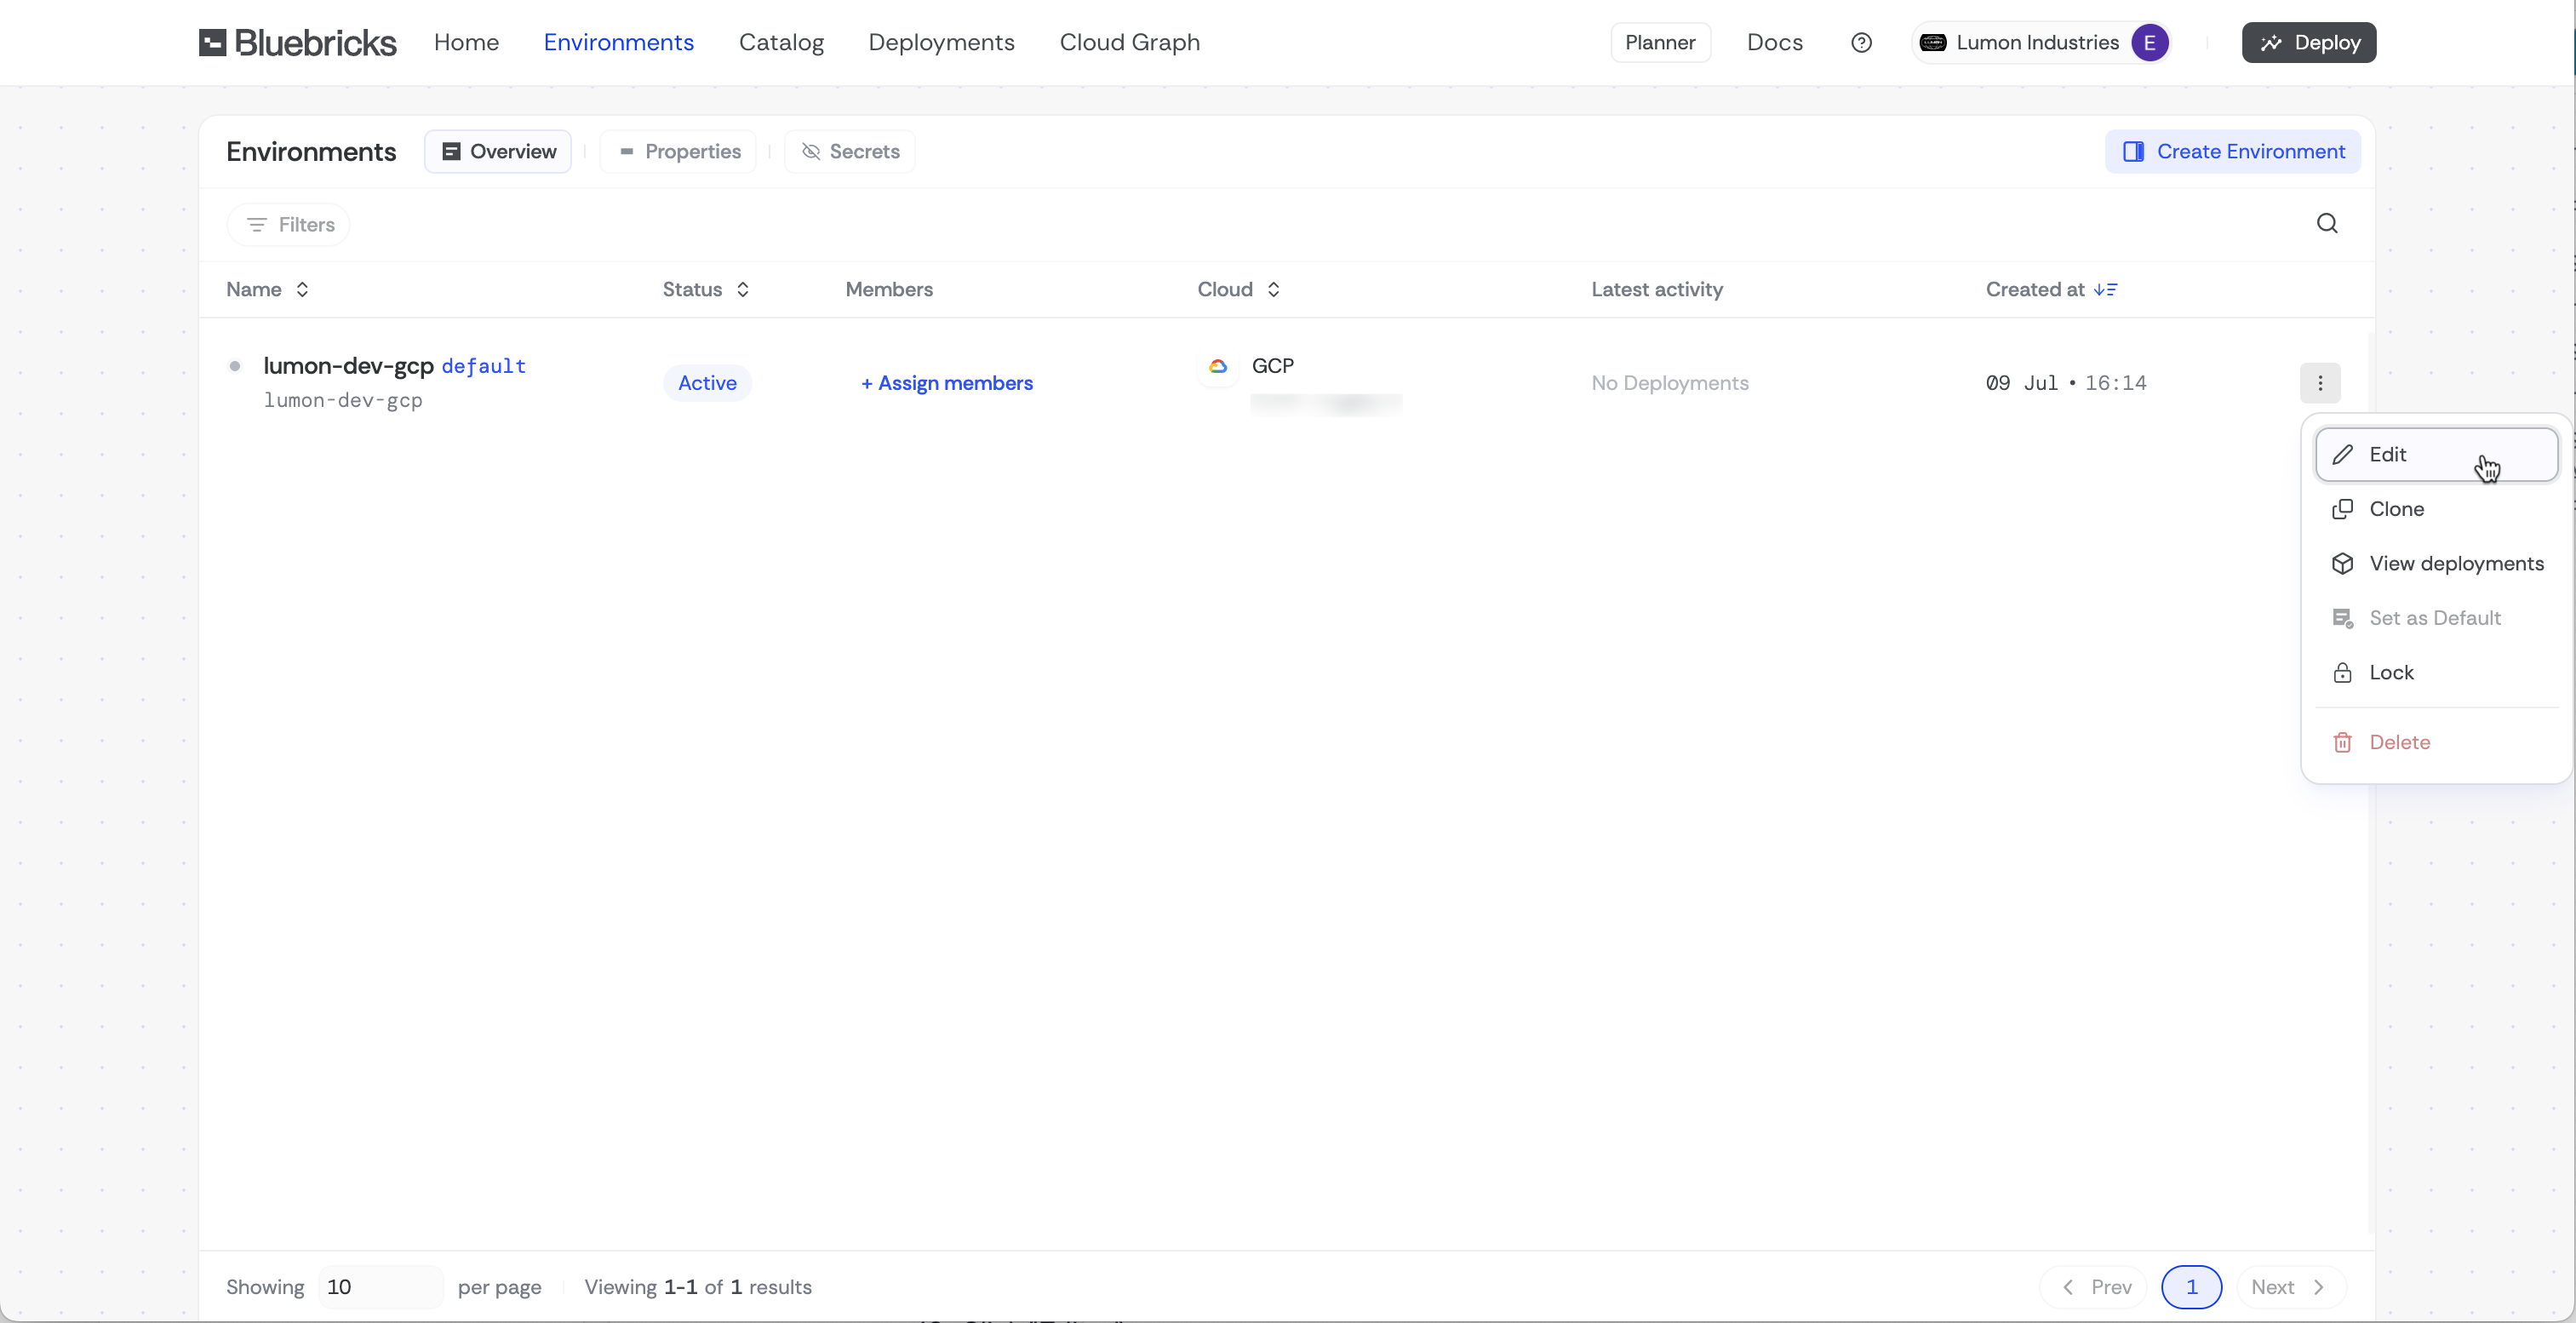
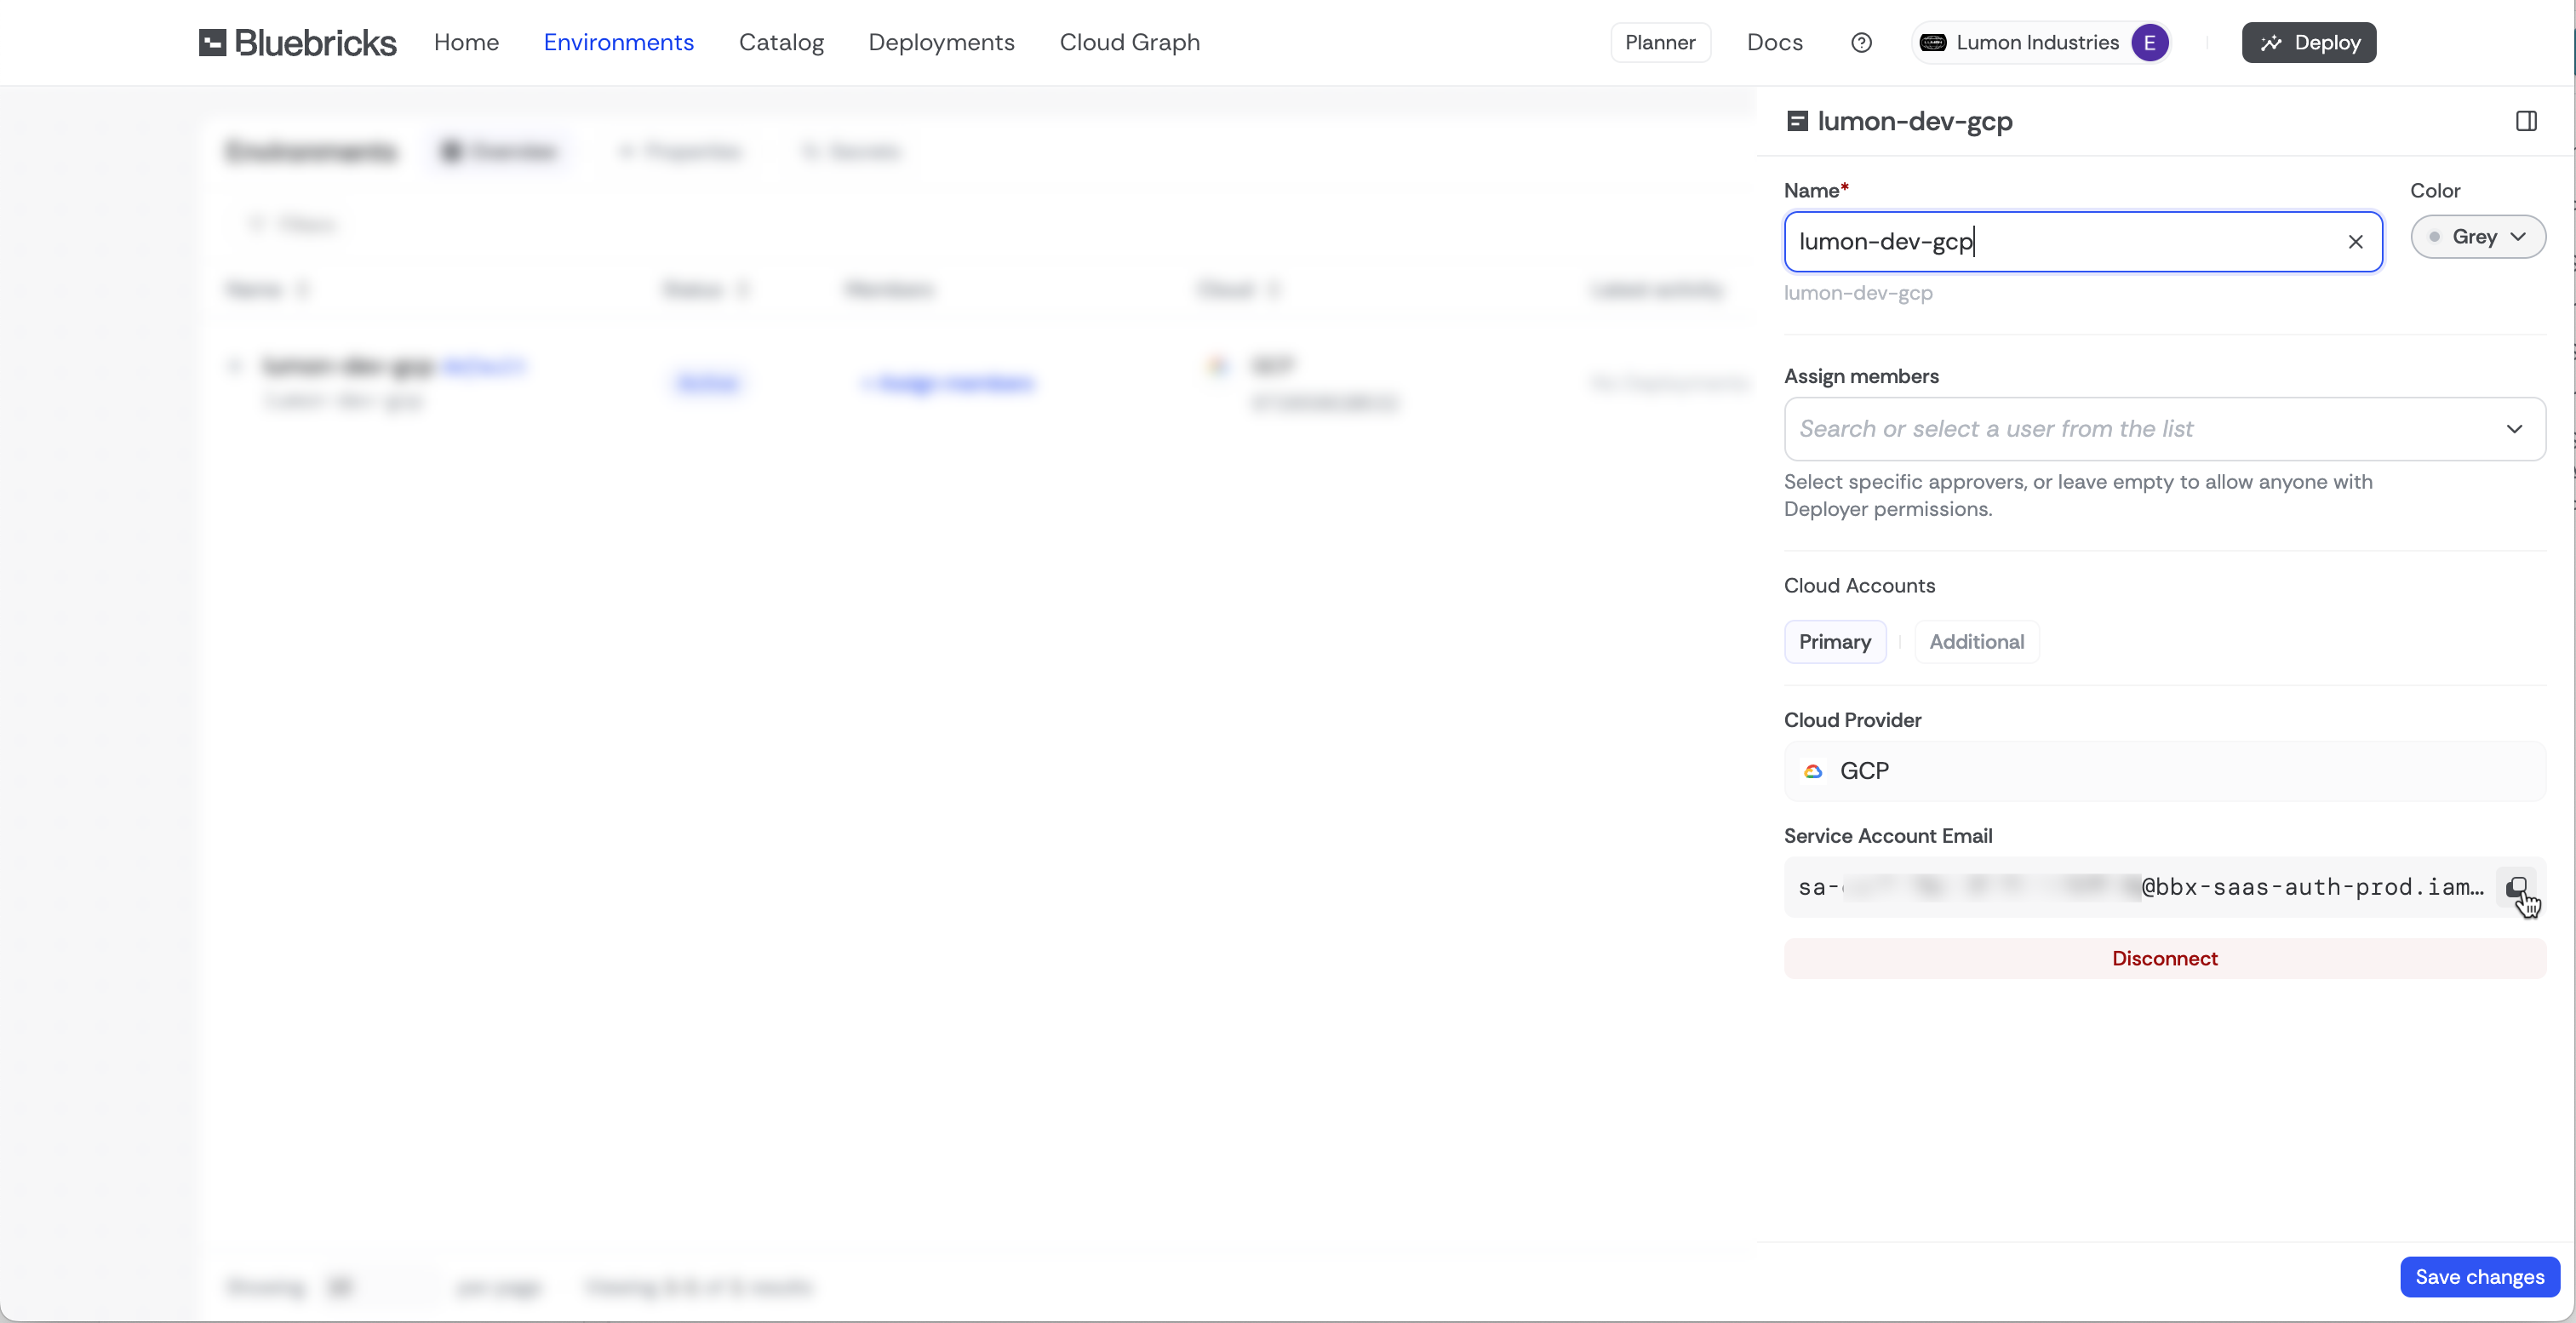
1. App only: Choose Edit on the collection options

   <figure><img src="https://454695563-files.gitbook.io/~/files/v0/b/gitbook-x-prod.appspot.com/o/spaces%2FL1aVoJ67VgVl8Uv83TuE%2Fuploads%2Fgit-blob-8dfb5cbd4eacbd302e12b20df5923dbc34181a13%2FCleanShot%202025-07-14%20at%2009.10.49%402x.png?alt=media" alt=""><figcaption></figcaption></figure>
2. Copy Bluebricks Service Account (It is in the API output if the API was used to connect GCP)
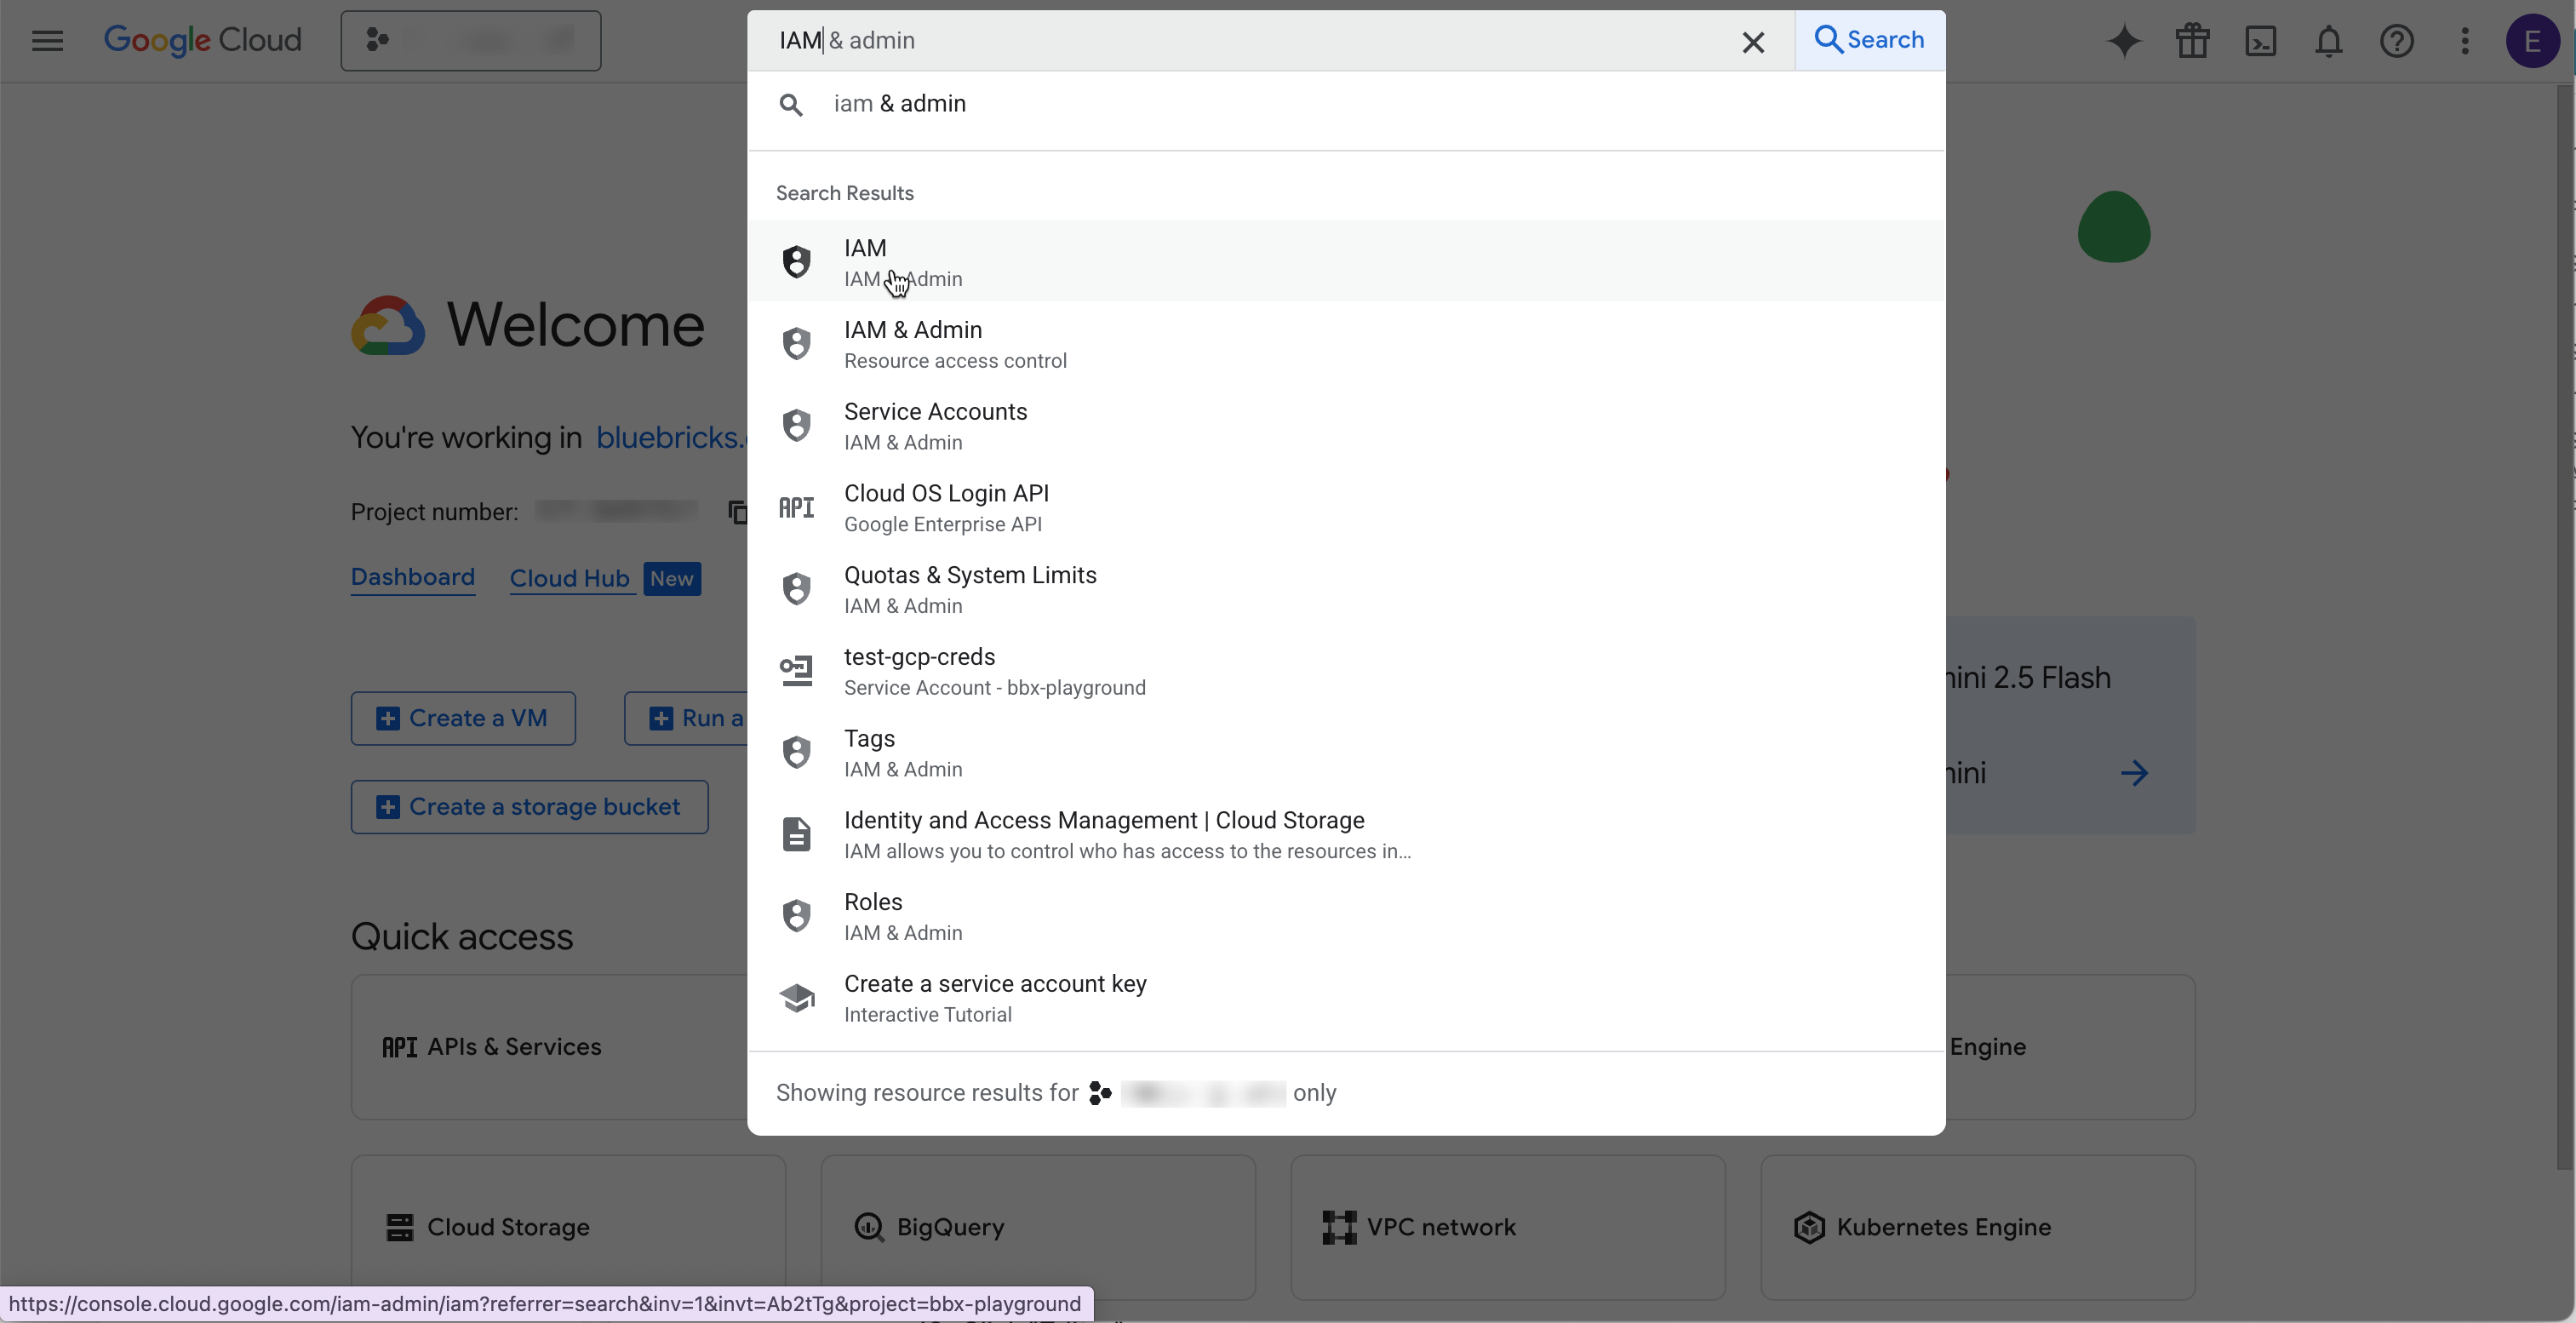
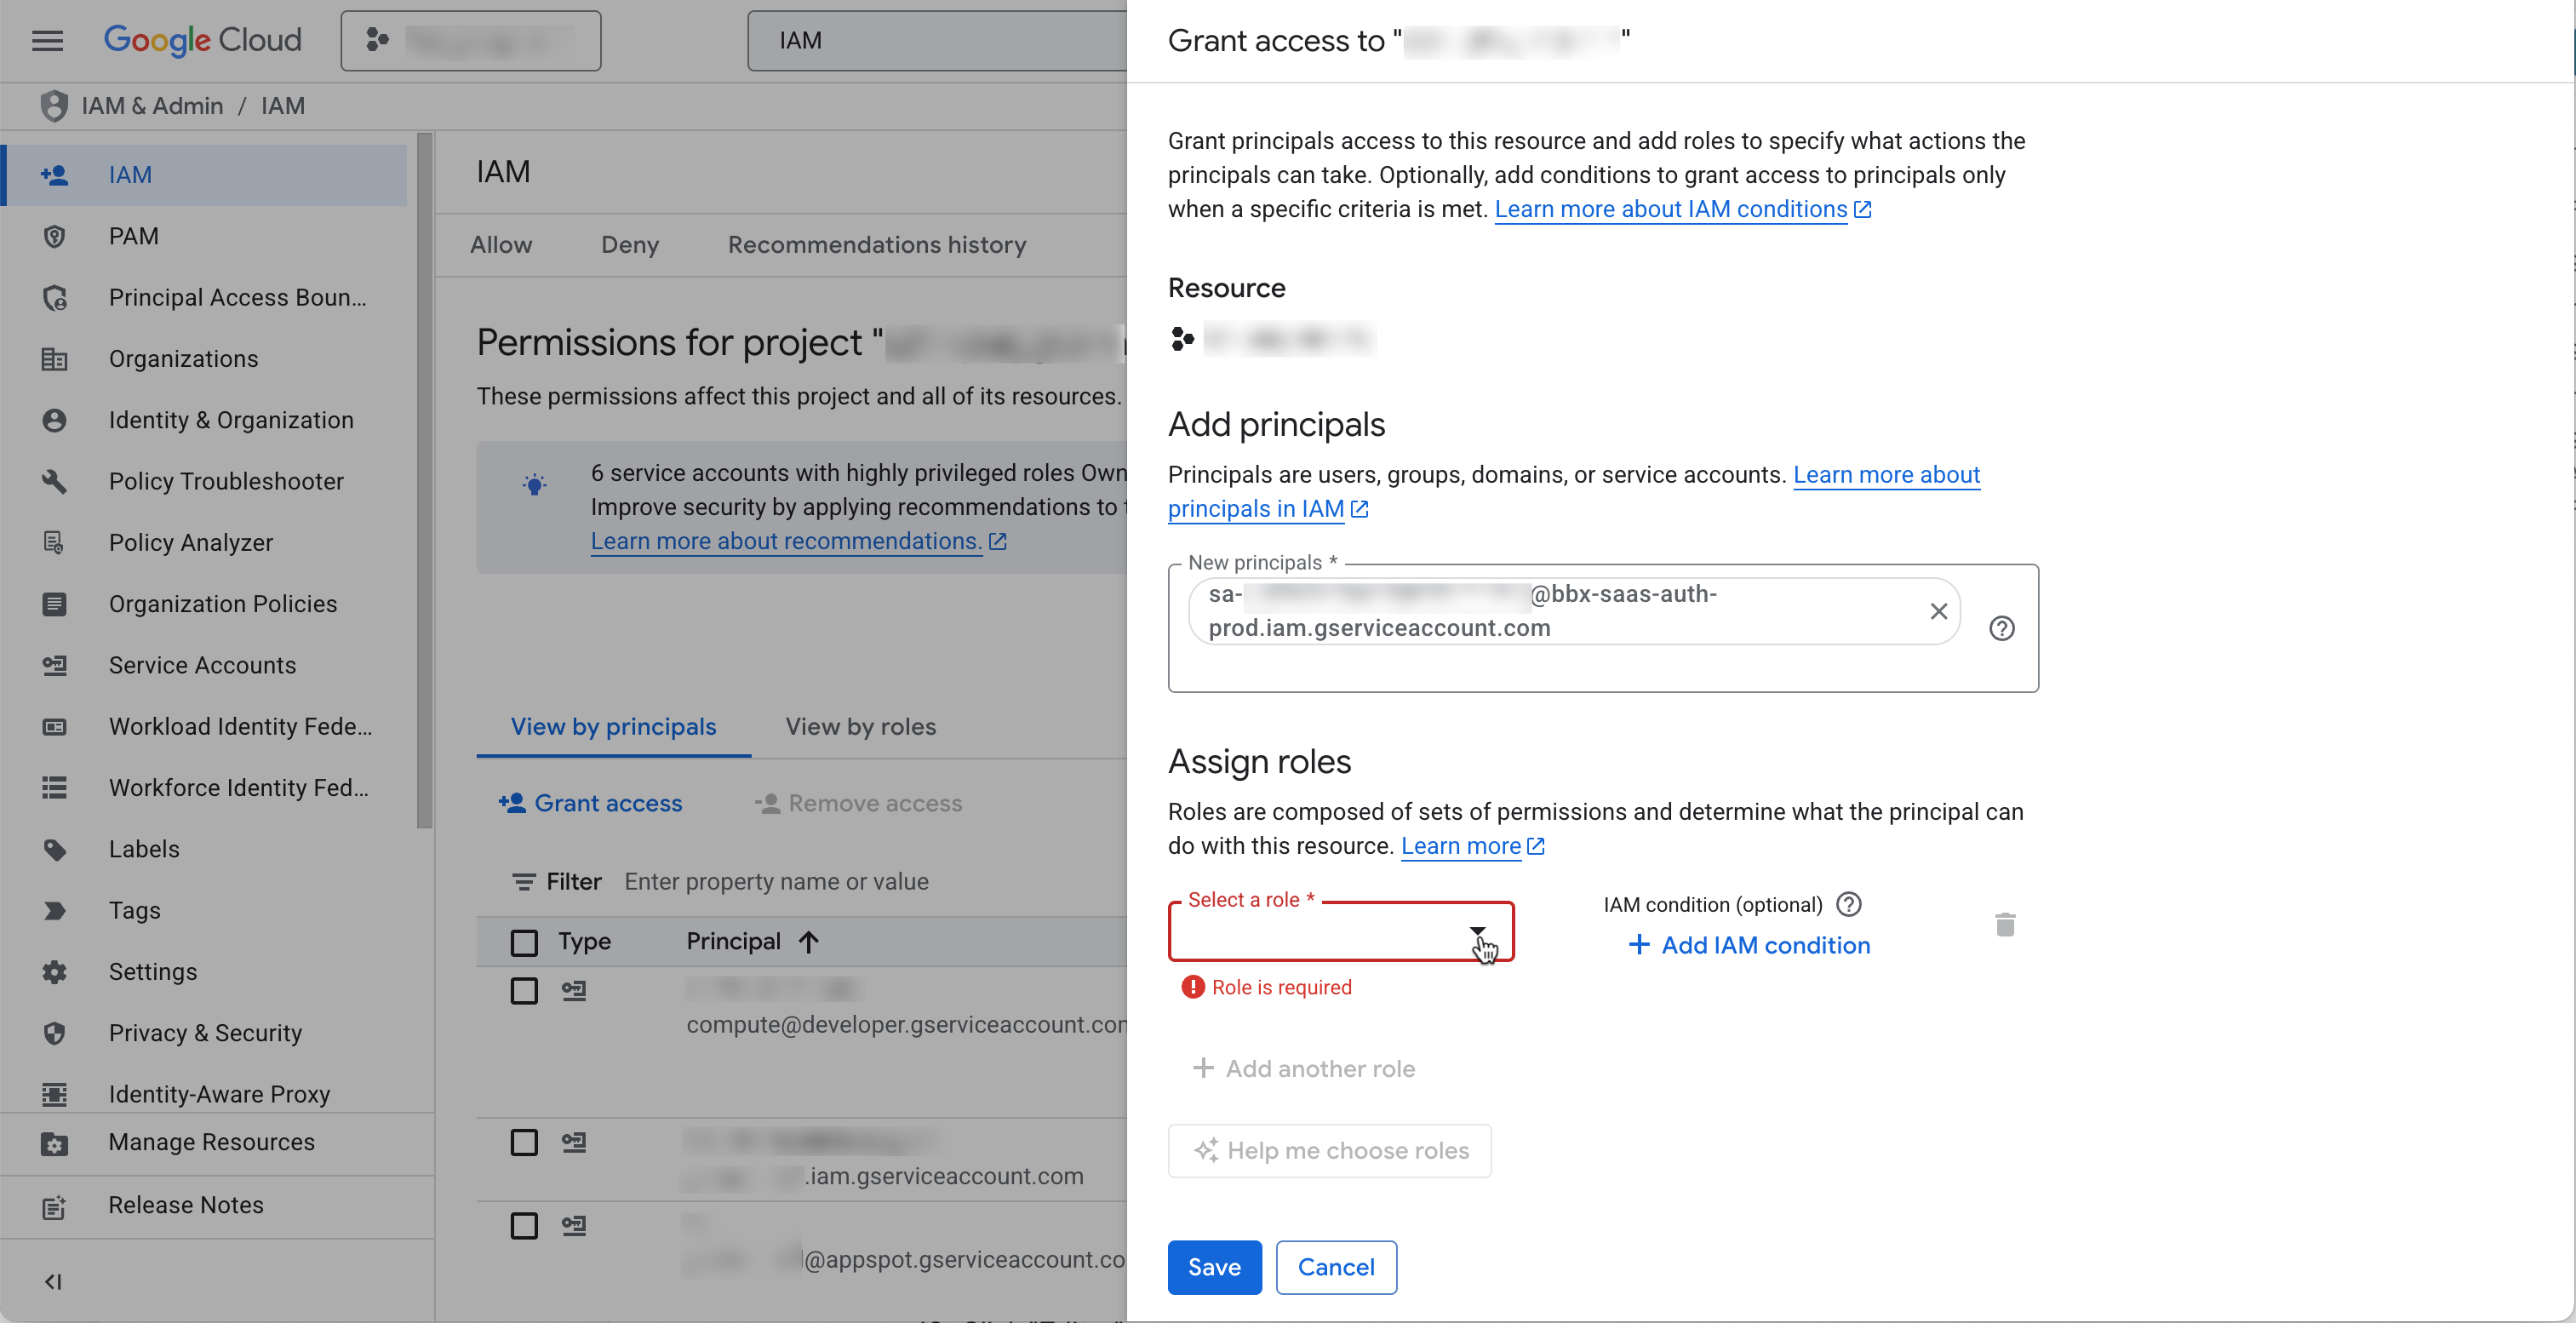
   <figure><img src="https://454695563-files.gitbook.io/~/files/v0/b/gitbook-x-prod.appspot.com/o/spaces%2FL1aVoJ67VgVl8Uv83TuE%2Fuploads%2Fgit-blob-228c4b43d4ecba9cf3d40a23c642547eada674df%2FCleanShot%202025-07-14%20at%2009.12.11%402x.png?alt=media" alt=""><figcaption></figcaption></figure>
3. Navigate to <https://console.cloud.google.com/>
4. Click the "Search (/) for resources, docs, products and more" field, type "IAM" and click it

   <figure><img src="https://454695563-files.gitbook.io/~/files/v0/b/gitbook-x-prod.appspot.com/o/spaces%2FL1aVoJ67VgVl8Uv83TuE%2Fuploads%2Fgit-blob-daab5c77ddd838b992089063090deed8d96733bf%2FCleanShot%202025-07-14%20at%2009.16.26%402x.png?alt=media" alt=""><figcaption></figcaption></figure>
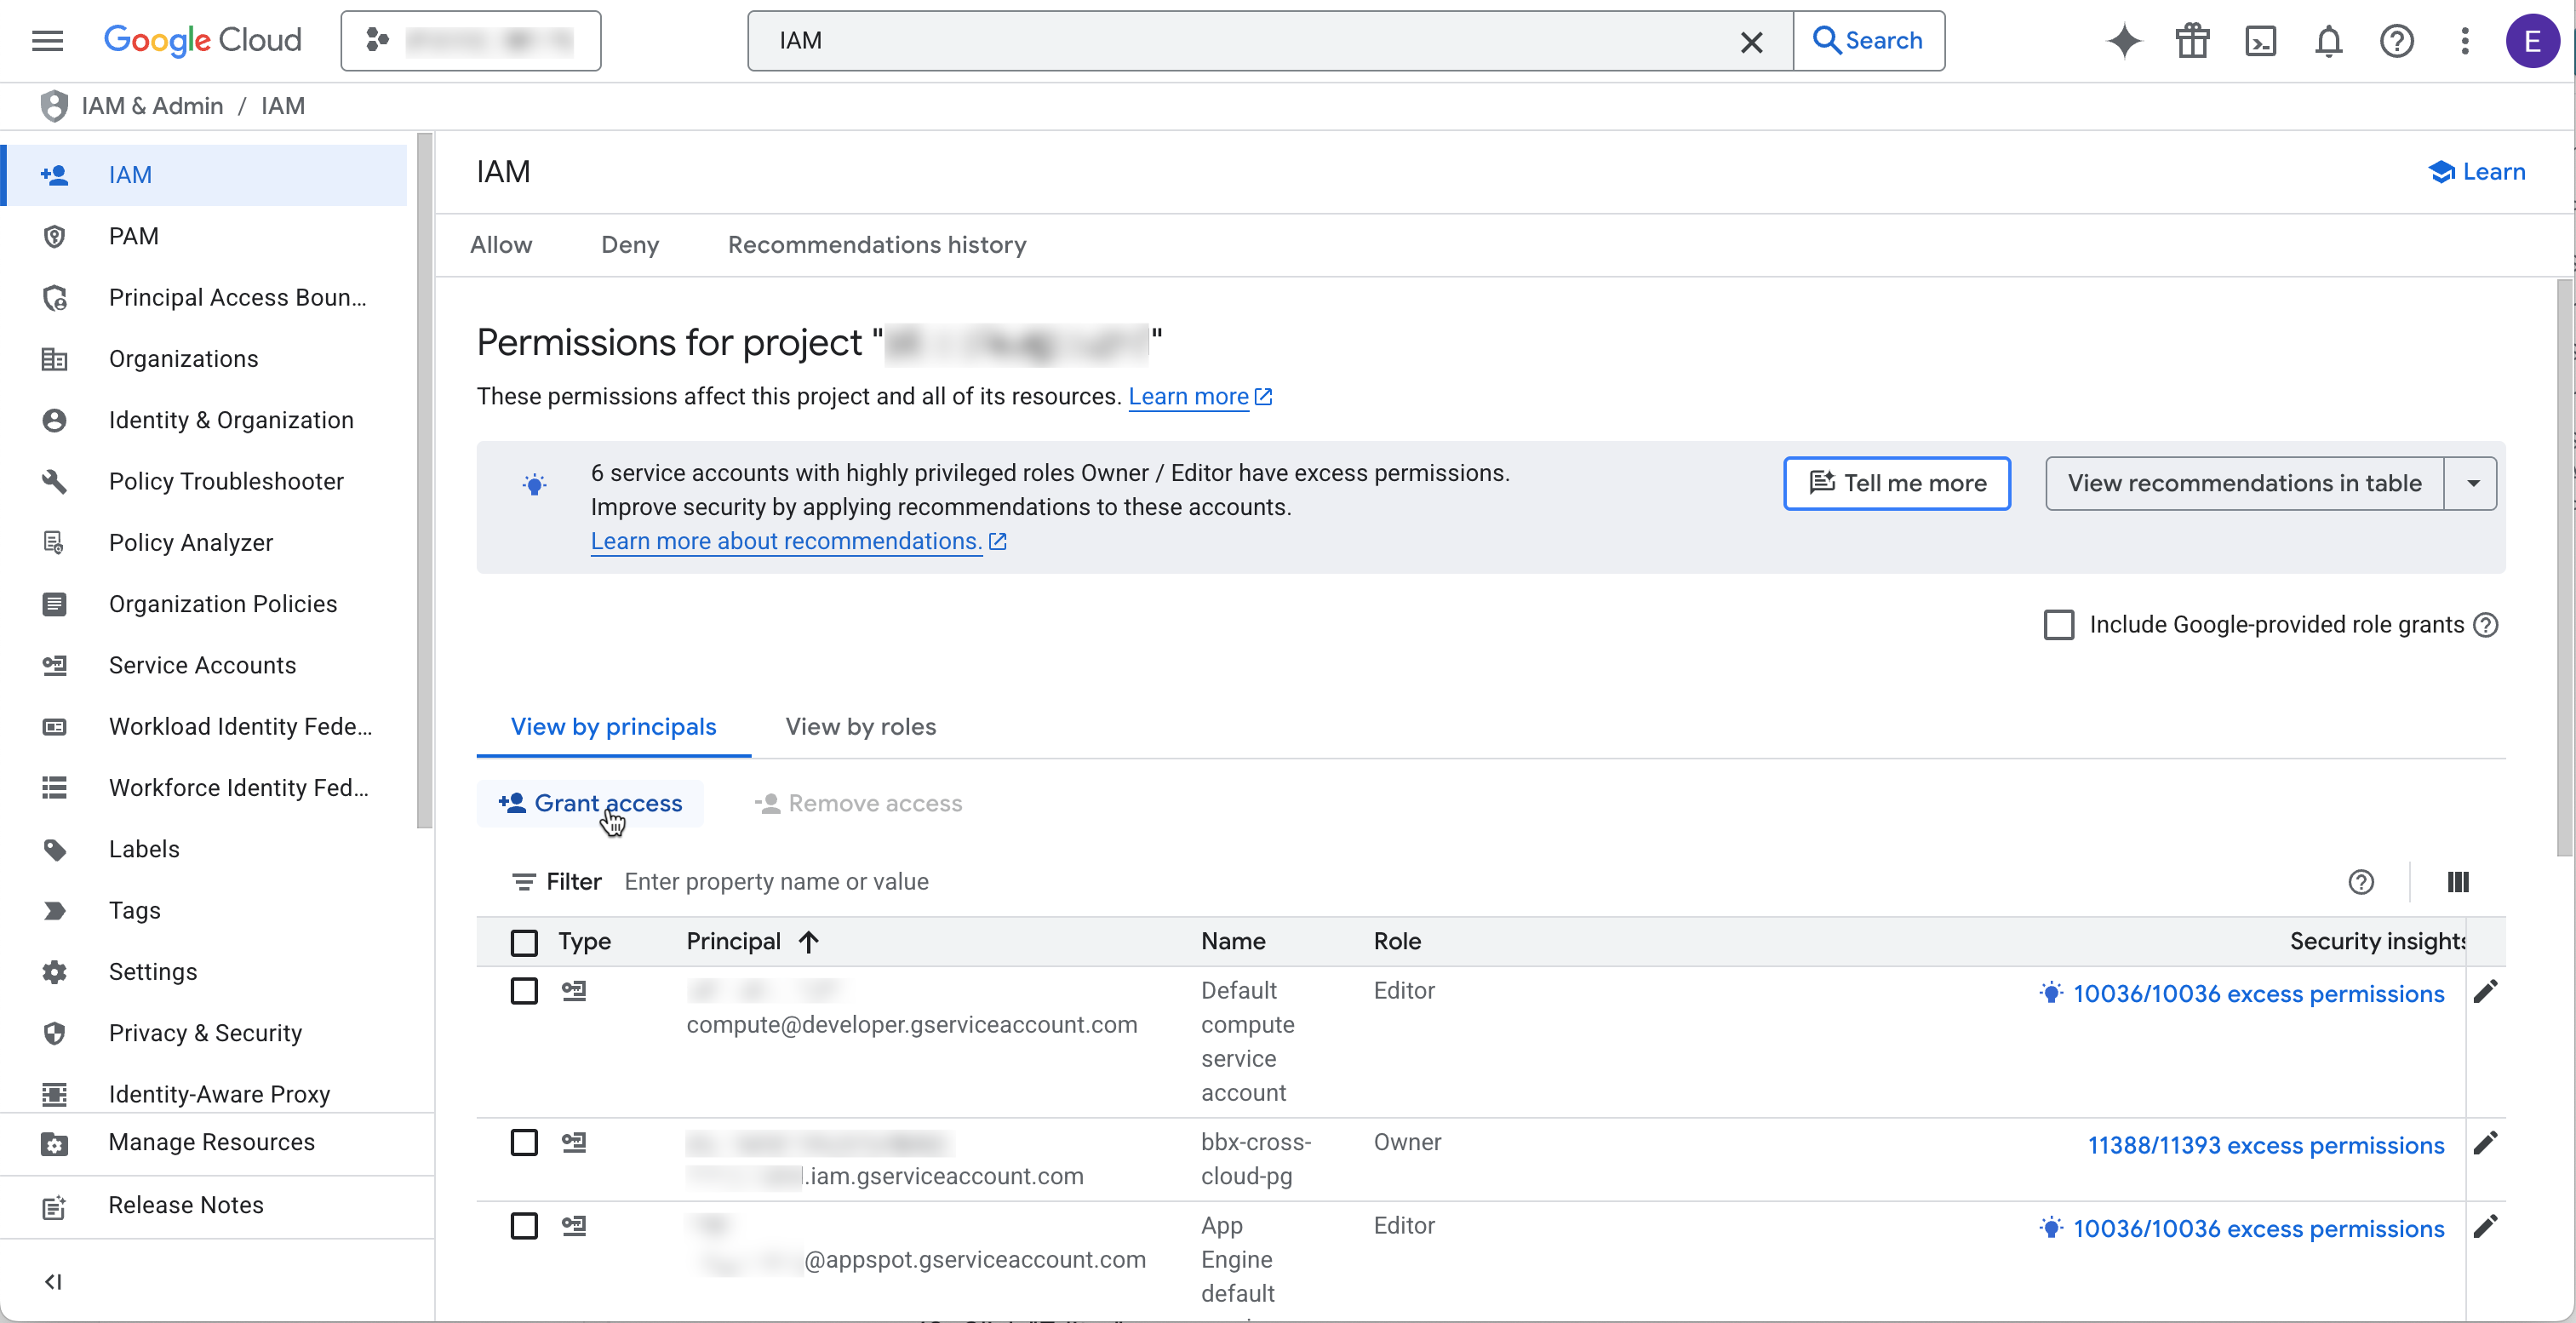
5. Click "Grant access"

   <figure><img src="https://454695563-files.gitbook.io/~/files/v0/b/gitbook-x-prod.appspot.com/o/spaces%2FL1aVoJ67VgVl8Uv83TuE%2Fuploads%2Fgit-blob-fb7481e8729d07f264409a408d6933e76953e9a8%2FCleanShot%202025-07-14%20at%2009.20.08%402x.png?alt=media" alt=""><figcaption></figcaption></figure>
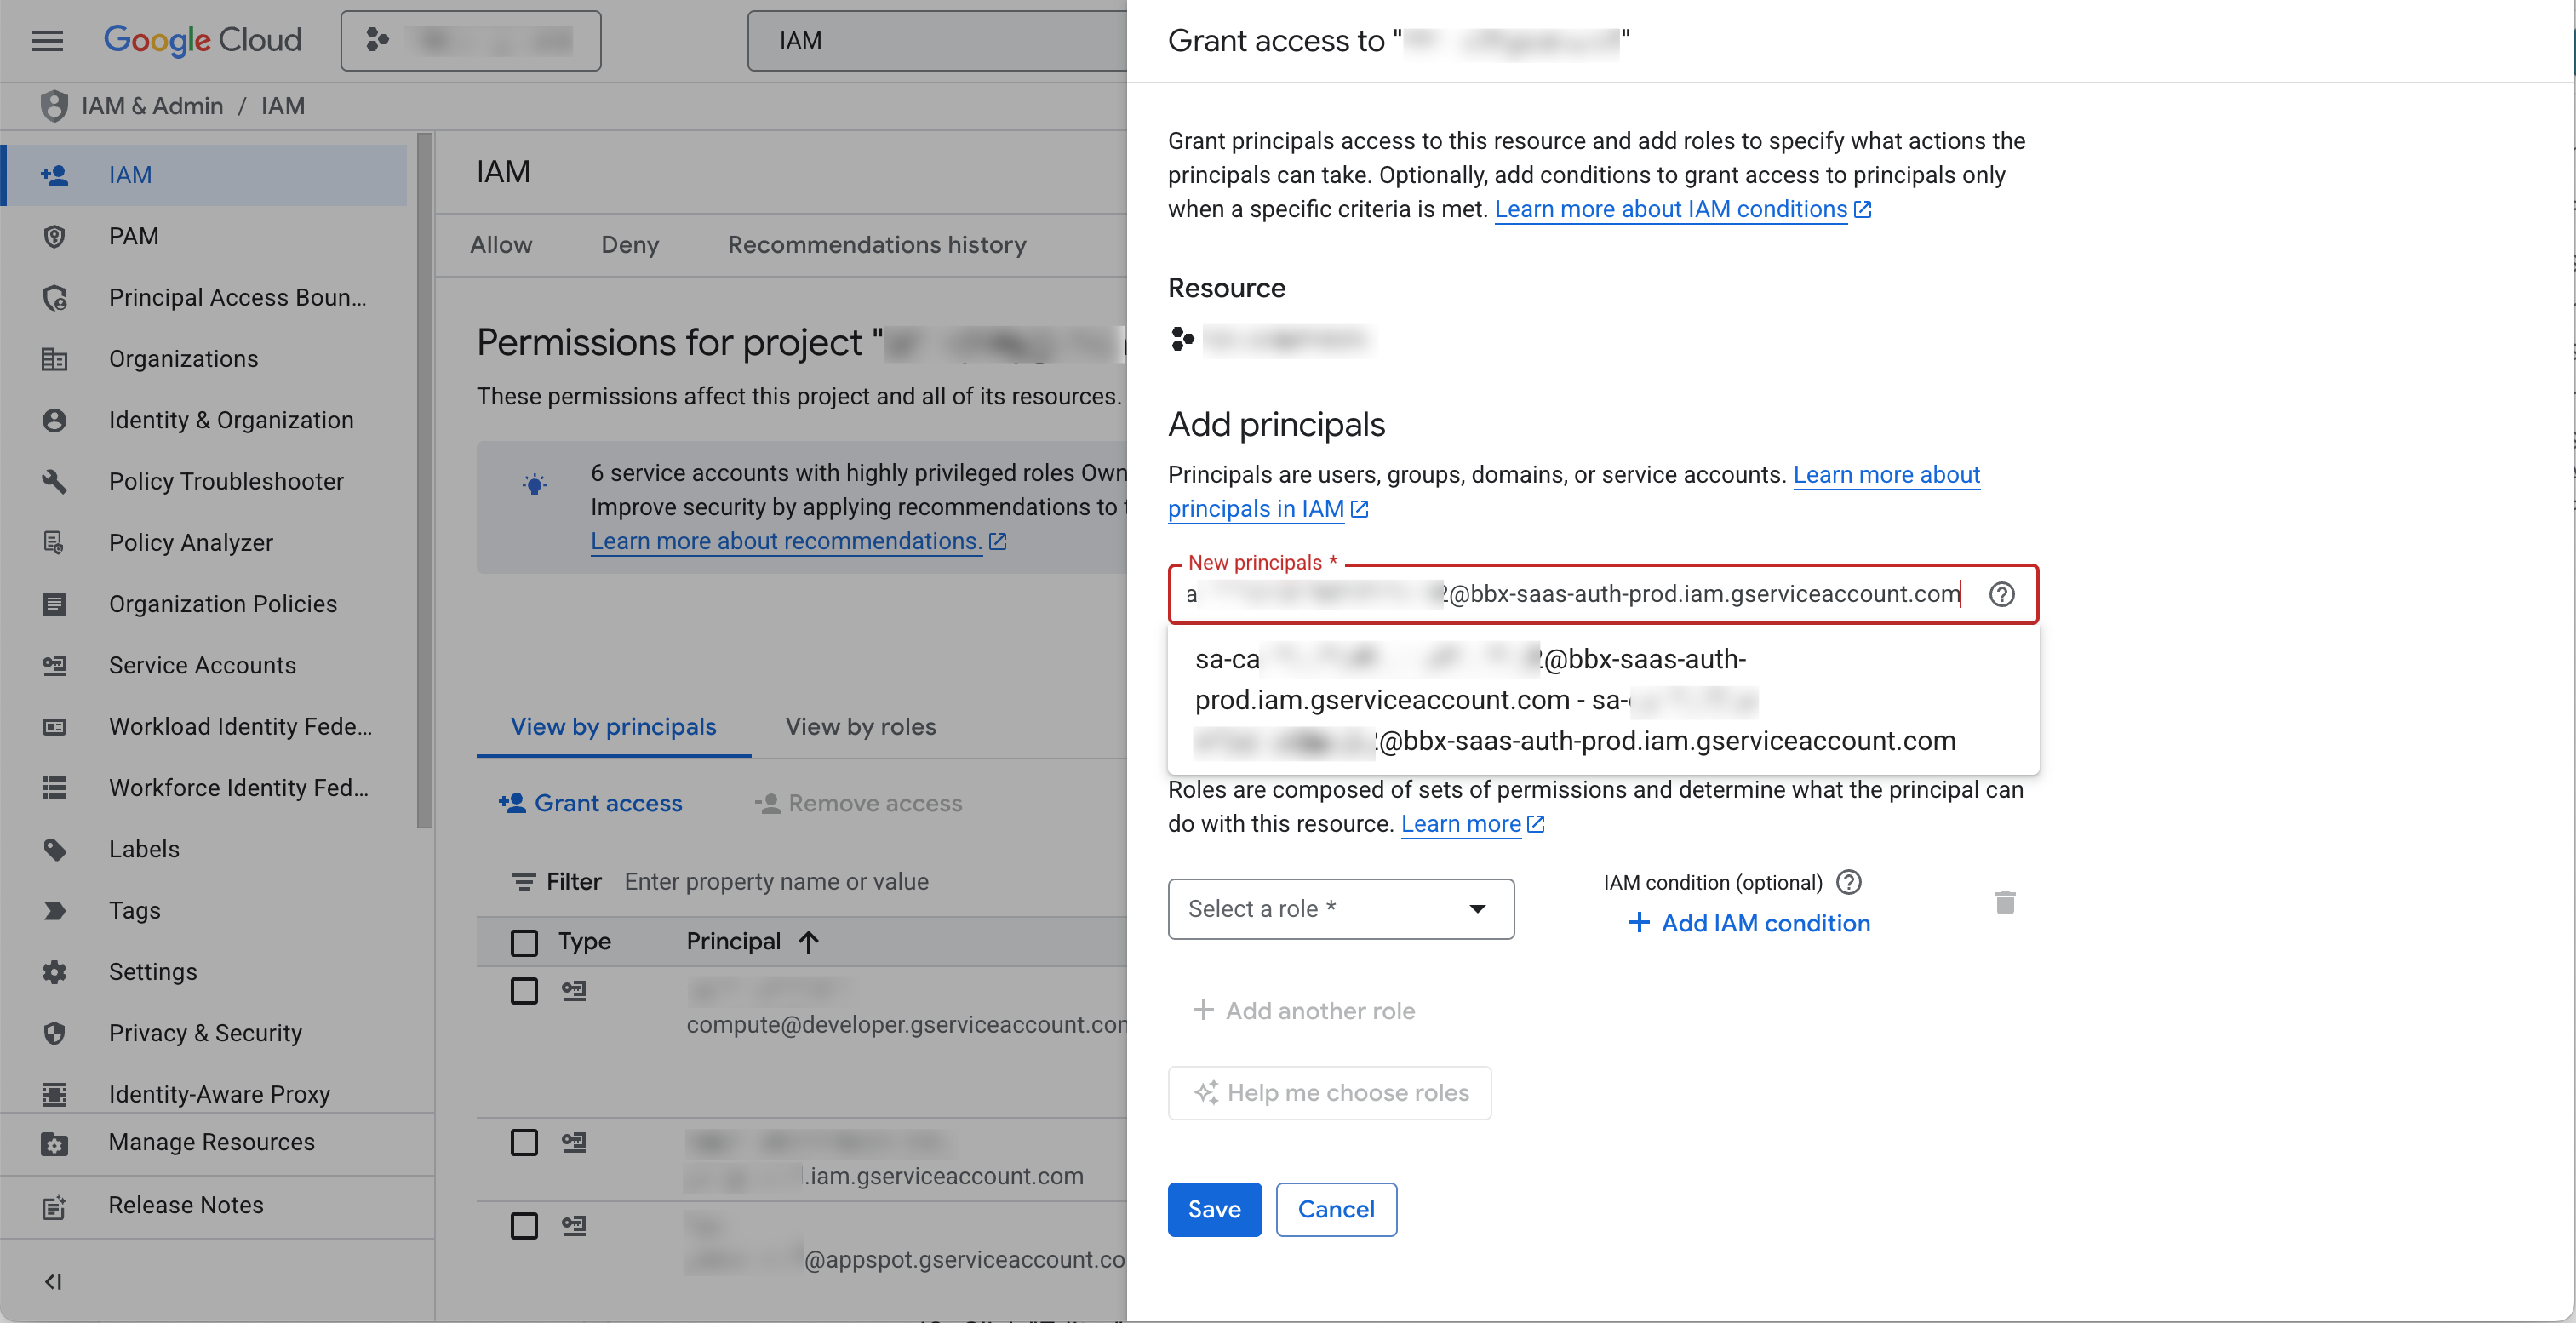
6. Click the "New principals" field
7. Paste or type the Service Account Email created by Bluebricks

   <figure><img src="https://454695563-files.gitbook.io/~/files/v0/b/gitbook-x-prod.appspot.com/o/spaces%2FL1aVoJ67VgVl8Uv83TuE%2Fuploads%2Fgit-blob-54426fb71a4f0c281e96abf4e81d1d568540ca9b%2FCleanShot%202025-07-14%20at%2009.26.28%402x.png?alt=media" alt=""><figcaption></figcaption></figure>
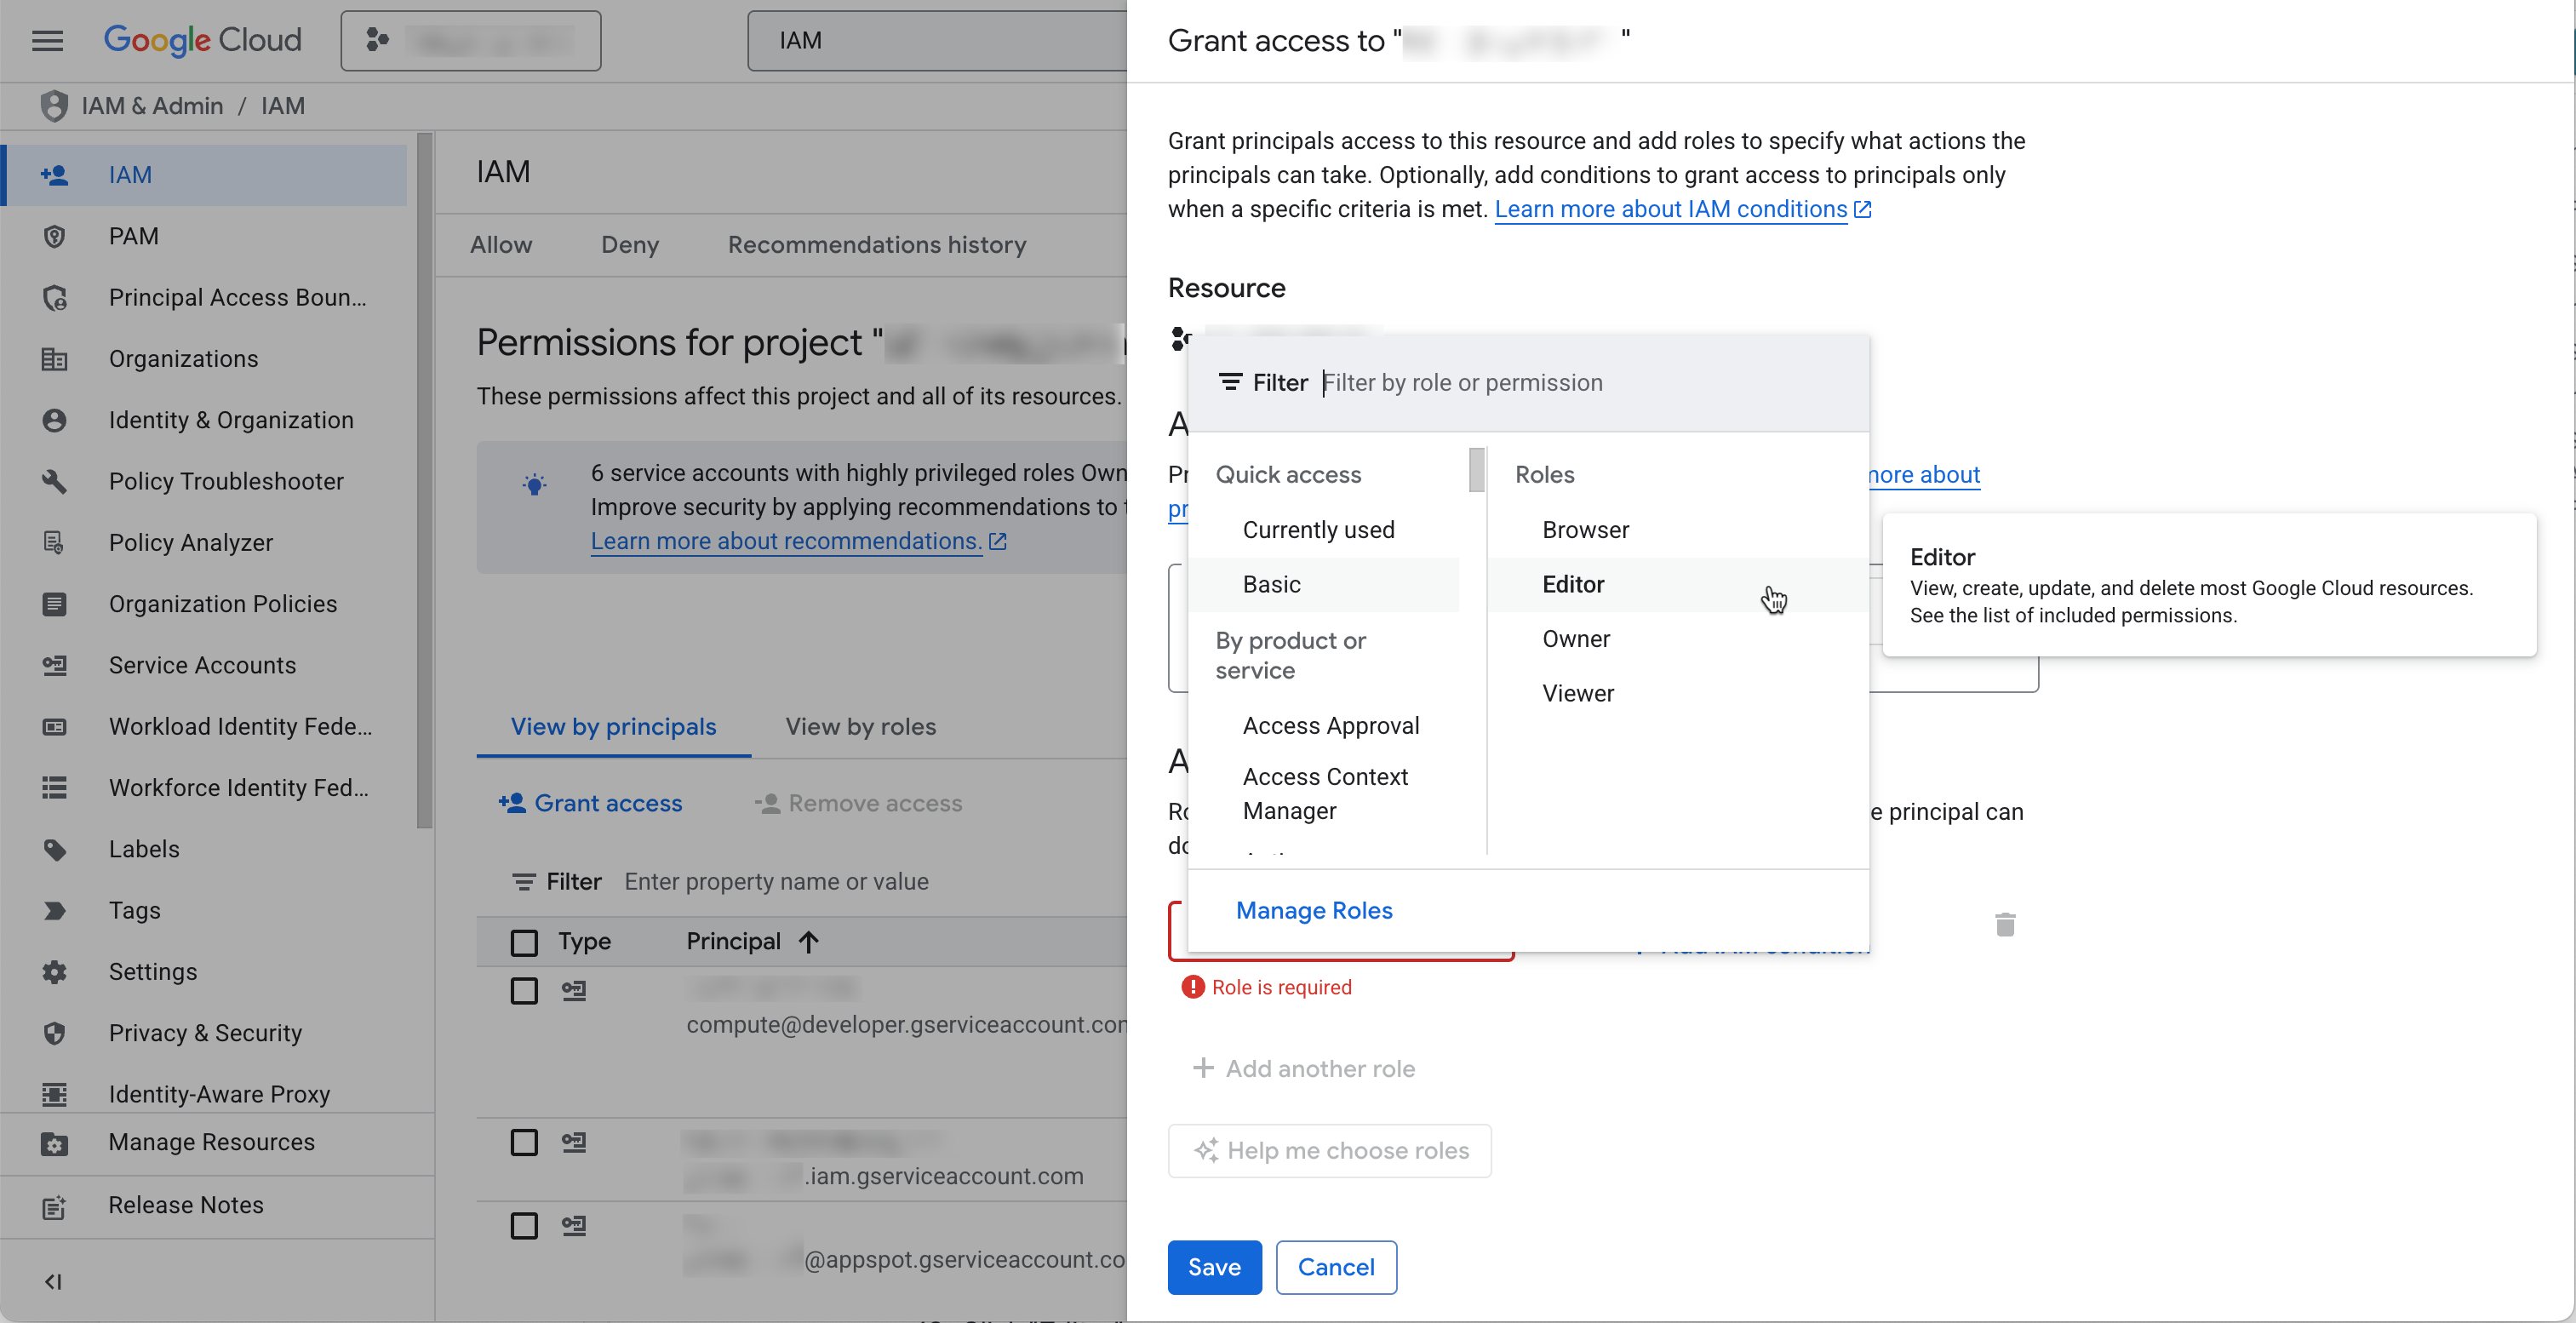
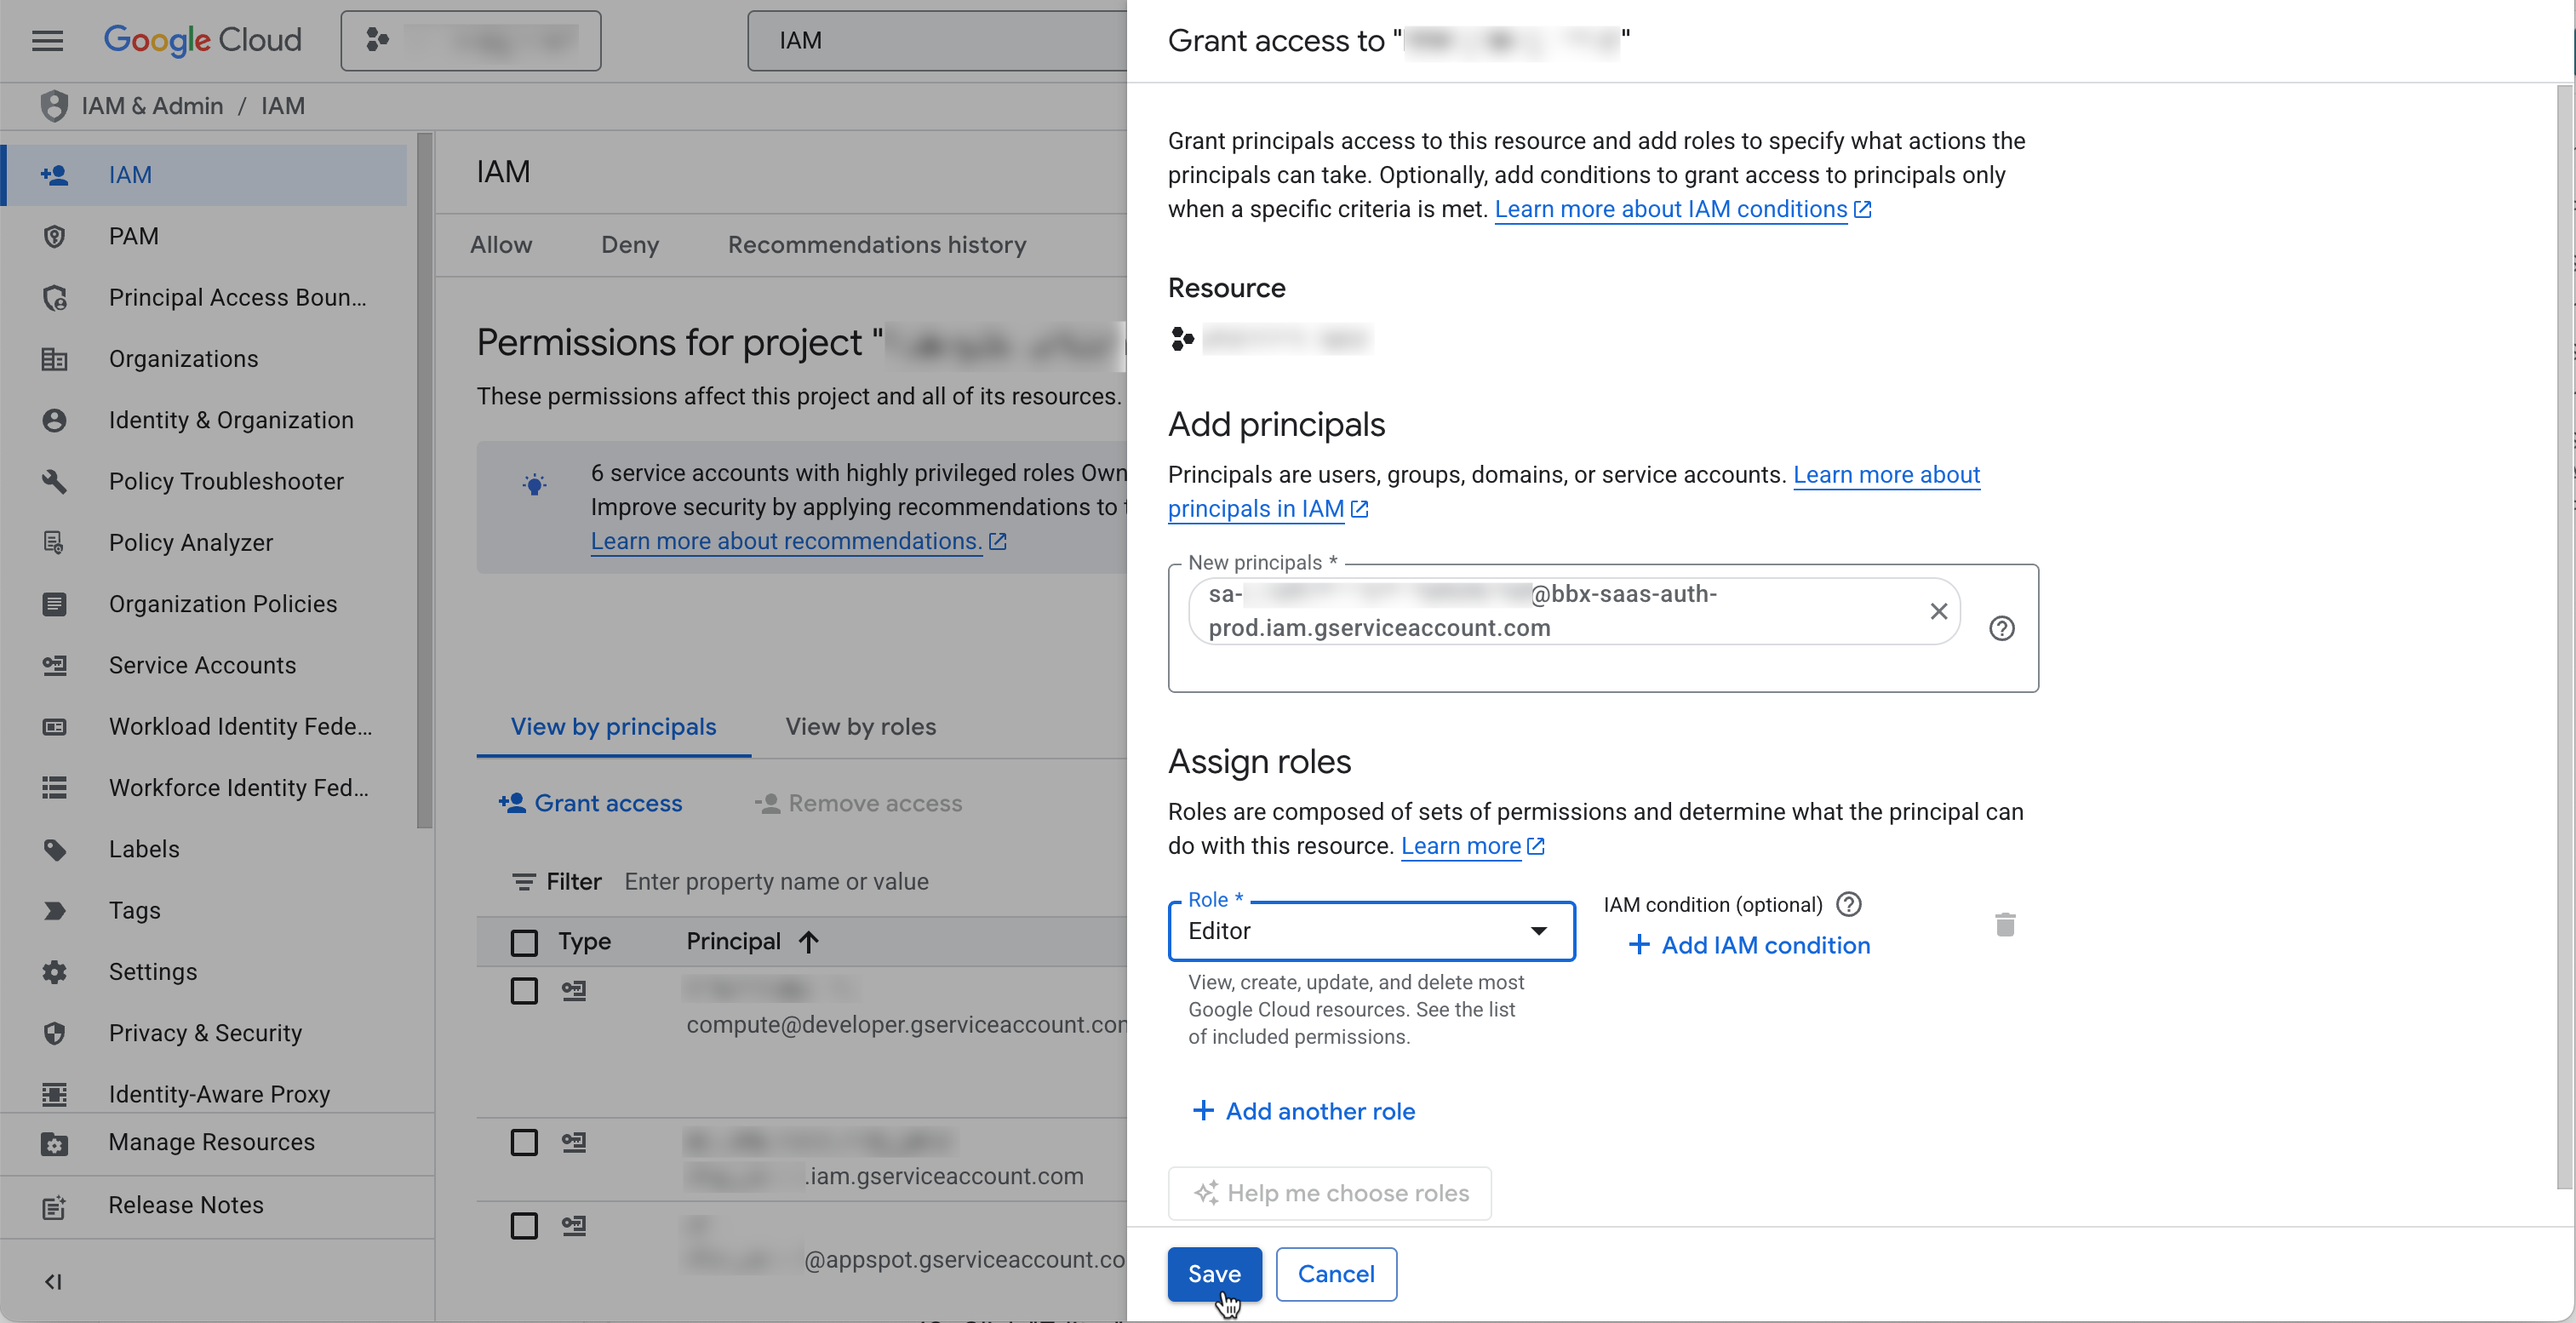
8. Under "Assign roles", choose "Select a role"

   <figure><img src="https://454695563-files.gitbook.io/~/files/v0/b/gitbook-x-prod.appspot.com/o/spaces%2FL1aVoJ67VgVl8Uv83TuE%2Fuploads%2Fgit-blob-4681772dddaf822bdf3a07cca81e54a8fa2cce68%2FCleanShot%202025-07-14%20at%2009.30.03%402x.png?alt=media" alt=""><figcaption></figcaption></figure>
9. Click "Editor"

   <figure><img src="https://454695563-files.gitbook.io/~/files/v0/b/gitbook-x-prod.appspot.com/o/spaces%2FL1aVoJ67VgVl8Uv83TuE%2Fuploads%2Fgit-blob-f948cef52d6d0db6ba5eab6605484cf94a4f5cec%2FCleanShot%202025-07-14%20at%2009.31.26%402x.png?alt=media" alt=""><figcaption></figcaption></figure>
10. Click "Save"

    <figure><img src="https://454695563-files.gitbook.io/~/files/v0/b/gitbook-x-prod.appspot.com/o/spaces%2FL1aVoJ67VgVl8Uv83TuE%2Fuploads%2Fgit-blob-5d48962e7ed76a76965d6ce4eddf7cd206309dd8%2FCleanShot%202025-07-14%20at%2009.32.54%402x.png?alt=media" alt=""><figcaption></figcaption></figure>

## Next steps

* [Connect your Cloud](https://bluebricks.co/docs/core-concepts/collections/connect-your-cloud): overview of all cloud connection types
* [CLI Reference: bricks clouds](https://bluebricks.co/docs/bricks-cli/cli-reference/bricks_clouds)
