# Connecting to Azure

Connecting an **Azure Account** to a **Bluebricks Environment** takes up to **5 minutes**.

### Prerequisites

1. Ensure you have a valid subscription id in [Azure](https://portal.azure.com/#home).

### Step 1: Create an environment with an Azure cloud

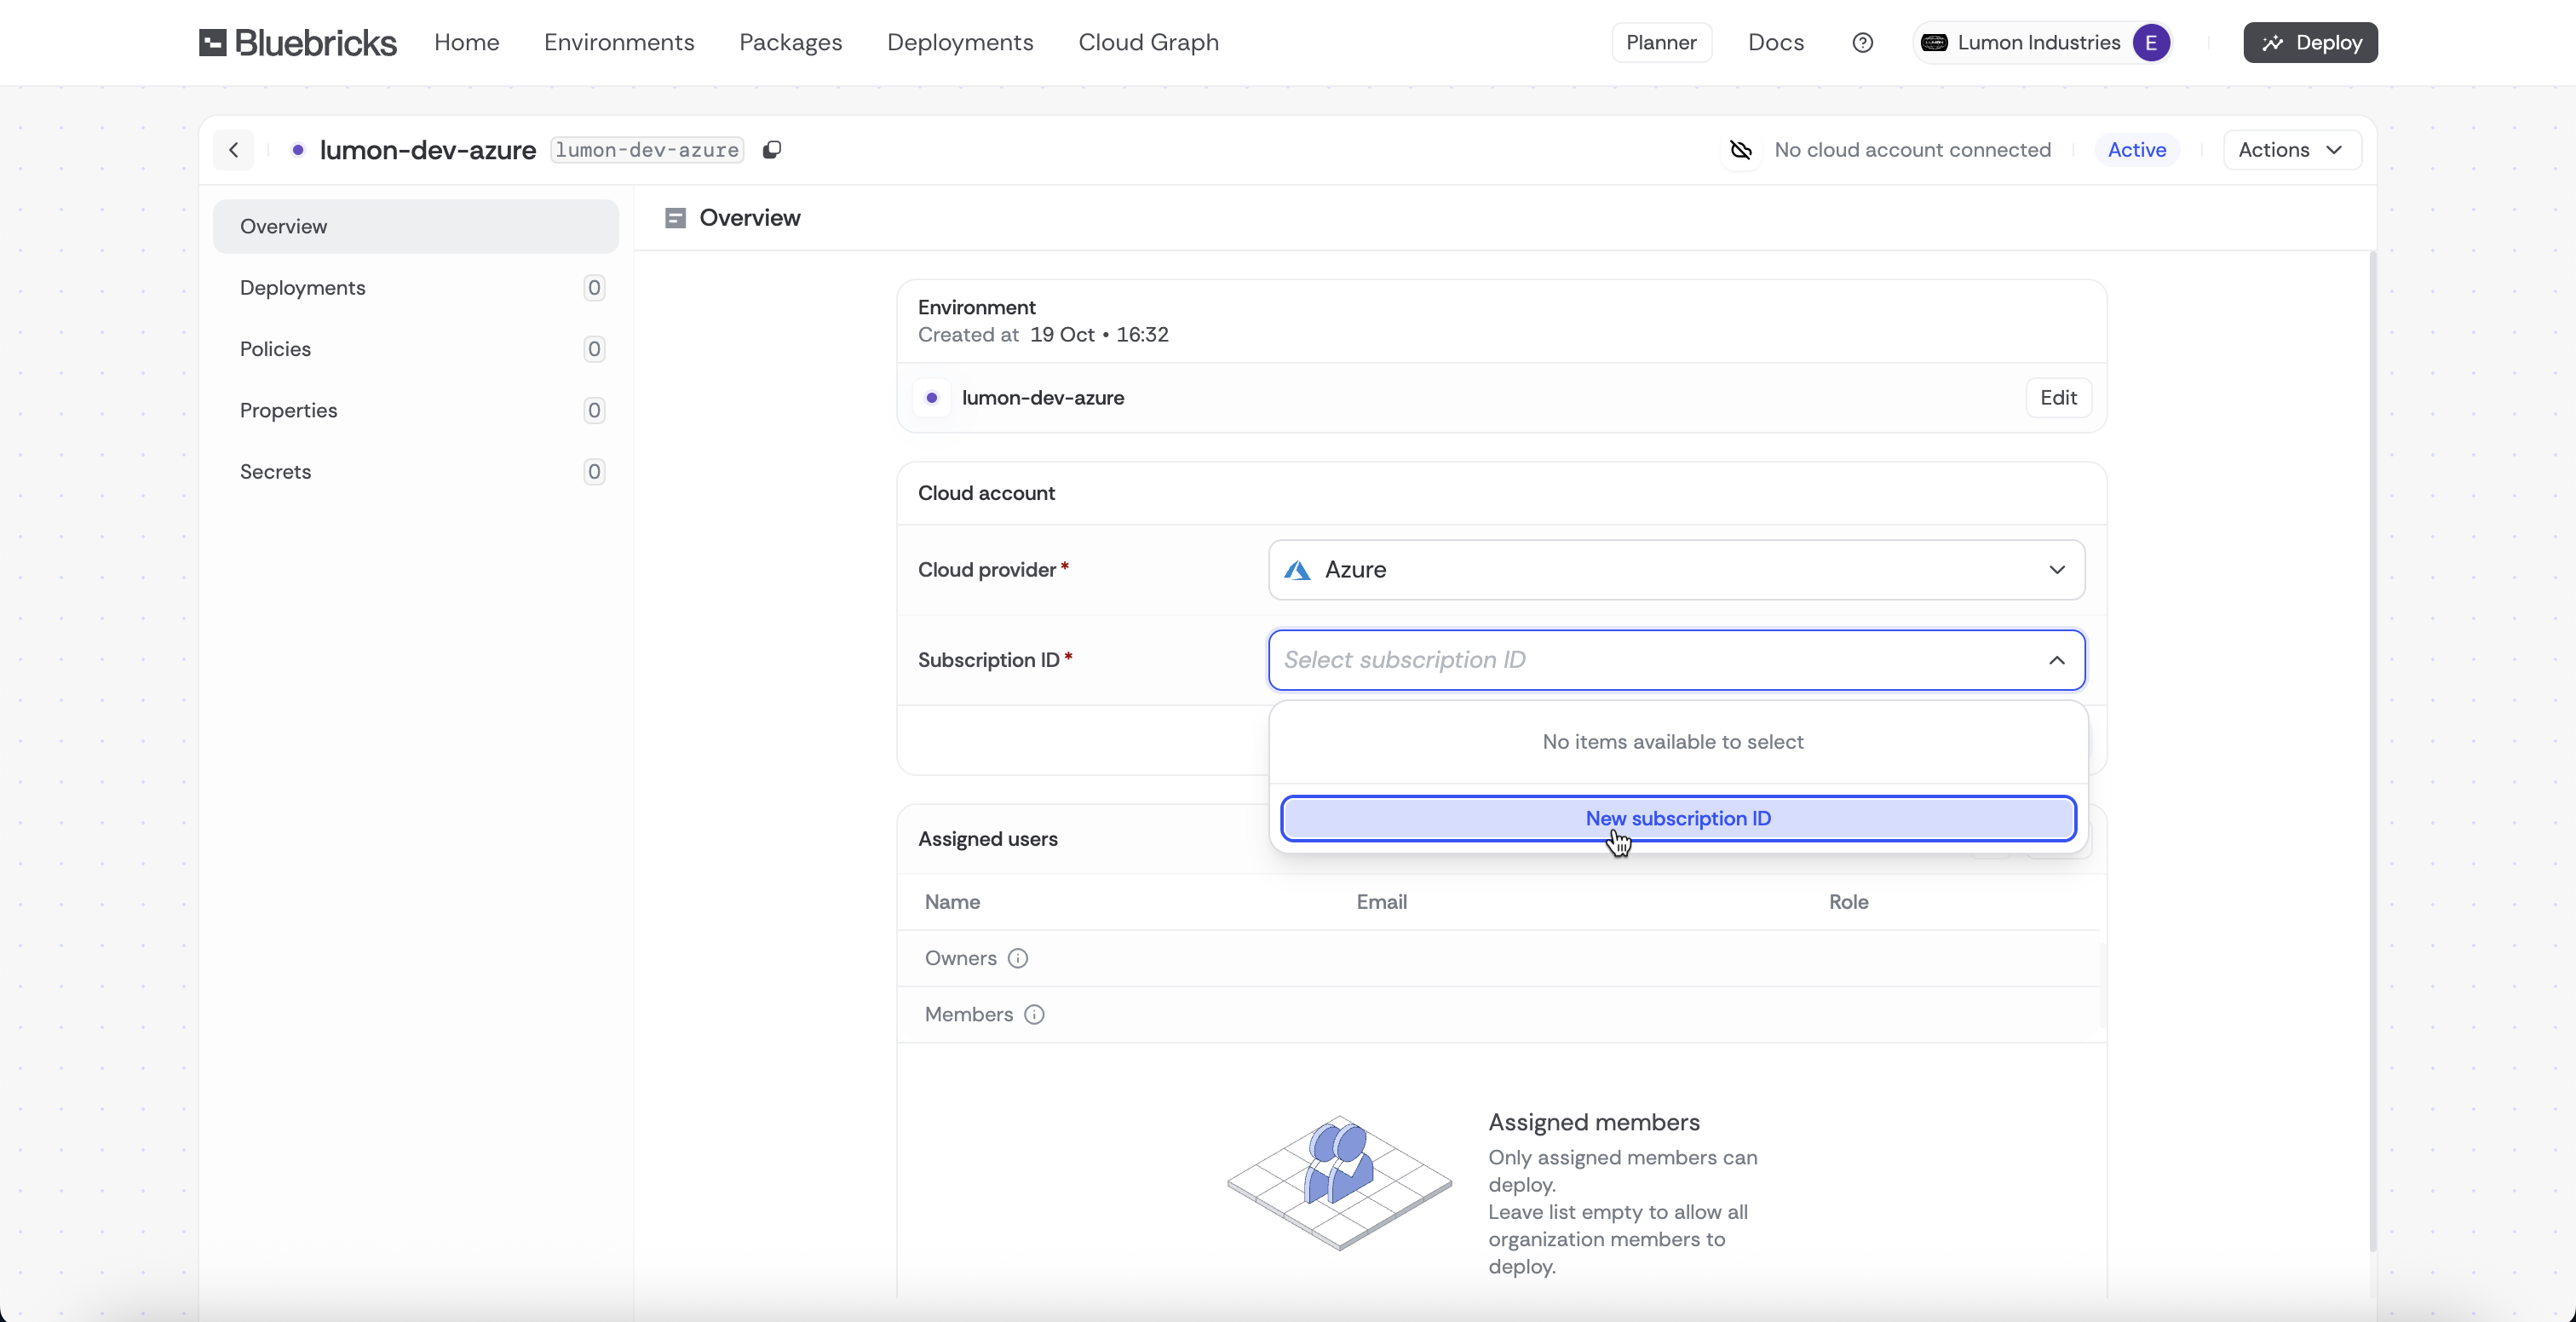
1. Go to the Collections page
2. Click **"Create collection"** and give it a name
3. Select **Azure** as the **Cloud Provider**
4. Choose "**New subscription ID**" or an existing subscription ID.

<figure><img src="https://454695563-files.gitbook.io/~/files/v0/b/gitbook-x-prod.appspot.com/o/spaces%2FL1aVoJ67VgVl8Uv83TuE%2Fuploads%2Fgit-blob-bab6bb3b17731f730aae2068f874853bbdef0d85%2FCleanShot%202025-10-19%20at%2016.38.56%402x.png?alt=media" alt=""><figcaption></figcaption></figure>

4. If creating a **New Subscription**, keep the page open and go to Azure Portal.

### Step 2: Create an Azure Service Principal with OIDC

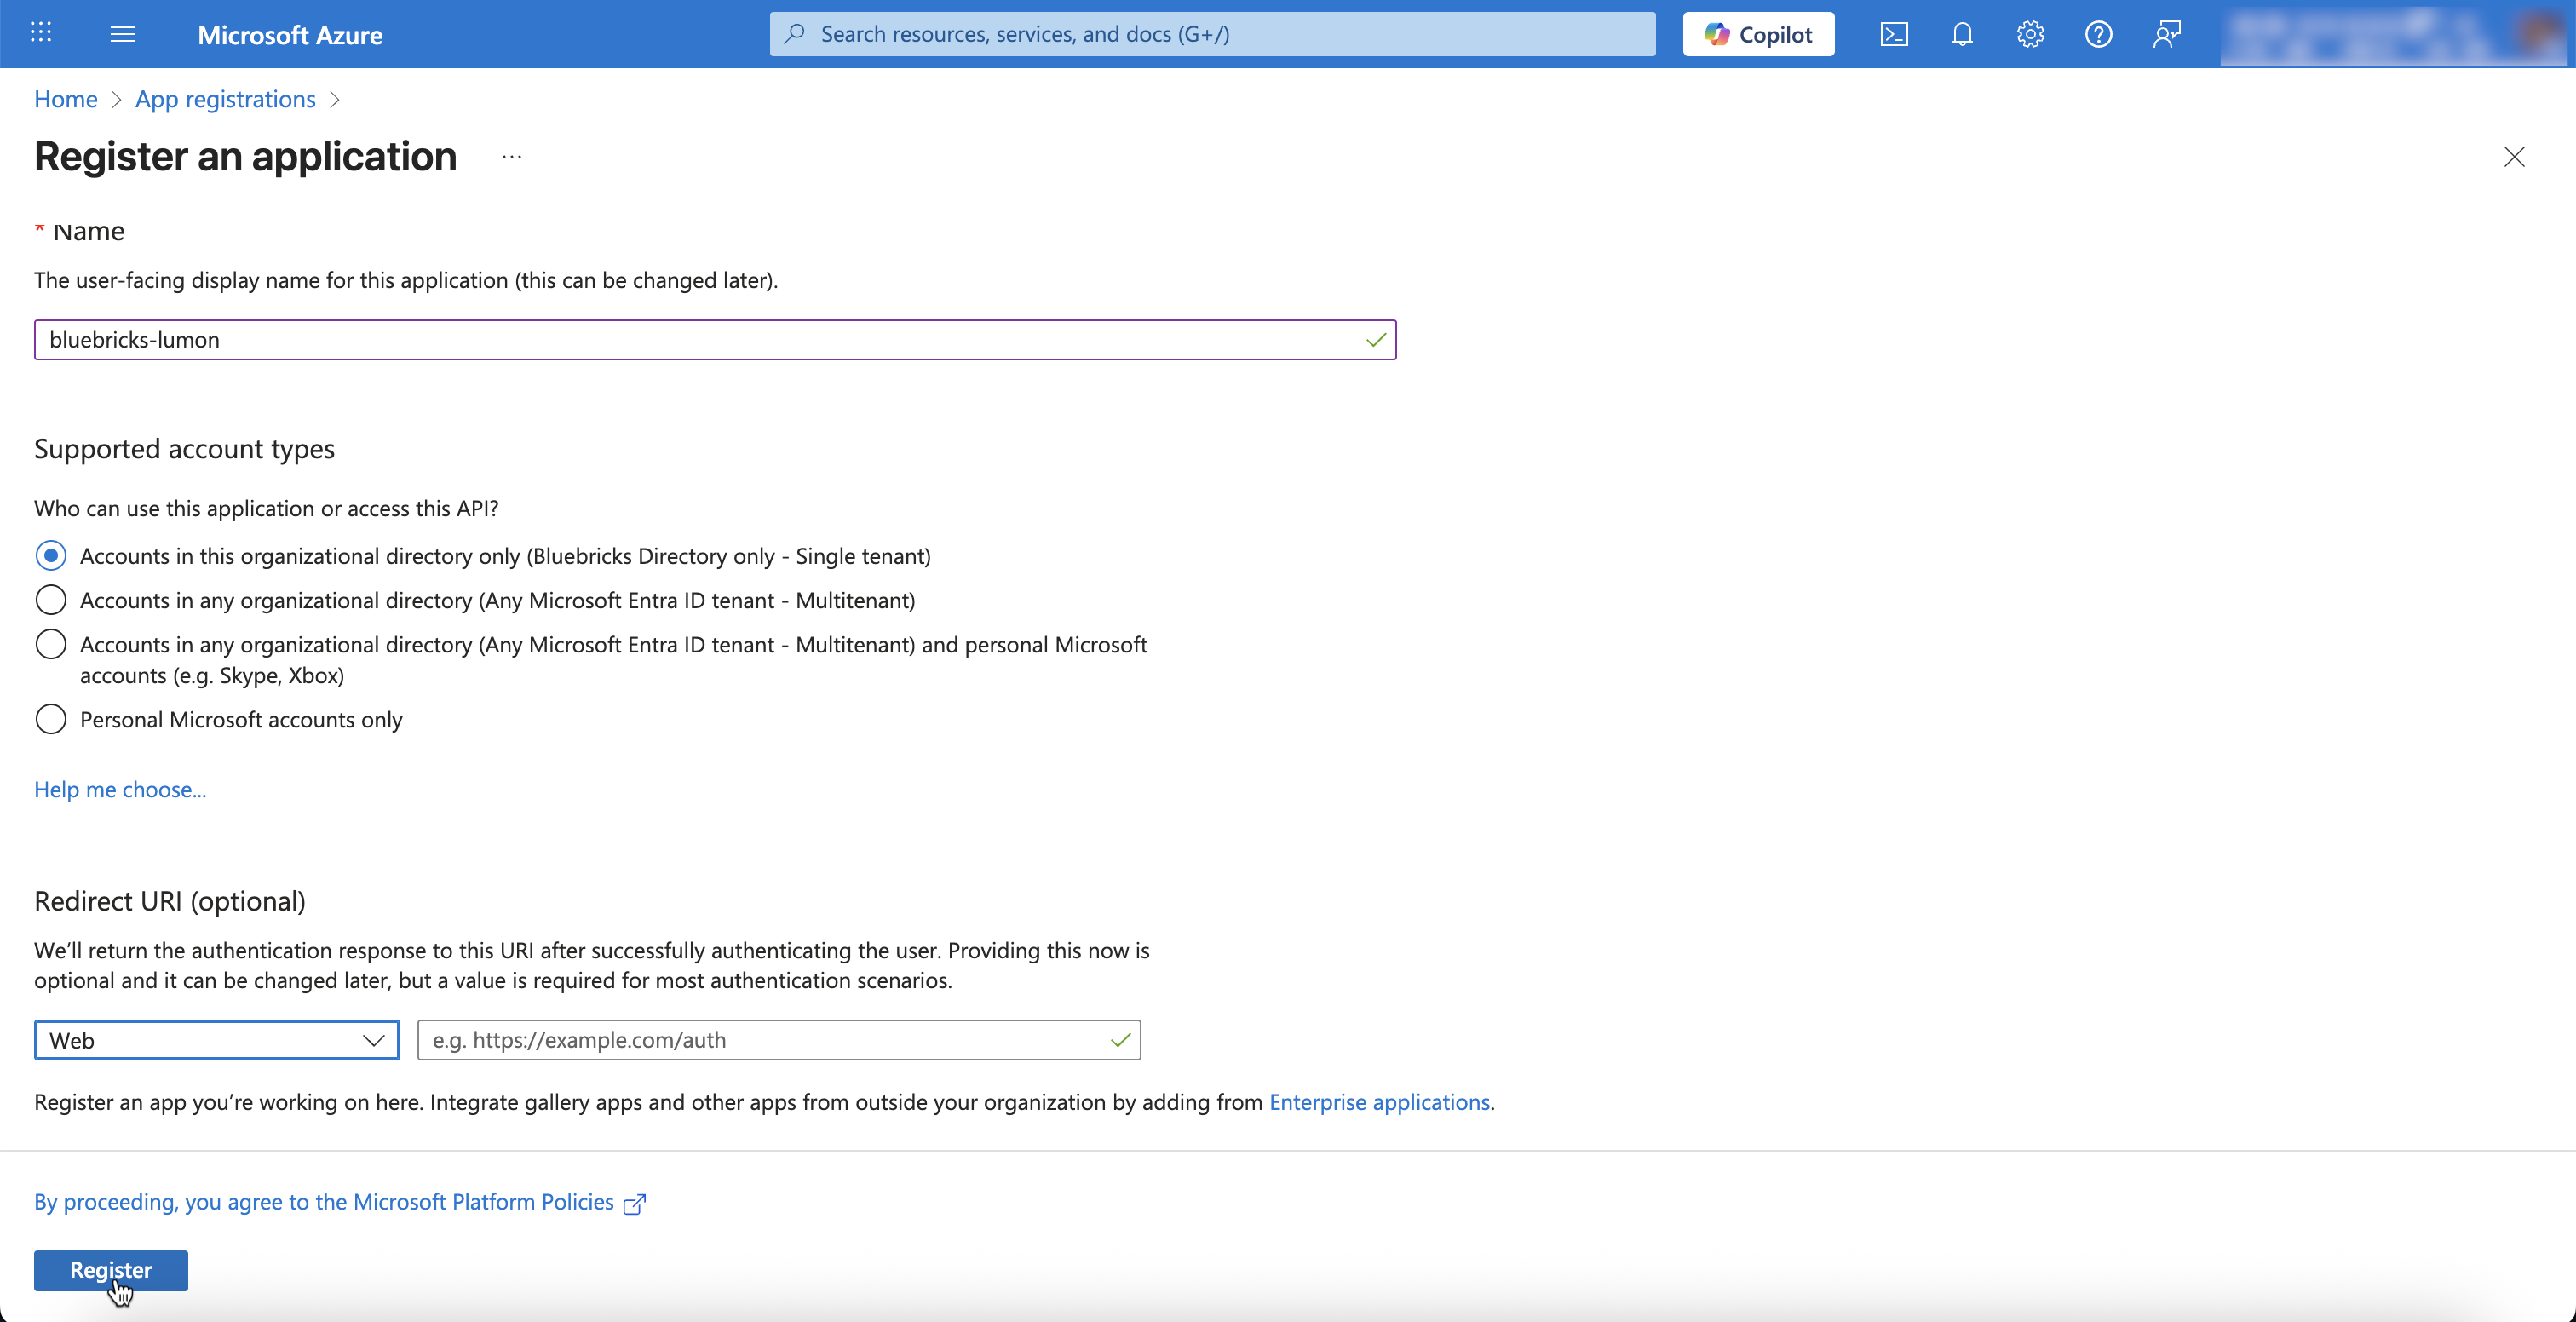
1. Navigate to "App Registration" and select "New Registration"
   1. Give a Name
   2. Choose "Accounts in this organizational directory only (Single Tenant)"
   3. Select "Web" as the Redirect URI Platform and leave the value blank
   4. Register the app

<figure><img src="https://454695563-files.gitbook.io/~/files/v0/b/gitbook-x-prod.appspot.com/o/spaces%2FL1aVoJ67VgVl8Uv83TuE%2Fuploads%2Fgit-blob-2406e10f3d0a227972f62b3233f6b3a24fdfee37%2FCleanShot%202025-10-19%20at%2016.45.28%402x.png?alt=media" alt=""><figcaption></figcaption></figure>

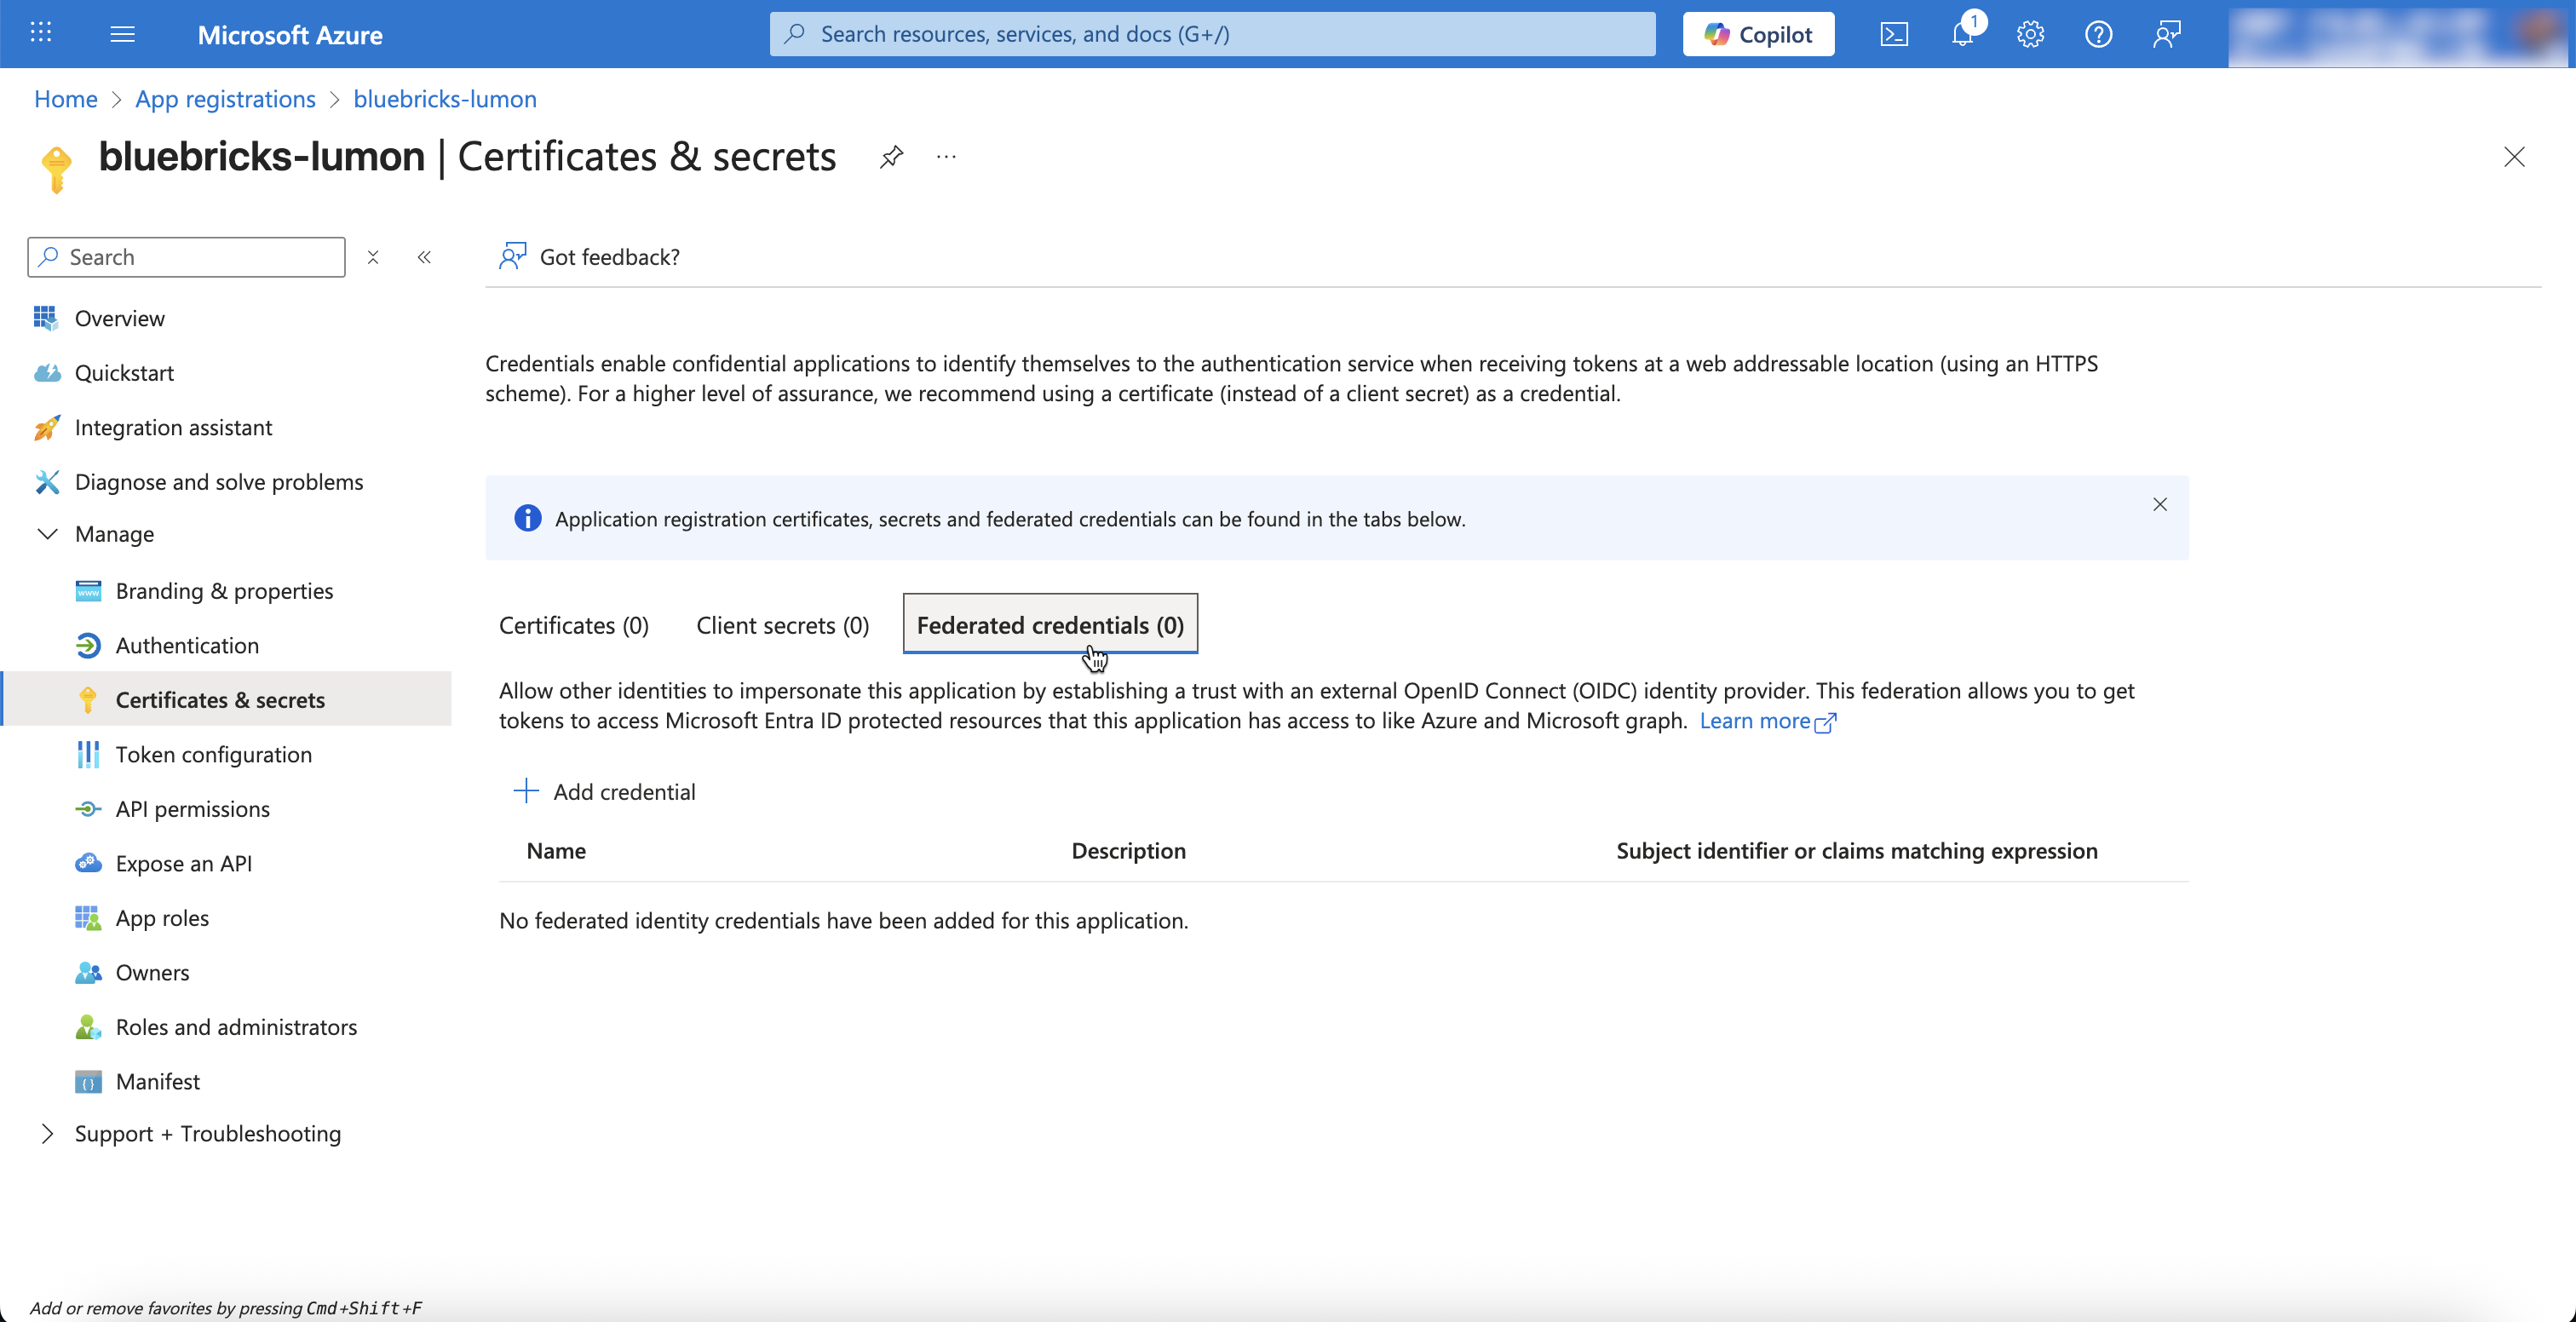
2. Click the app you just create and go to to "Certificates & Secrets" under "Manage"

<figure><img src="https://454695563-files.gitbook.io/~/files/v0/b/gitbook-x-prod.appspot.com/o/spaces%2FL1aVoJ67VgVl8Uv83TuE%2Fuploads%2Fgit-blob-44bef61e2082e57b049d17fa54d7d7b84090020f%2FCleanShot%202025-10-19%20at%2016.50.54%402x.png?alt=media" alt=""><figcaption></figcaption></figure>

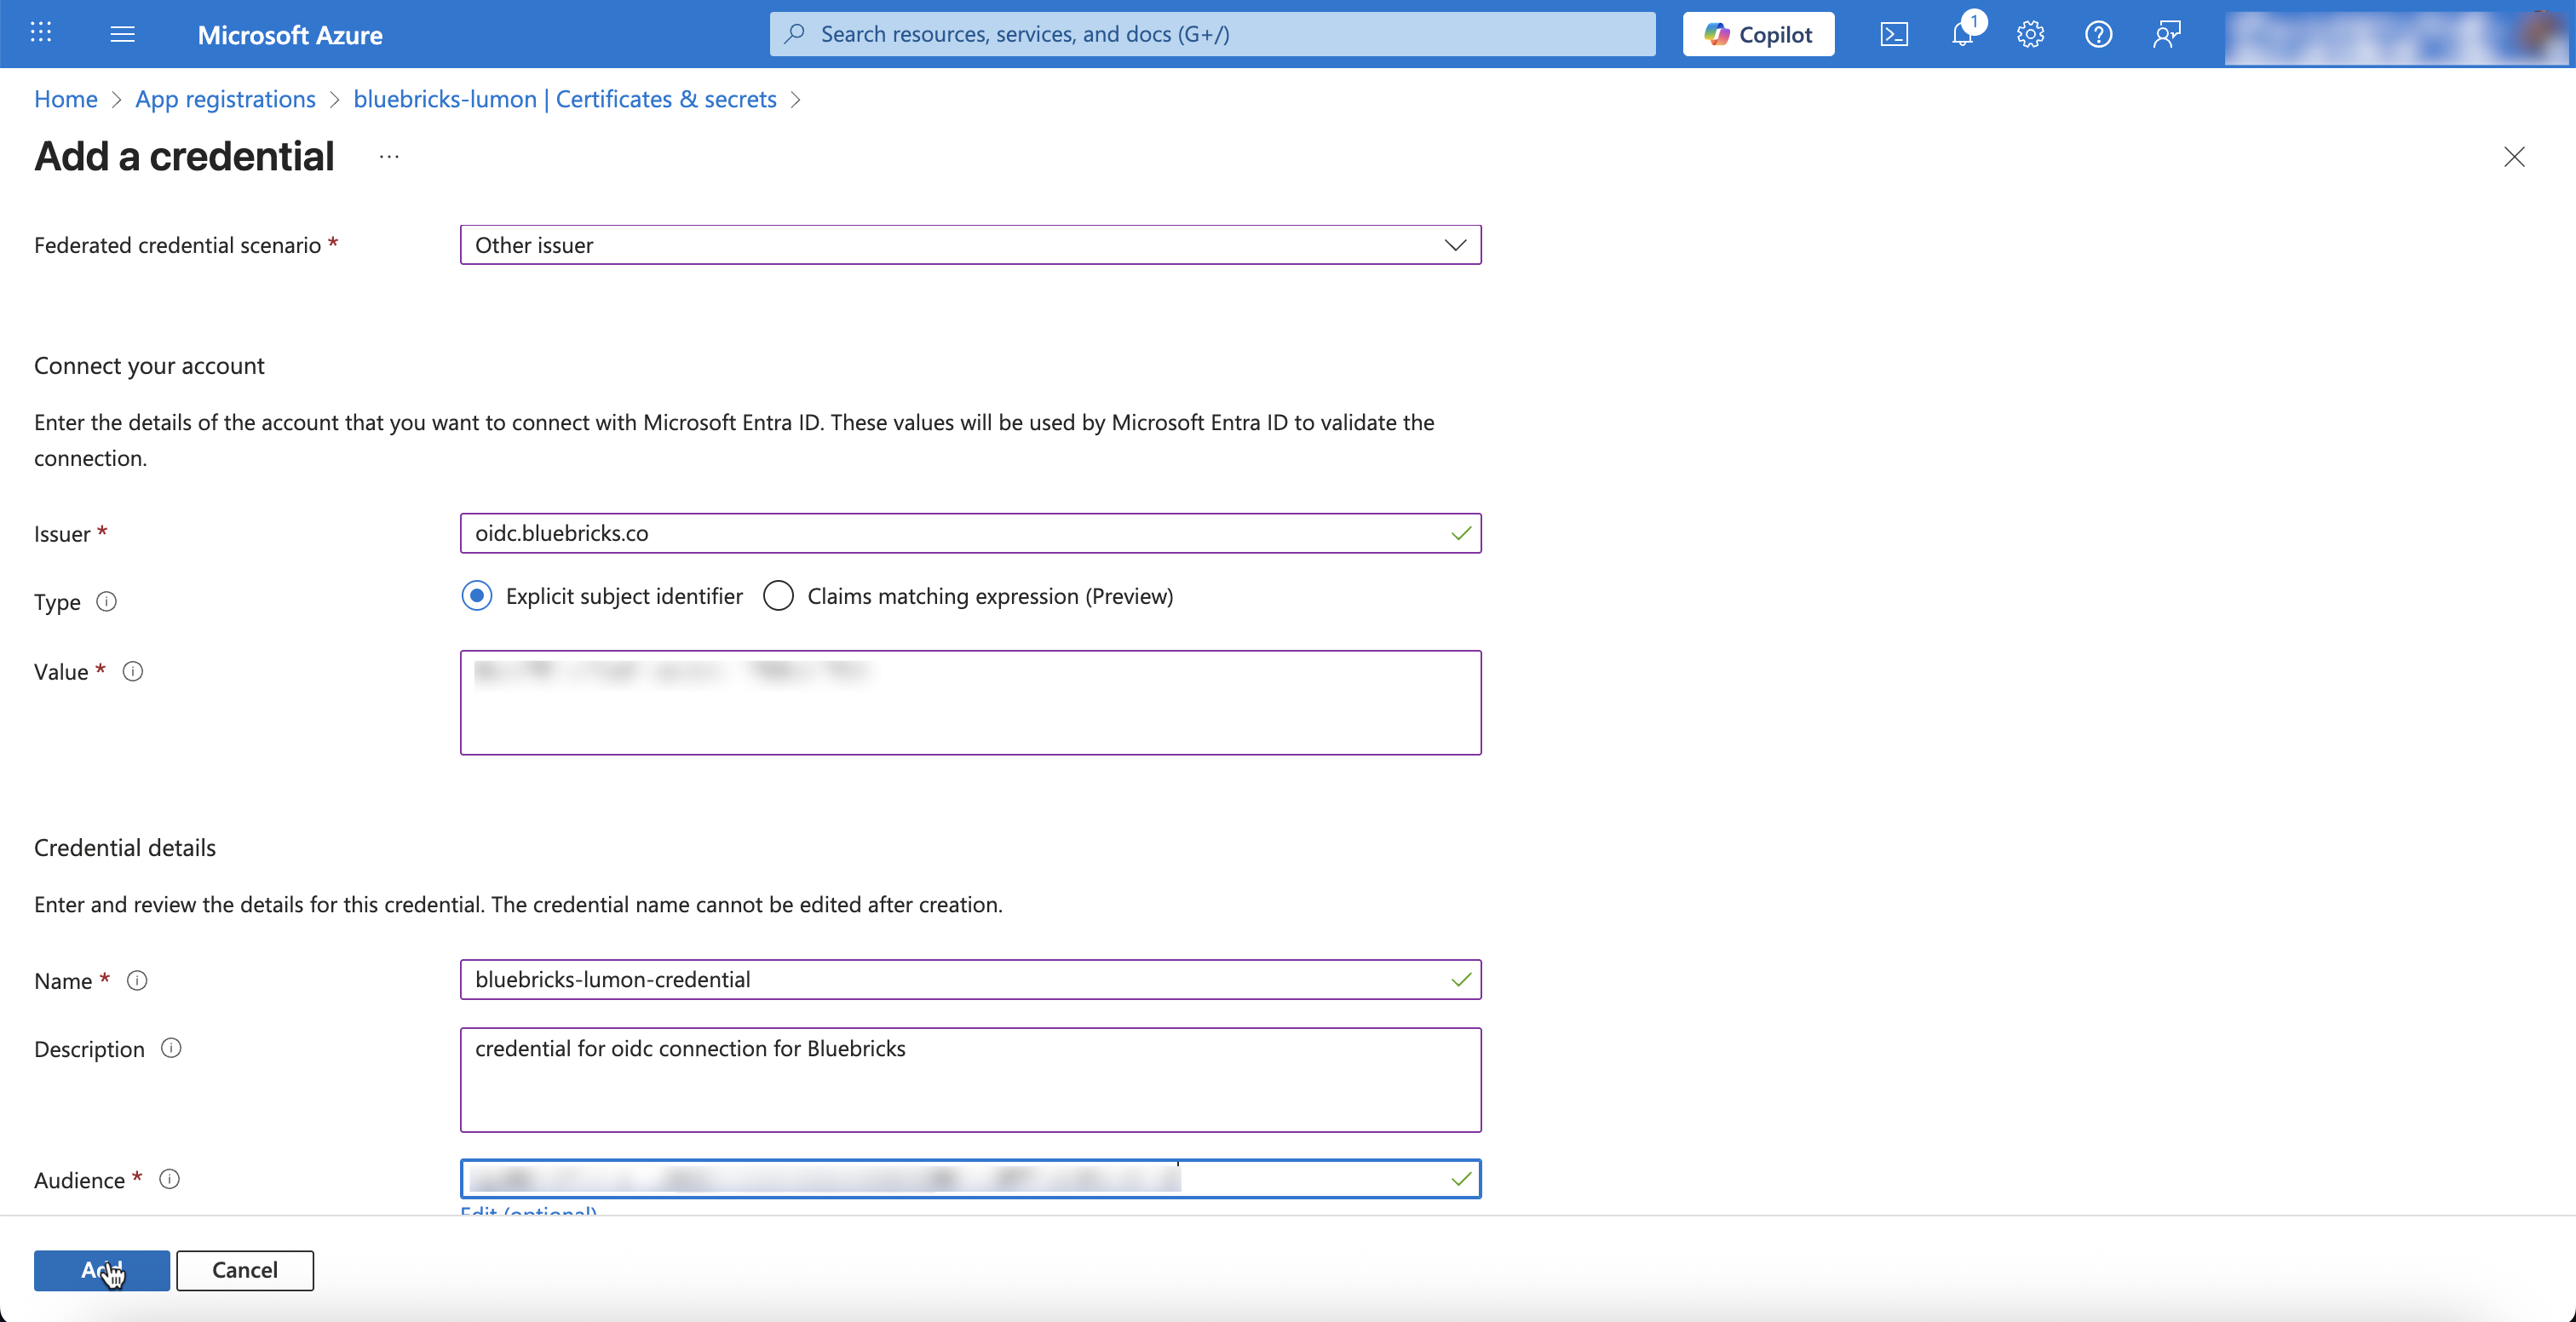
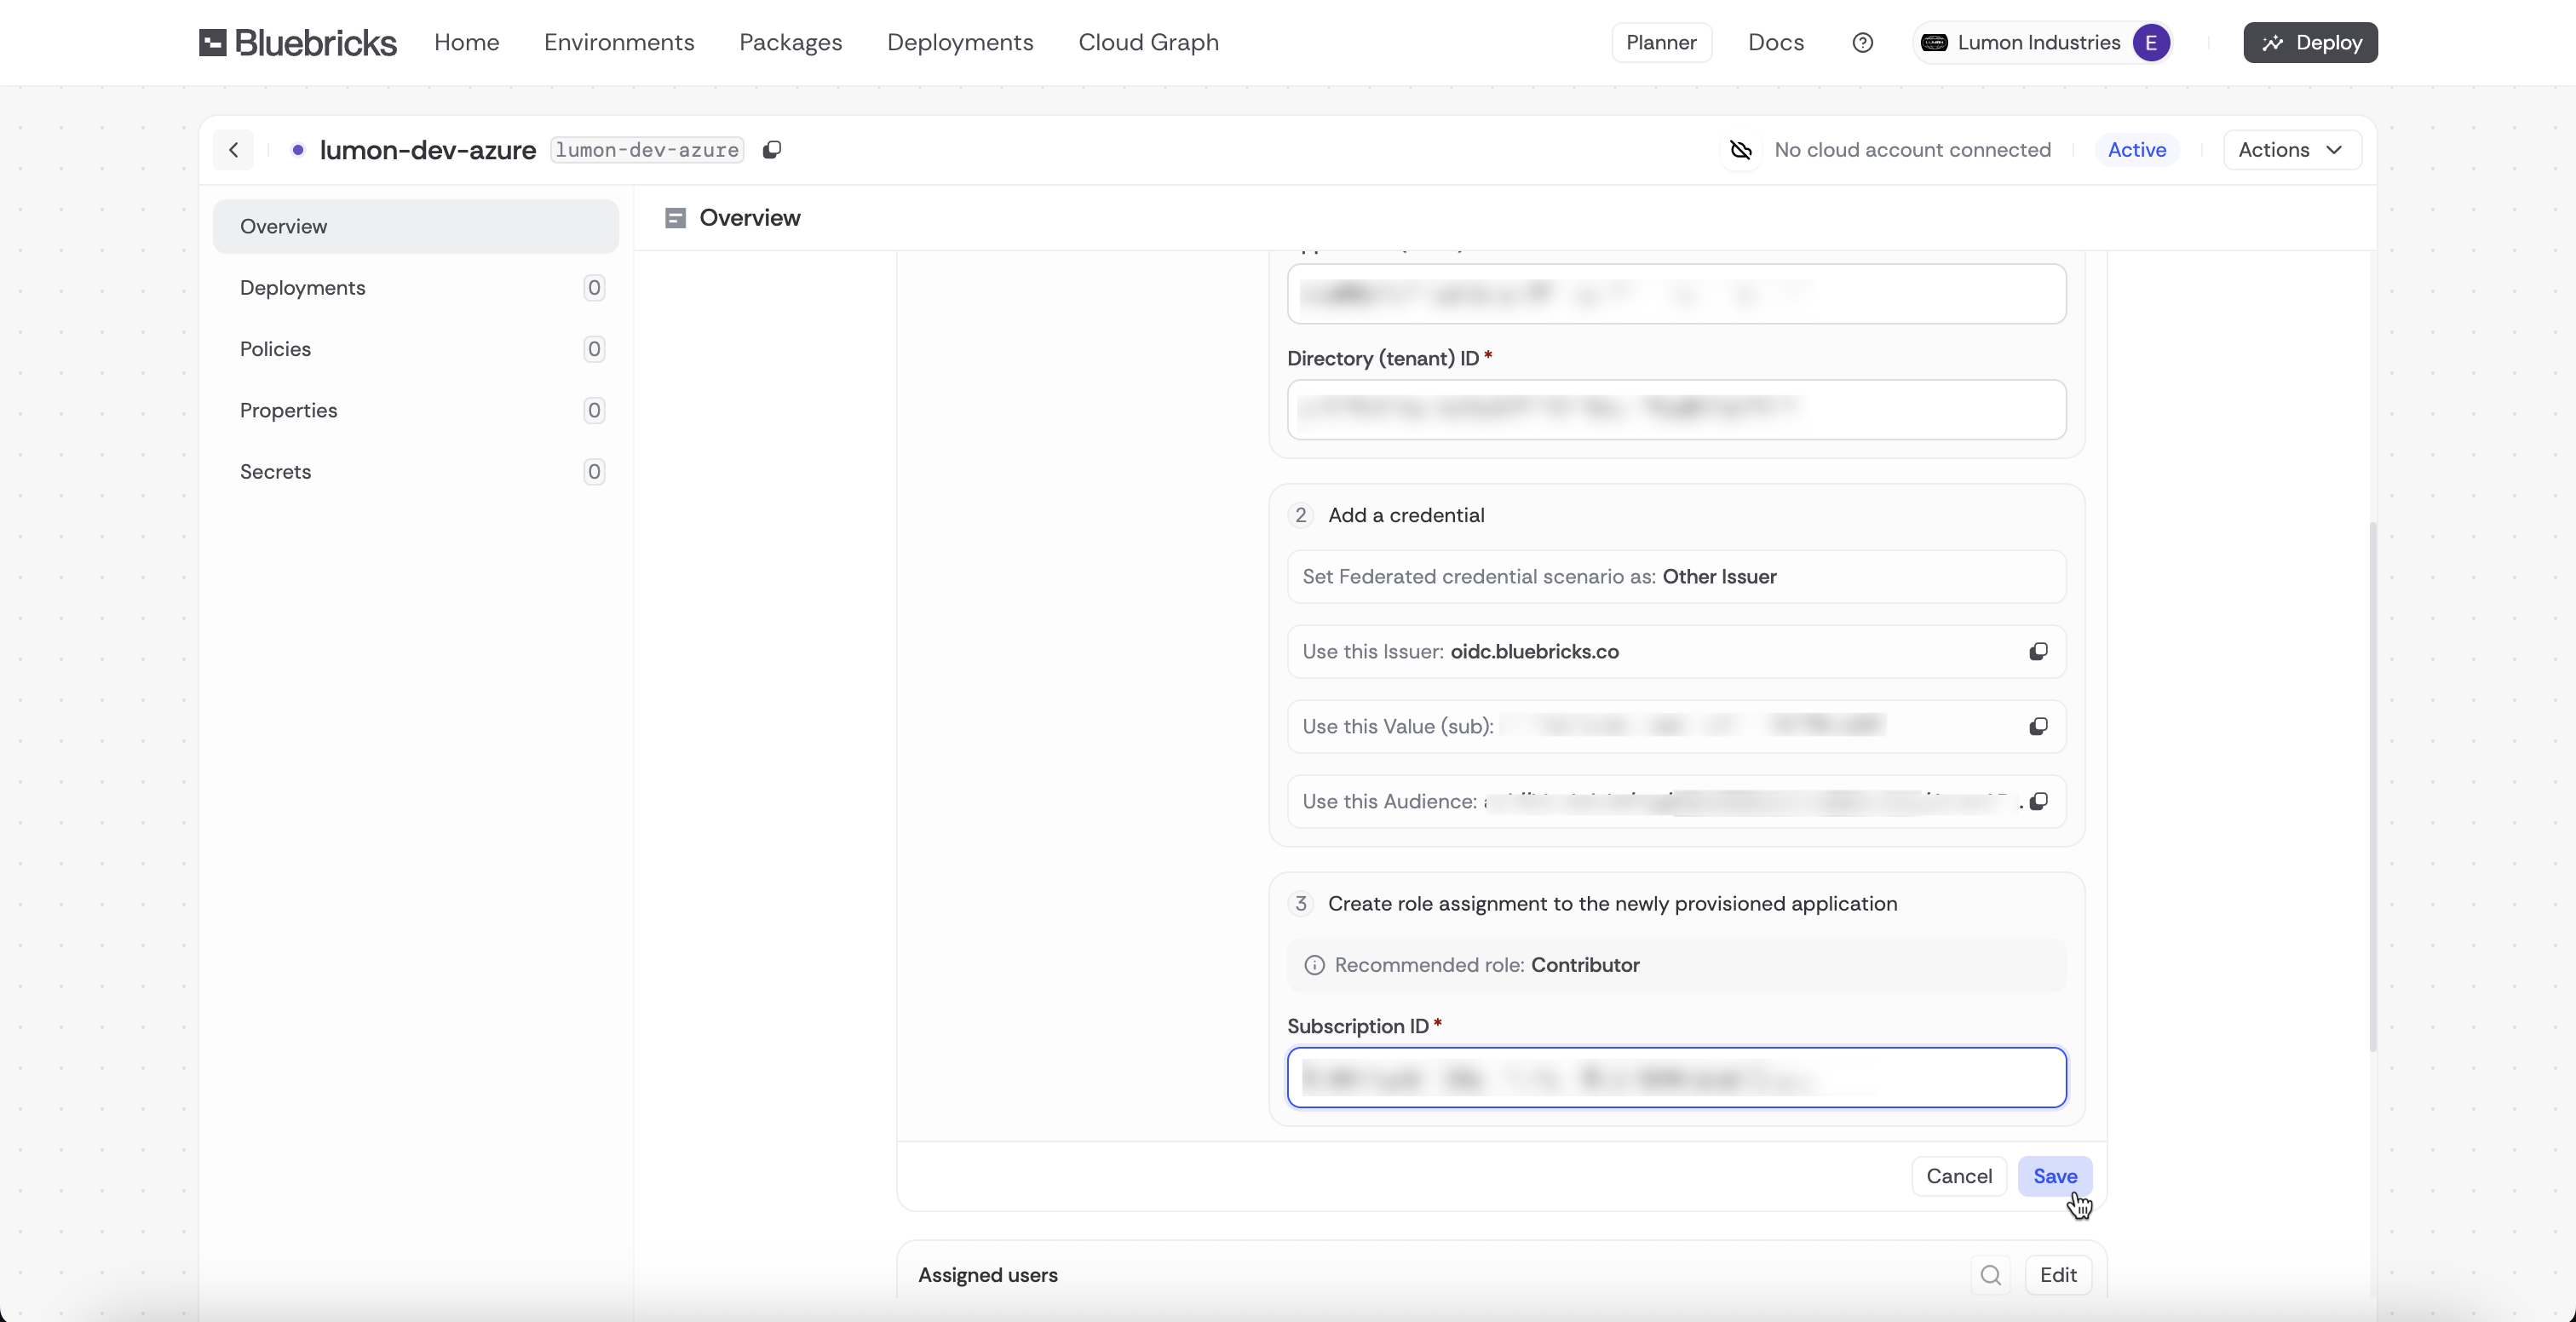
3. Go to the "Federated Credentials" tab select "Add credential"

   1. Select "Other Issuer" as the Federated credential scenario
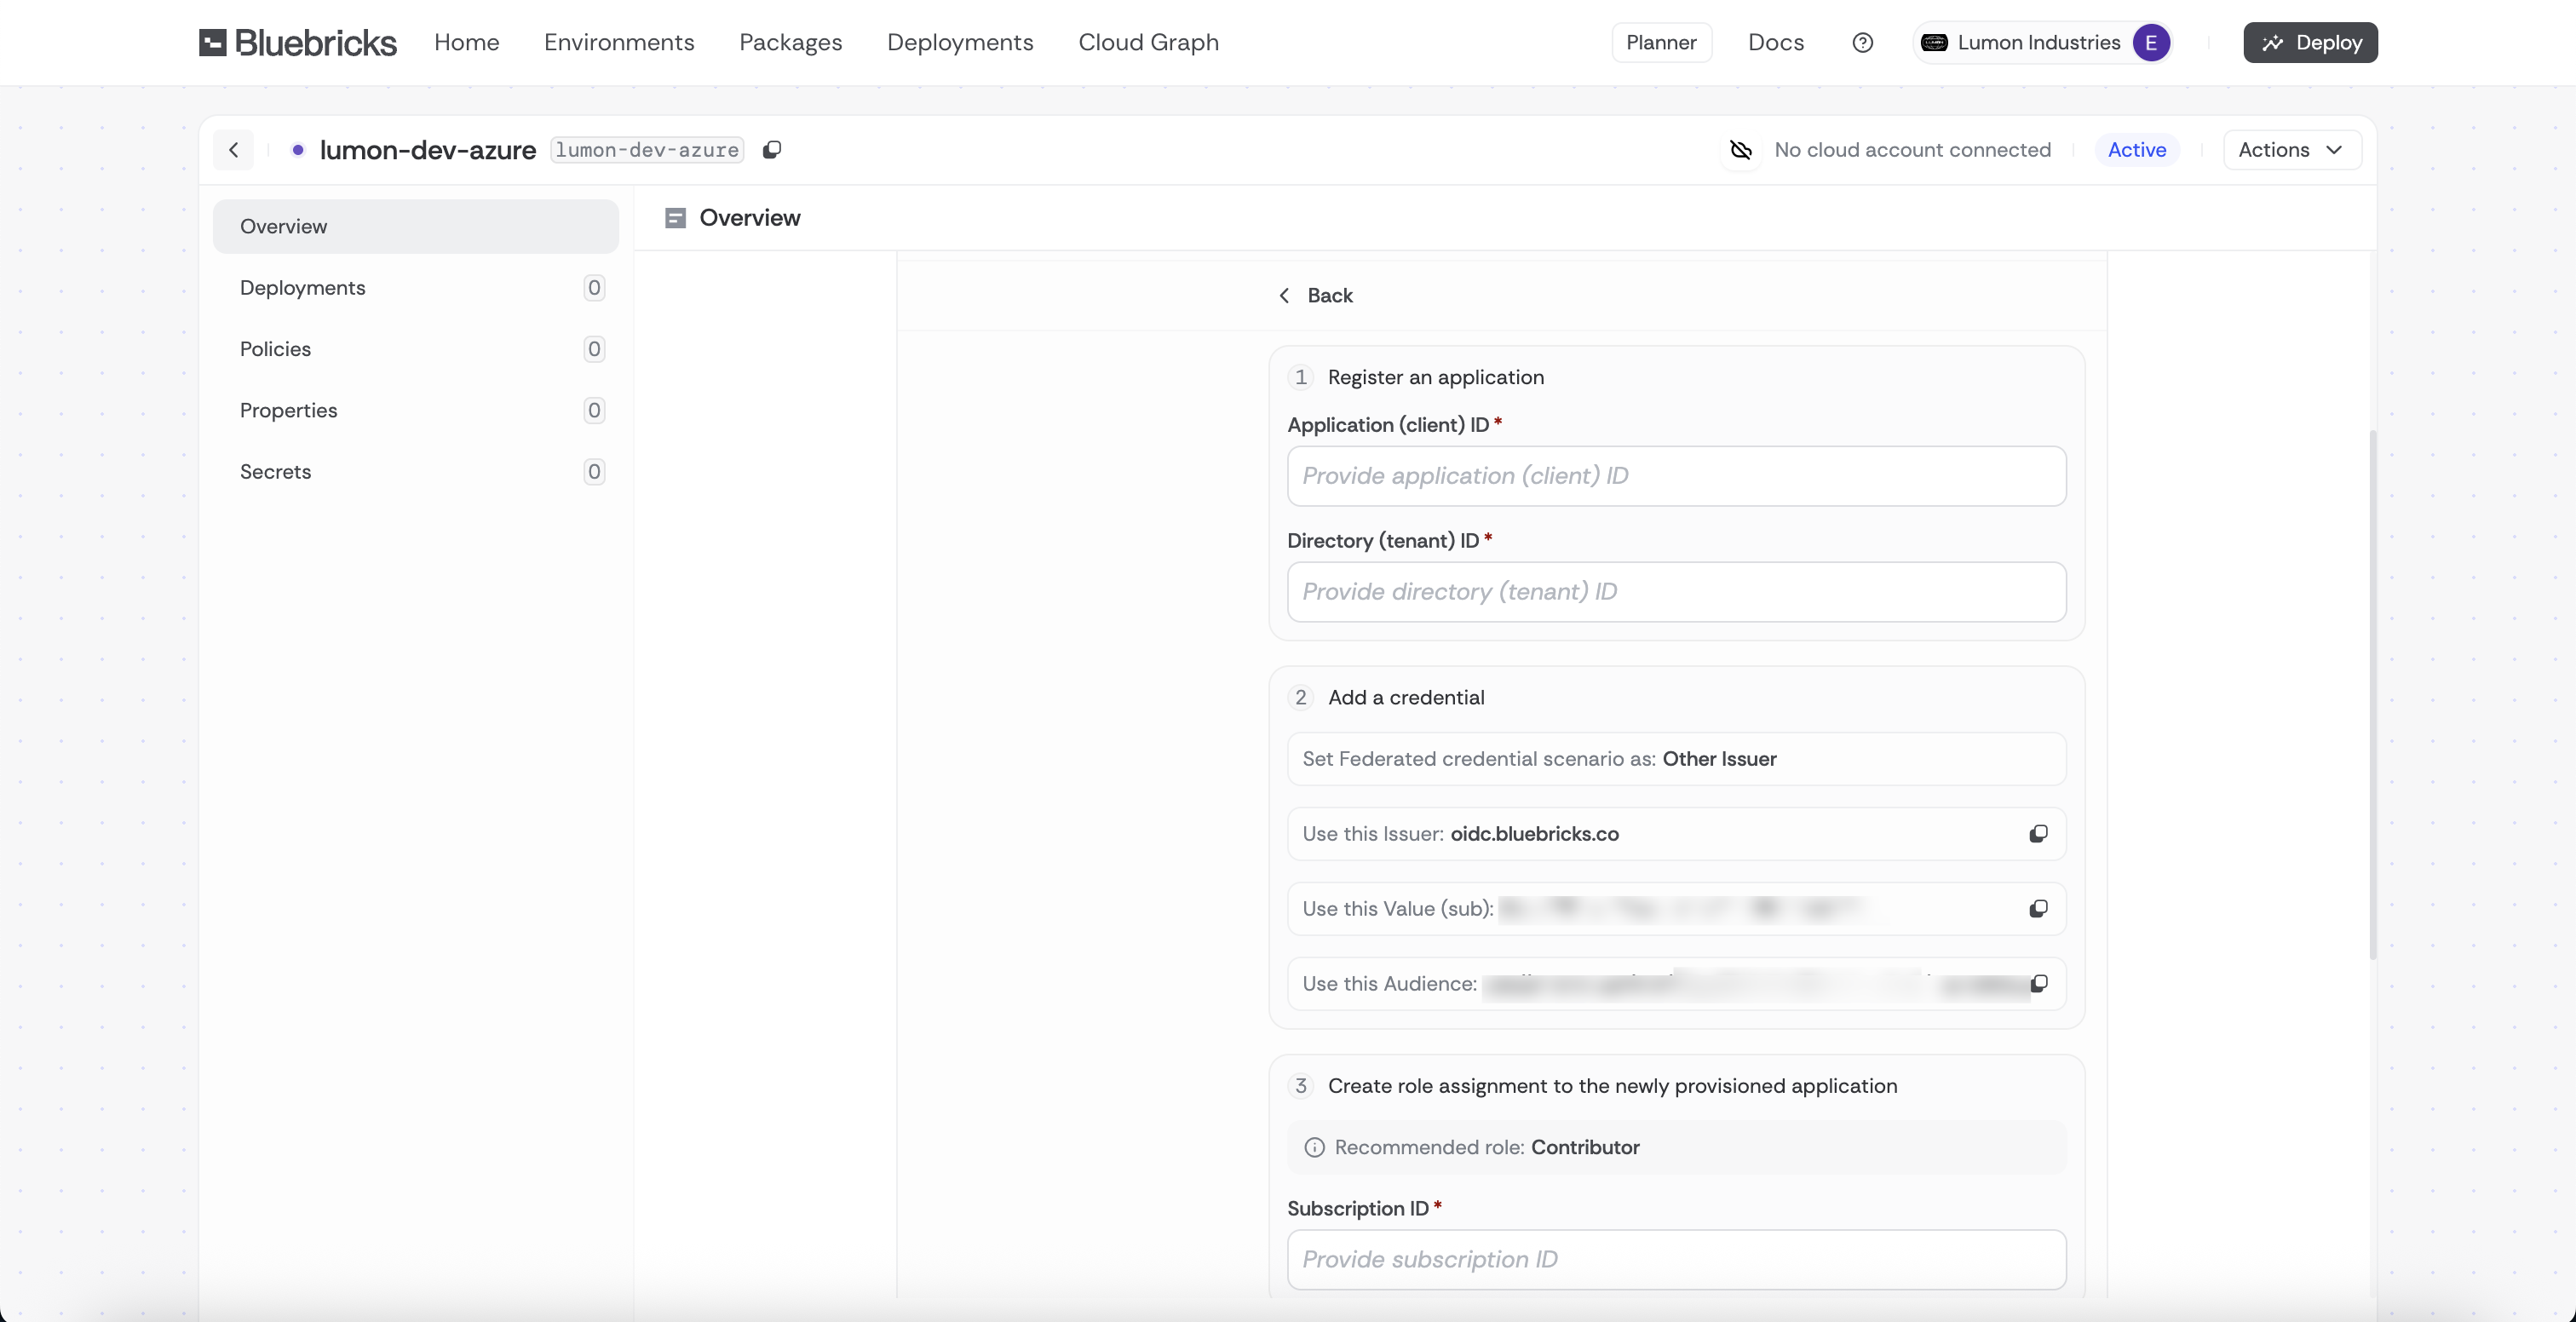
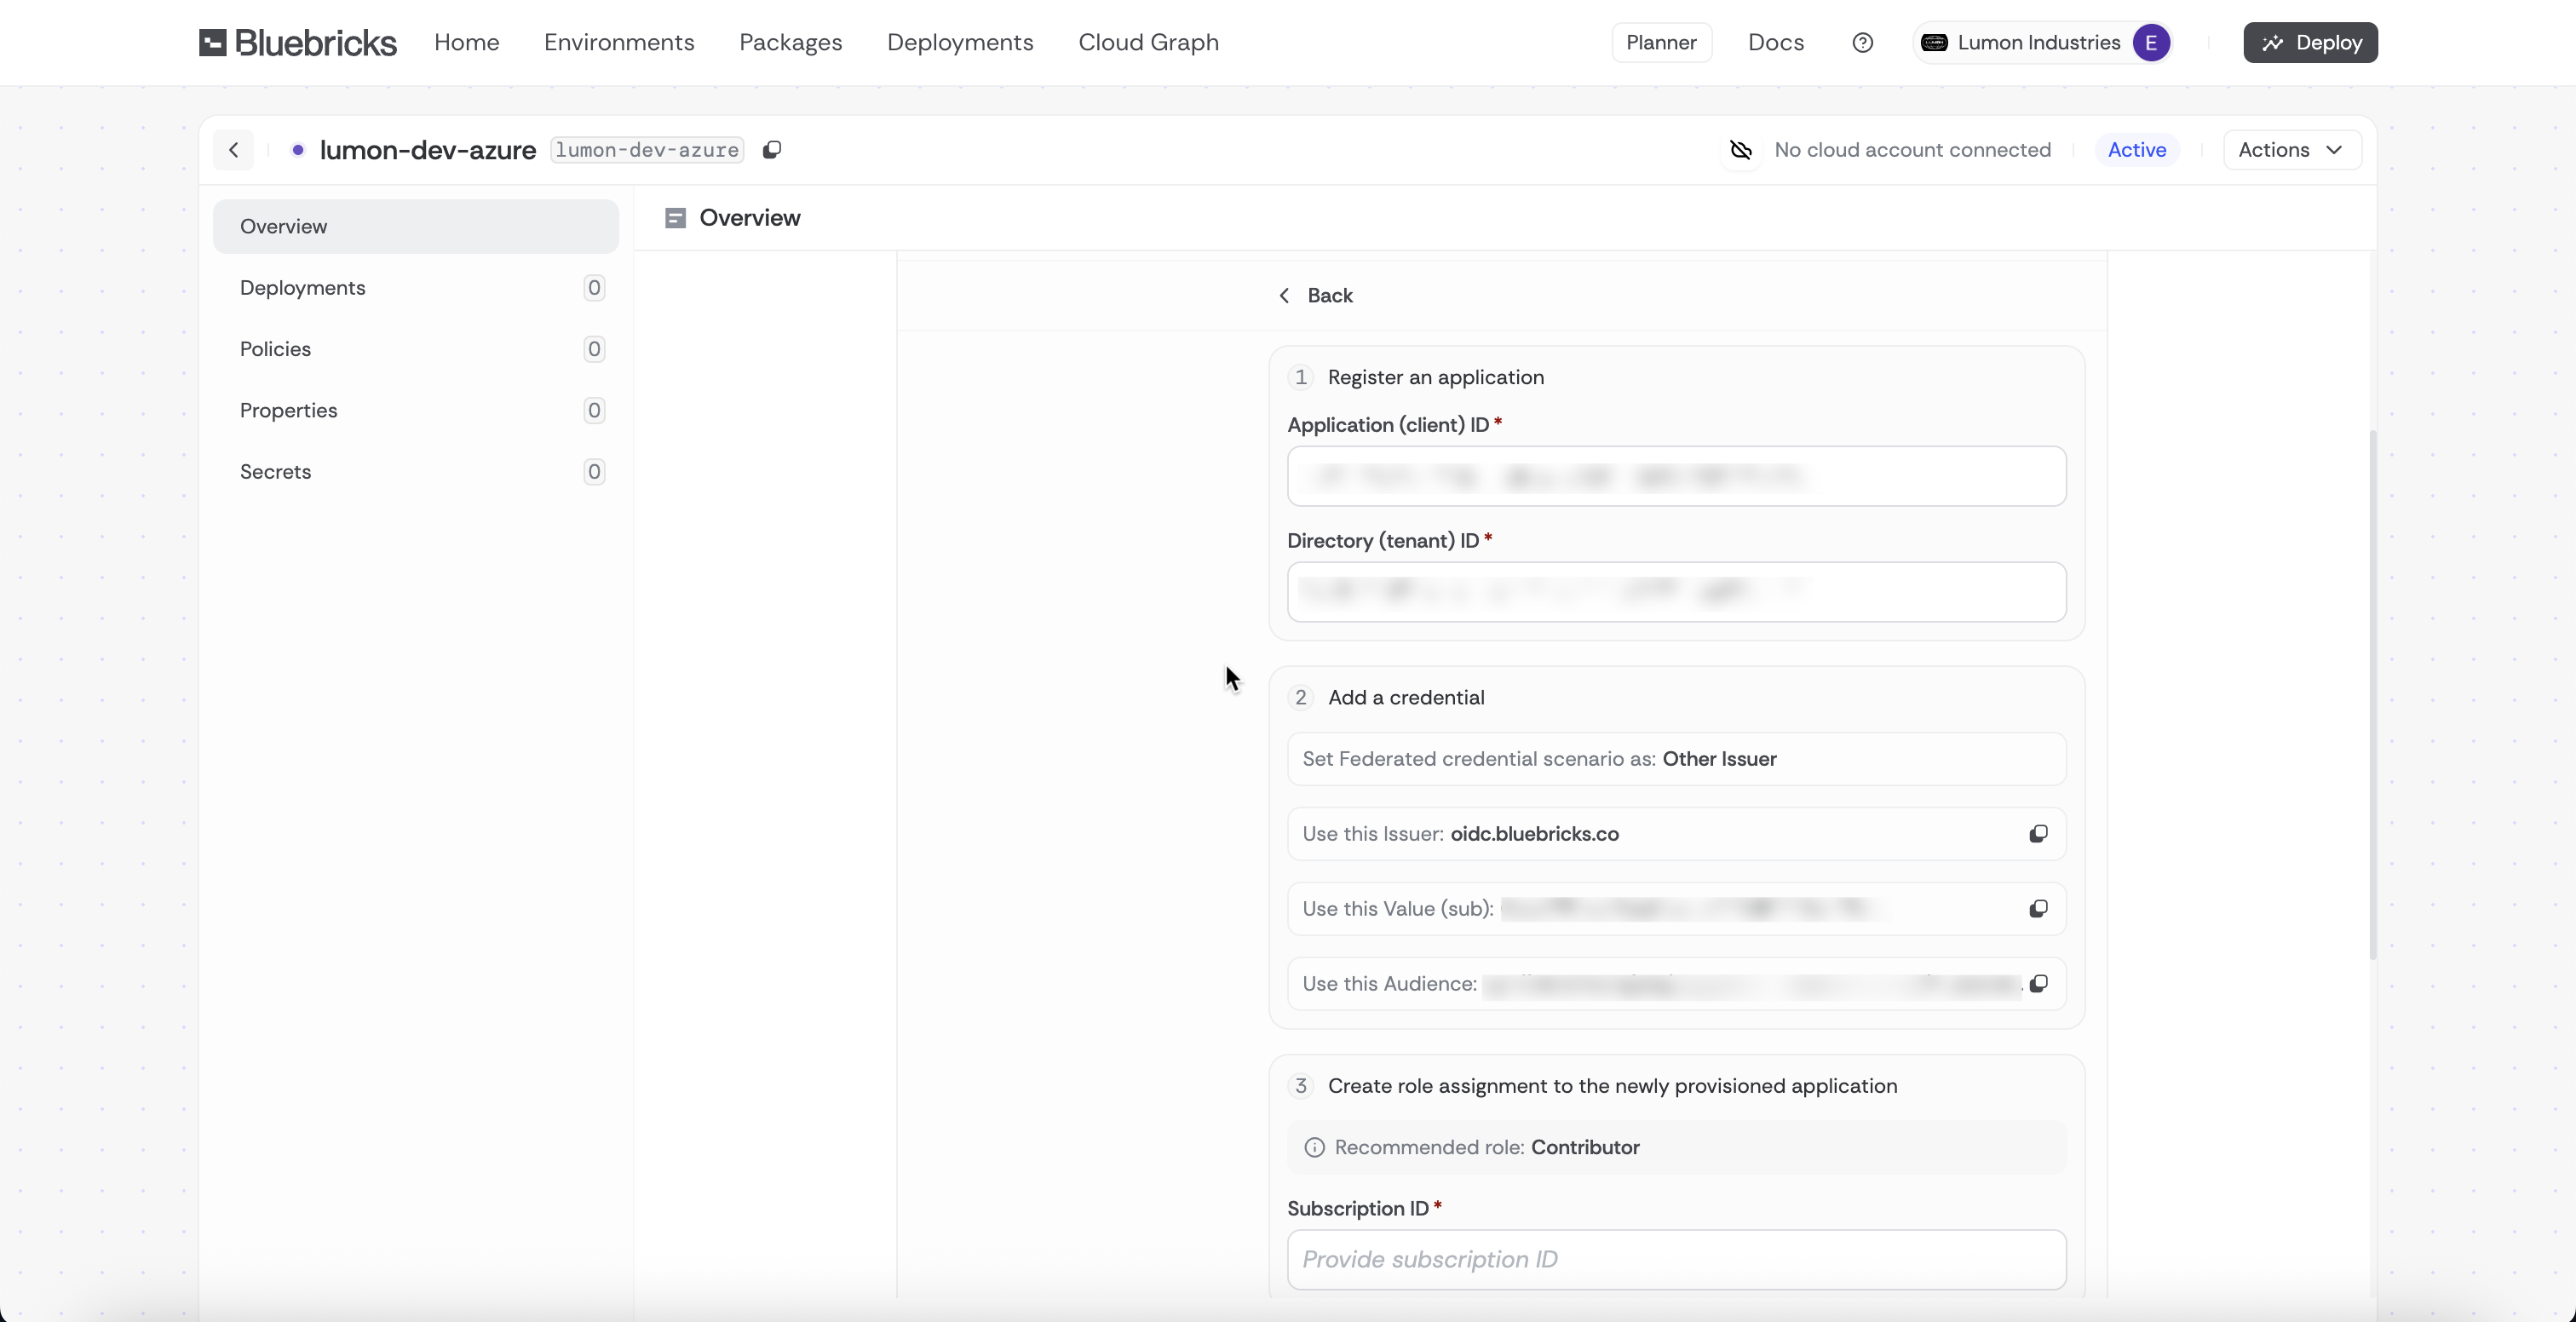
   2. Copy the "Issuer" URL from the open environment page in Step 1 as the "Issuer"
   3. Choose "Explicit subject identifier"
   4. Copy the "Value" from the open environment page in Step 1 as the "Value"
   5. Give the Credential a name
   6. Copy the "Audience" from the open environment page in Step 1 as the "Audience"
   7. Add the Credential

   <figure><img src="https://454695563-files.gitbook.io/~/files/v0/b/gitbook-x-prod.appspot.com/o/spaces%2FL1aVoJ67VgVl8Uv83TuE%2Fuploads%2Fgit-blob-591251c5c73d0df4fd7dfe82f6176a422fede98a%2FCleanShot%202025-10-19%20at%2016.59.11%402x.png?alt=media" alt=""><figcaption><p>Bluebricks Environment Page</p></figcaption></figure>

   <figure><img src="https://454695563-files.gitbook.io/~/files/v0/b/gitbook-x-prod.appspot.com/o/spaces%2FL1aVoJ67VgVl8Uv83TuE%2Fuploads%2Fgit-blob-420ff85a6cb48d80e88d49162b0b1e0511eaaa9c%2FCleanShot%202025-10-19%20at%2016.54.53%402x.png?alt=media" alt=""><figcaption><p>Azure Federated Credential page</p></figcaption></figure>
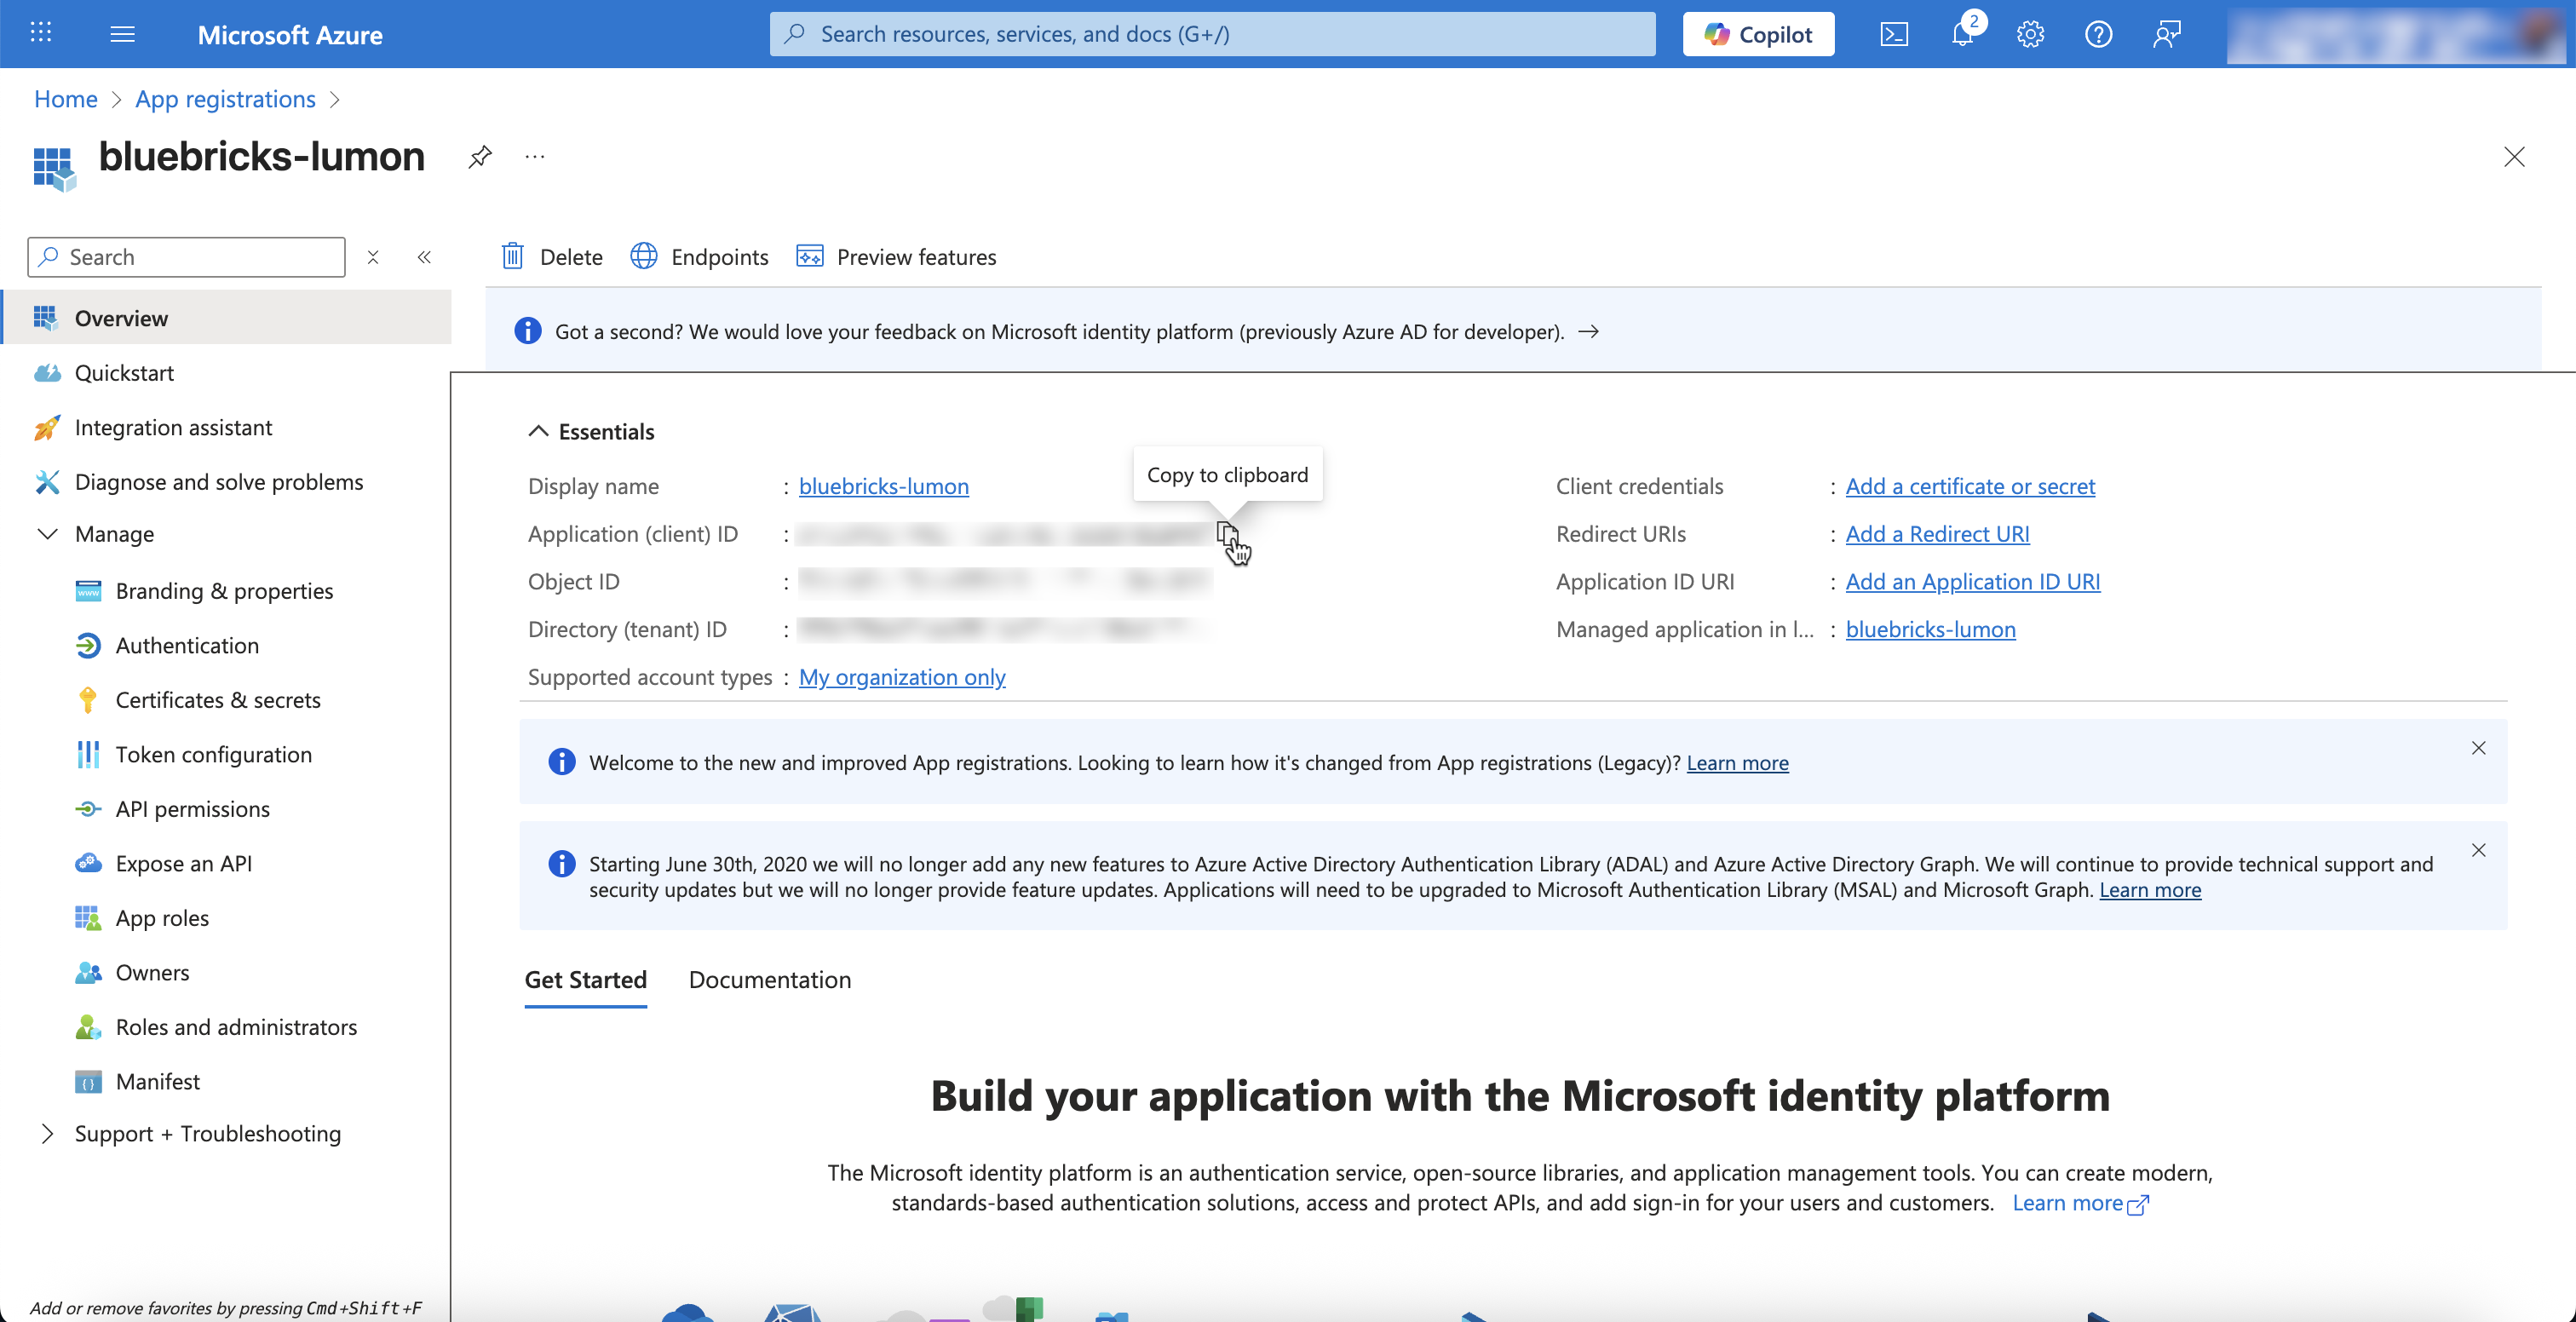
4. Go to the "Overview" section of the App and copy following into environment page on Bluebricks:

   1. Application (client) ID
   2. Directory (tenant) ID

   <figure><img src="https://454695563-files.gitbook.io/~/files/v0/b/gitbook-x-prod.appspot.com/o/spaces%2FL1aVoJ67VgVl8Uv83TuE%2Fuploads%2Fgit-blob-89b7955e3f29d2e75c070086bd914233c9905dbf%2FCleanShot%202025-10-19%20at%2017.04.05%402x.png?alt=media" alt=""><figcaption><p>Azure Application Overview</p></figcaption></figure>

   <figure><img src="https://454695563-files.gitbook.io/~/files/v0/b/gitbook-x-prod.appspot.com/o/spaces%2FL1aVoJ67VgVl8Uv83TuE%2Fuploads%2Fgit-blob-ecab0bf94f8c9192ac8bf0e774e7a154ca9114f2%2FCleanShot%202025-10-19%20at%2017.05.45%402x.png?alt=media" alt=""><figcaption><p>Bluebricks Environment Page</p></figcaption></figure>

### Step 3: Create role assignment to the newly provisioned application

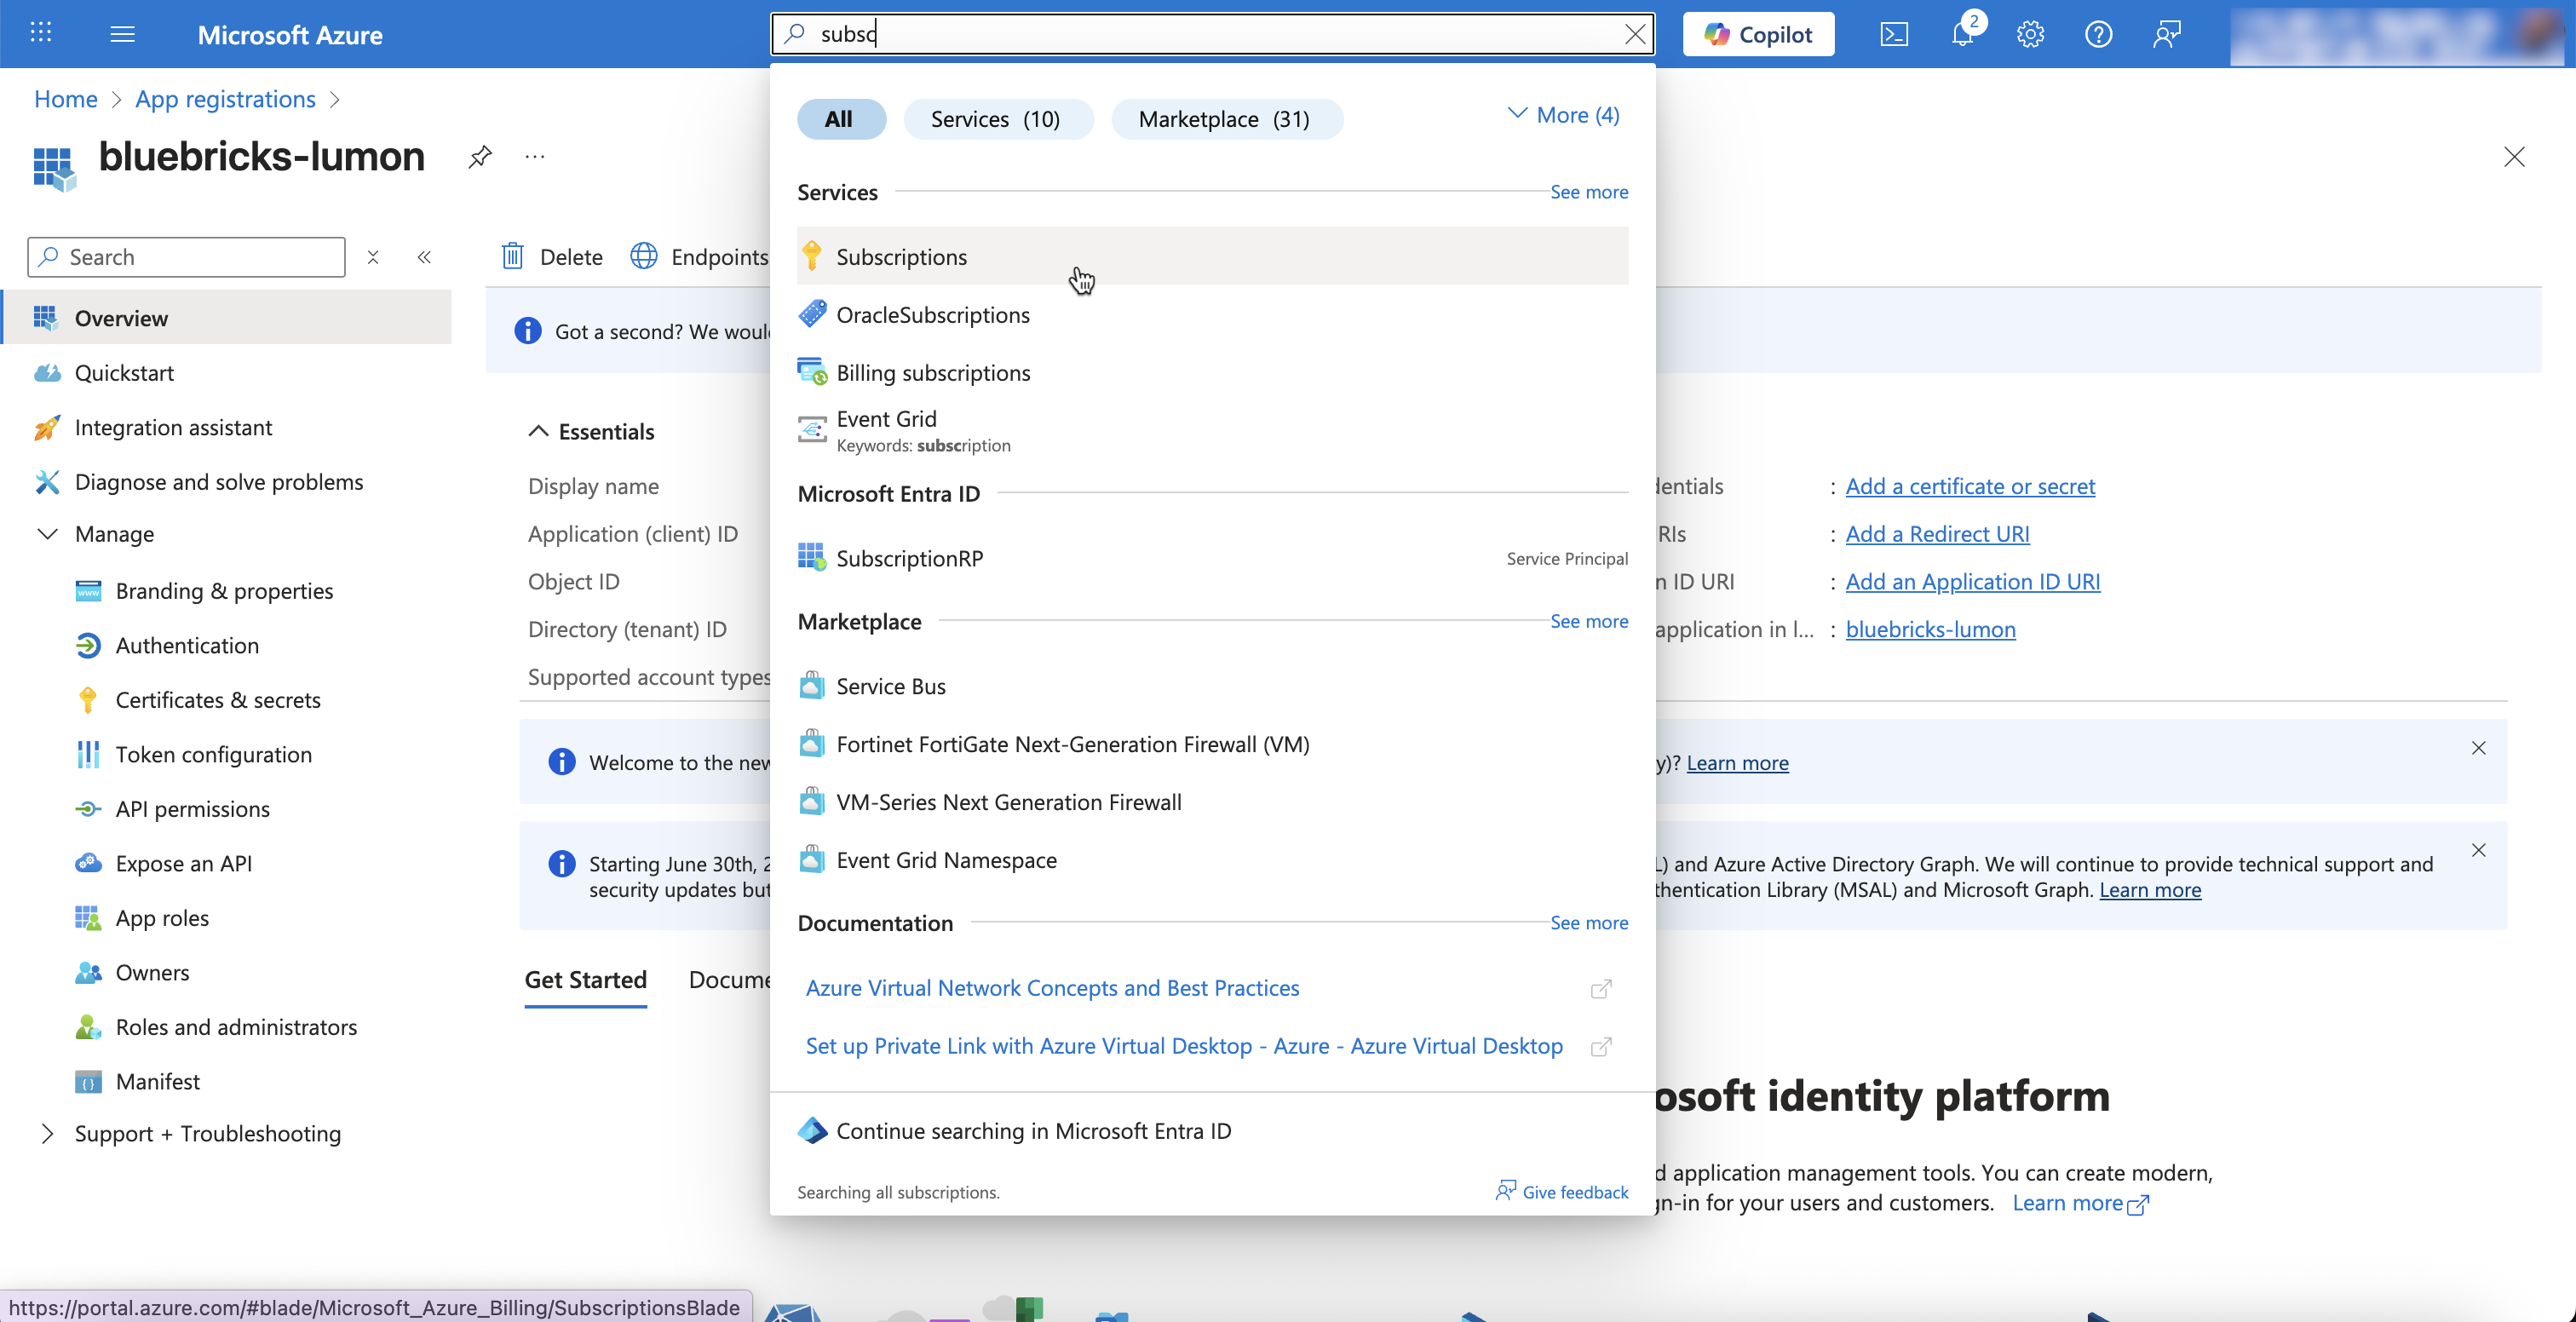
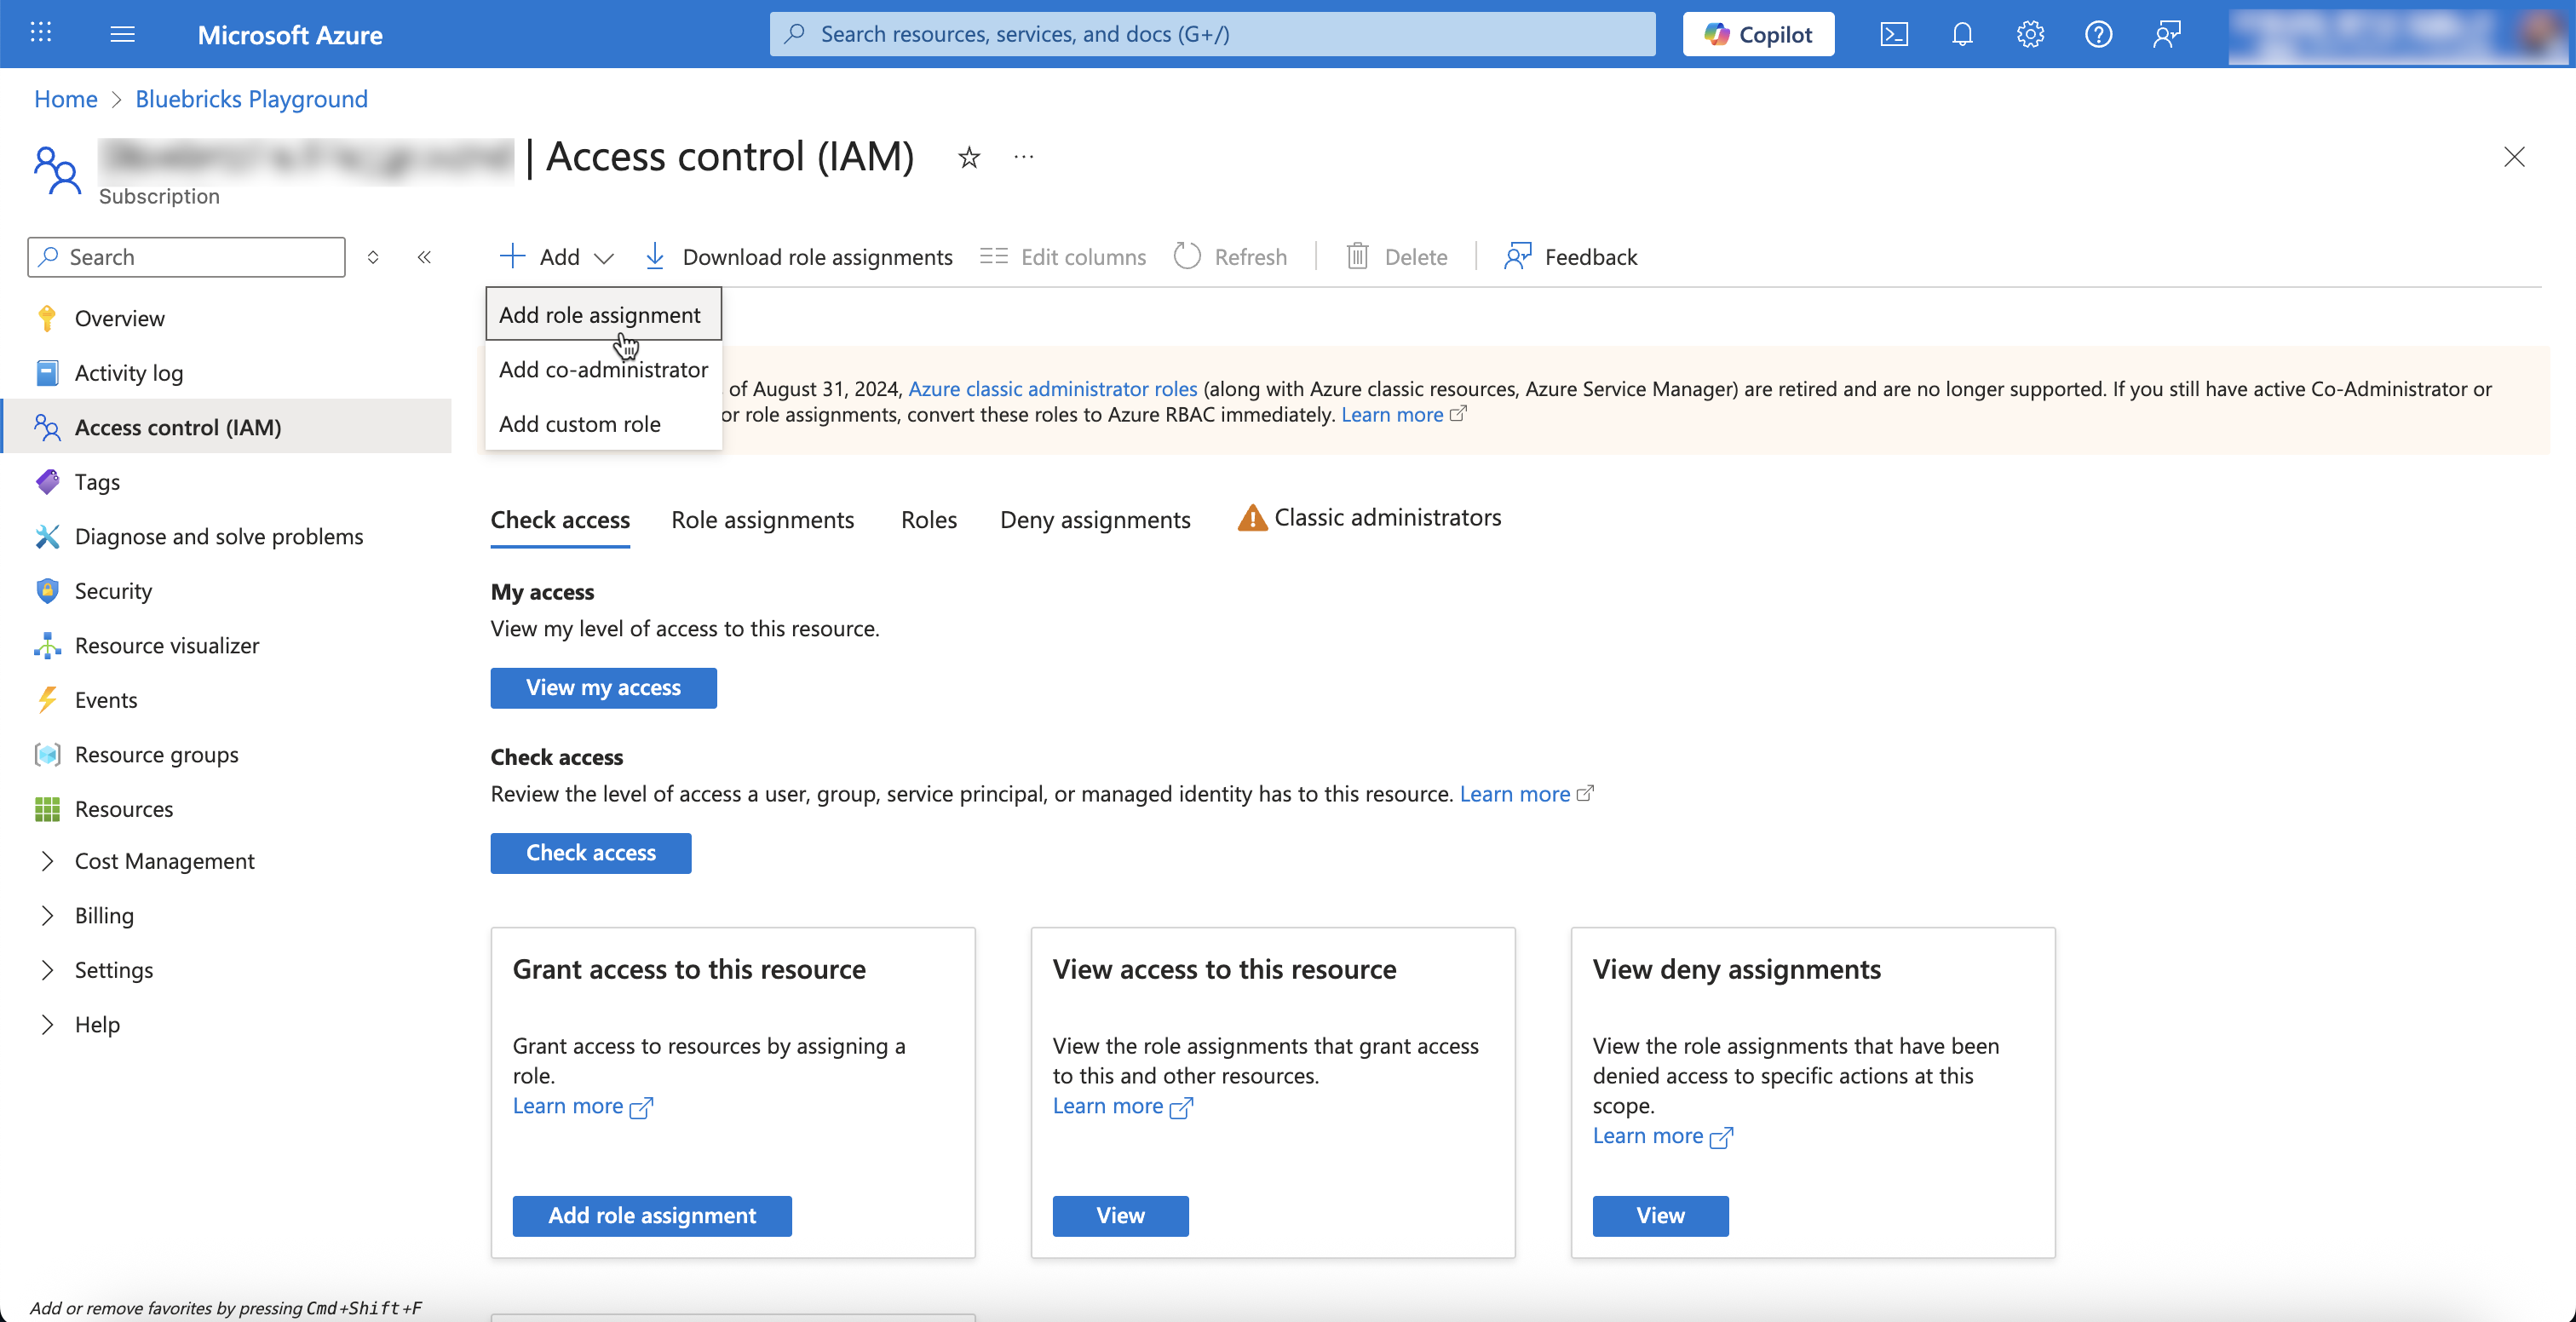
1. Navigate to "Subscriptions" and choose the subscription you want to connect to Bluebricks\\

   <figure><img src="https://454695563-files.gitbook.io/~/files/v0/b/gitbook-x-prod.appspot.com/o/spaces%2FL1aVoJ67VgVl8Uv83TuE%2Fuploads%2Fgit-blob-accf4006e62525914d57ba60781c16c977f97d7b%2FCleanShot%202025-10-19%20at%2017.08.51%402x.png?alt=media" alt=""><figcaption></figcaption></figure>
2. Choose "Access Control (IAM)"
3. Choose "Add" and then "Add [Role Assignment](https://learn.microsoft.com/en-us/azure/role-based-access-control/role-assignments-portal)"

   <figure><img src="https://454695563-files.gitbook.io/~/files/v0/b/gitbook-x-prod.appspot.com/o/spaces%2FL1aVoJ67VgVl8Uv83TuE%2Fuploads%2Fgit-blob-d3b6fd92251810e6d06e85e9c9128885210a40df%2FCleanShot%202025-10-19%20at%2017.27.07%402x.png?alt=media" alt=""><figcaption></figcaption></figure>
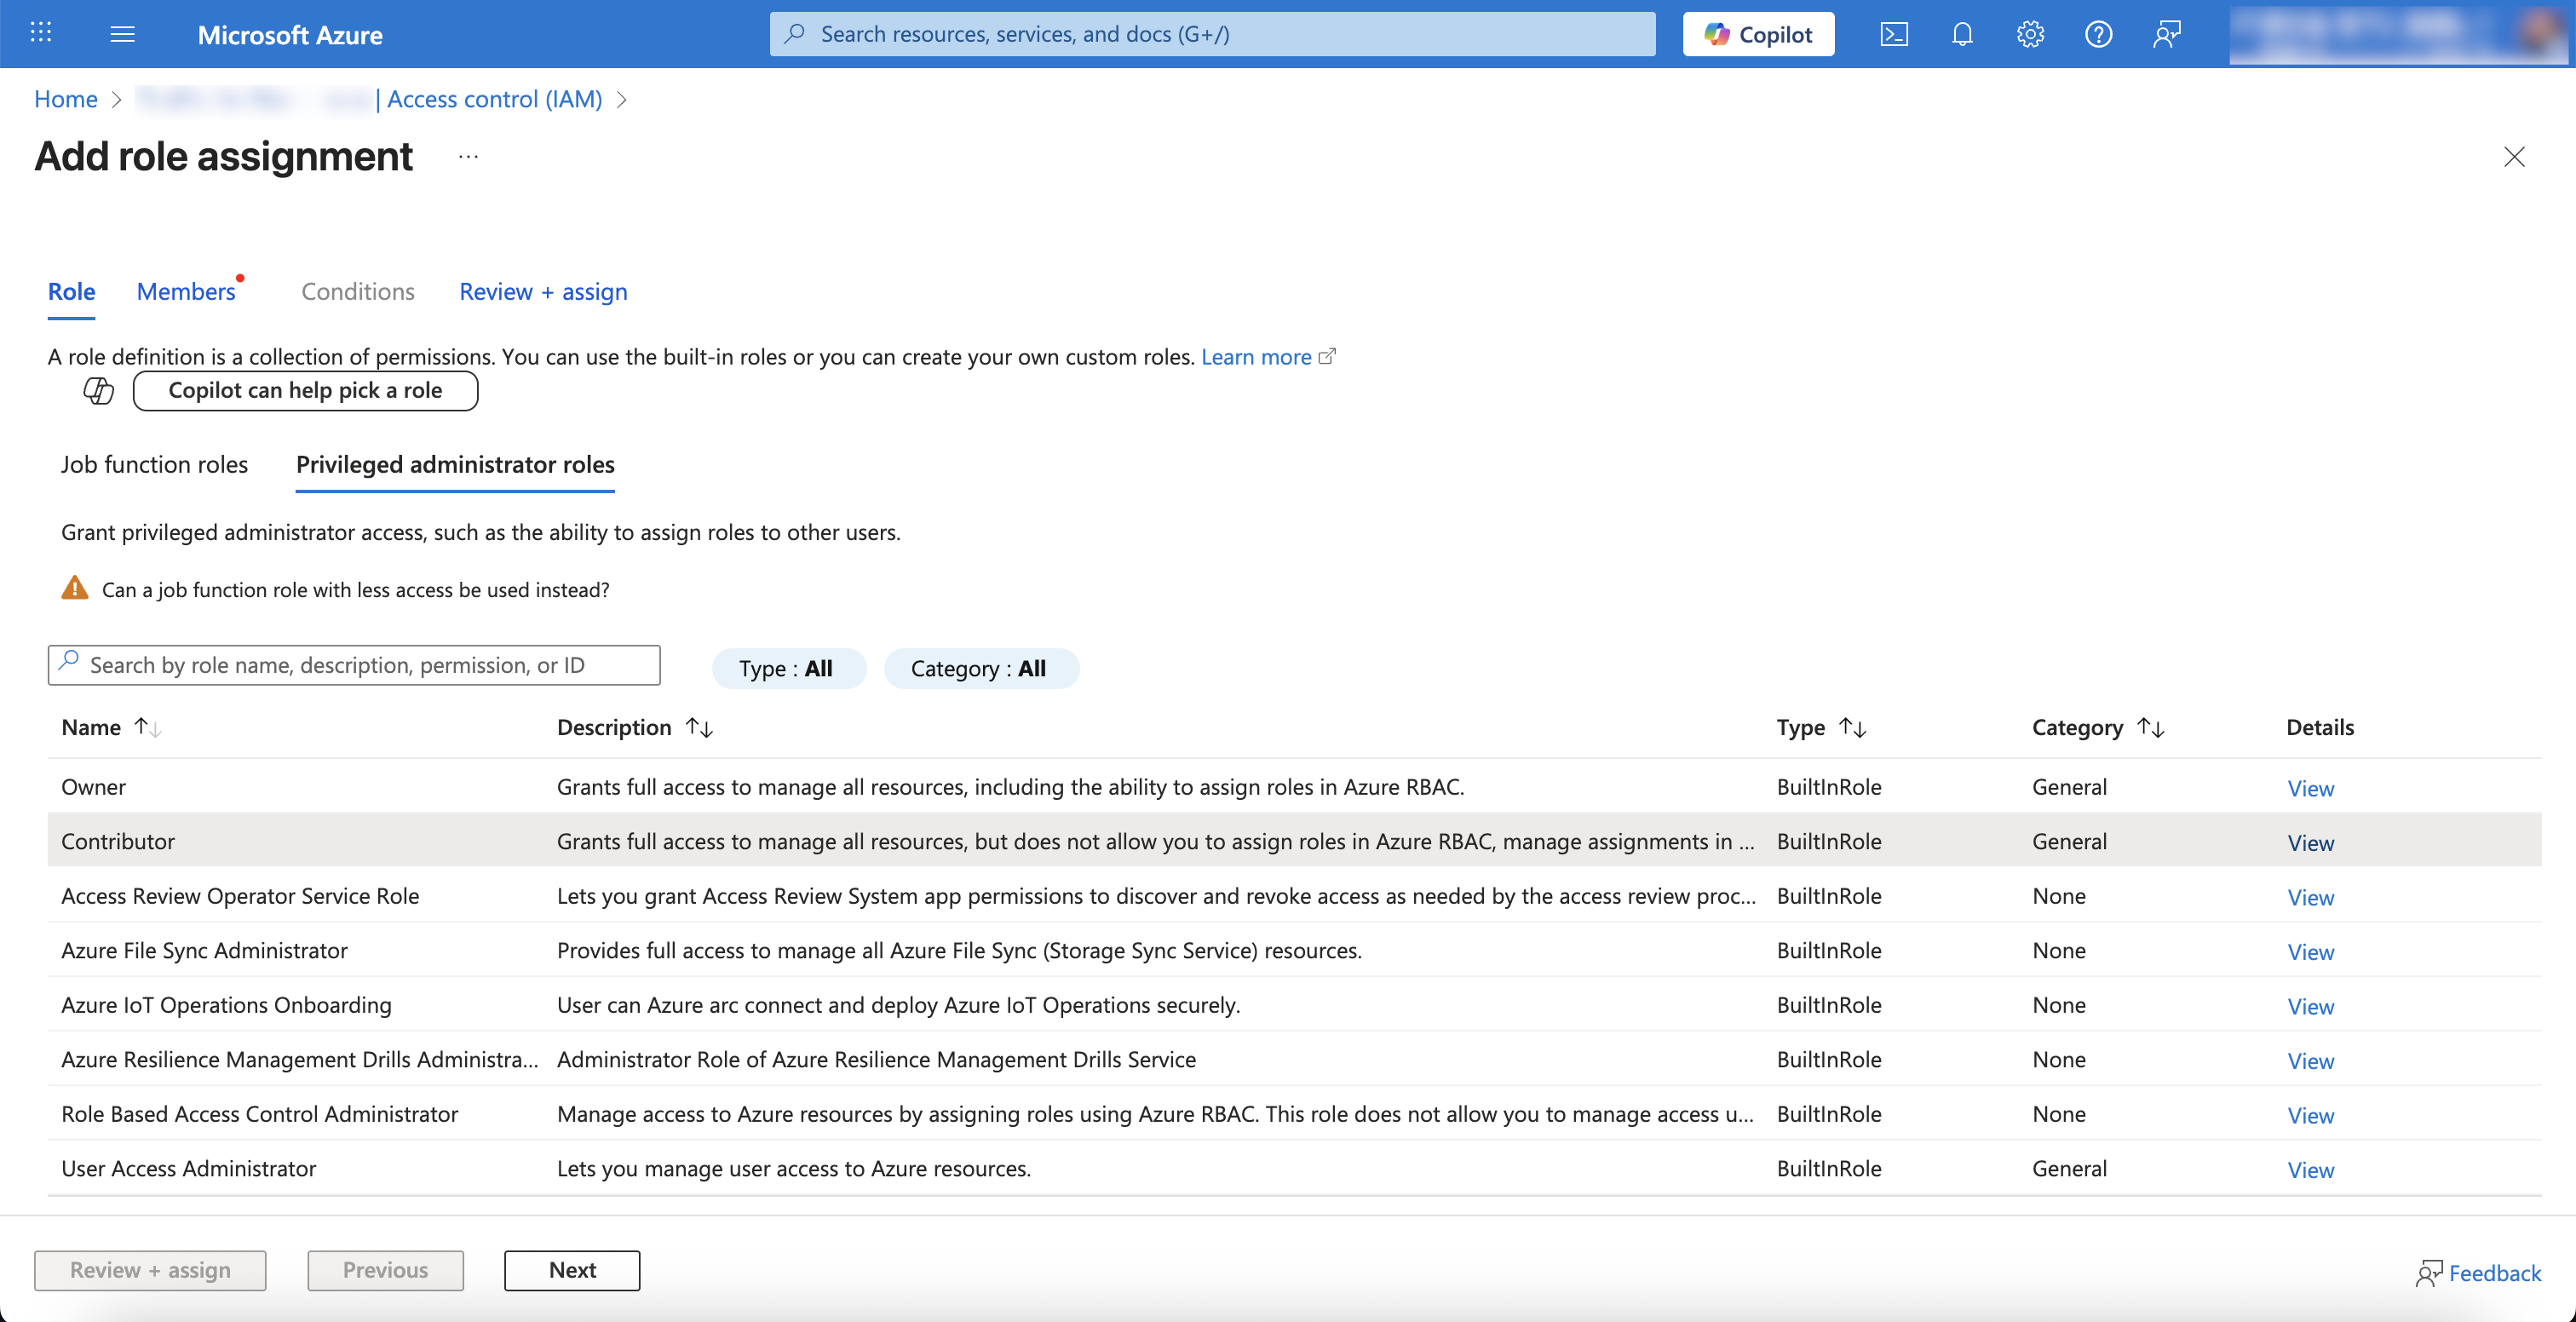
4. Choose the [appropriate Role](https://learn.microsoft.com/en-us/azure/role-based-access-control/built-in-roles/privileged#contributor) to allow Bluebricks to create Resources in Azure (We recommend `contributor` under "Privileged administrator roles")

   <figure><img src="https://454695563-files.gitbook.io/~/files/v0/b/gitbook-x-prod.appspot.com/o/spaces%2FL1aVoJ67VgVl8Uv83TuE%2Fuploads%2Fgit-blob-2259c6fa940293cb4ee5df209d3b9676c57d3bce%2FCleanShot%202025-10-19%20at%2017.31.57%402x.png?alt=media" alt=""><figcaption></figcaption></figure>
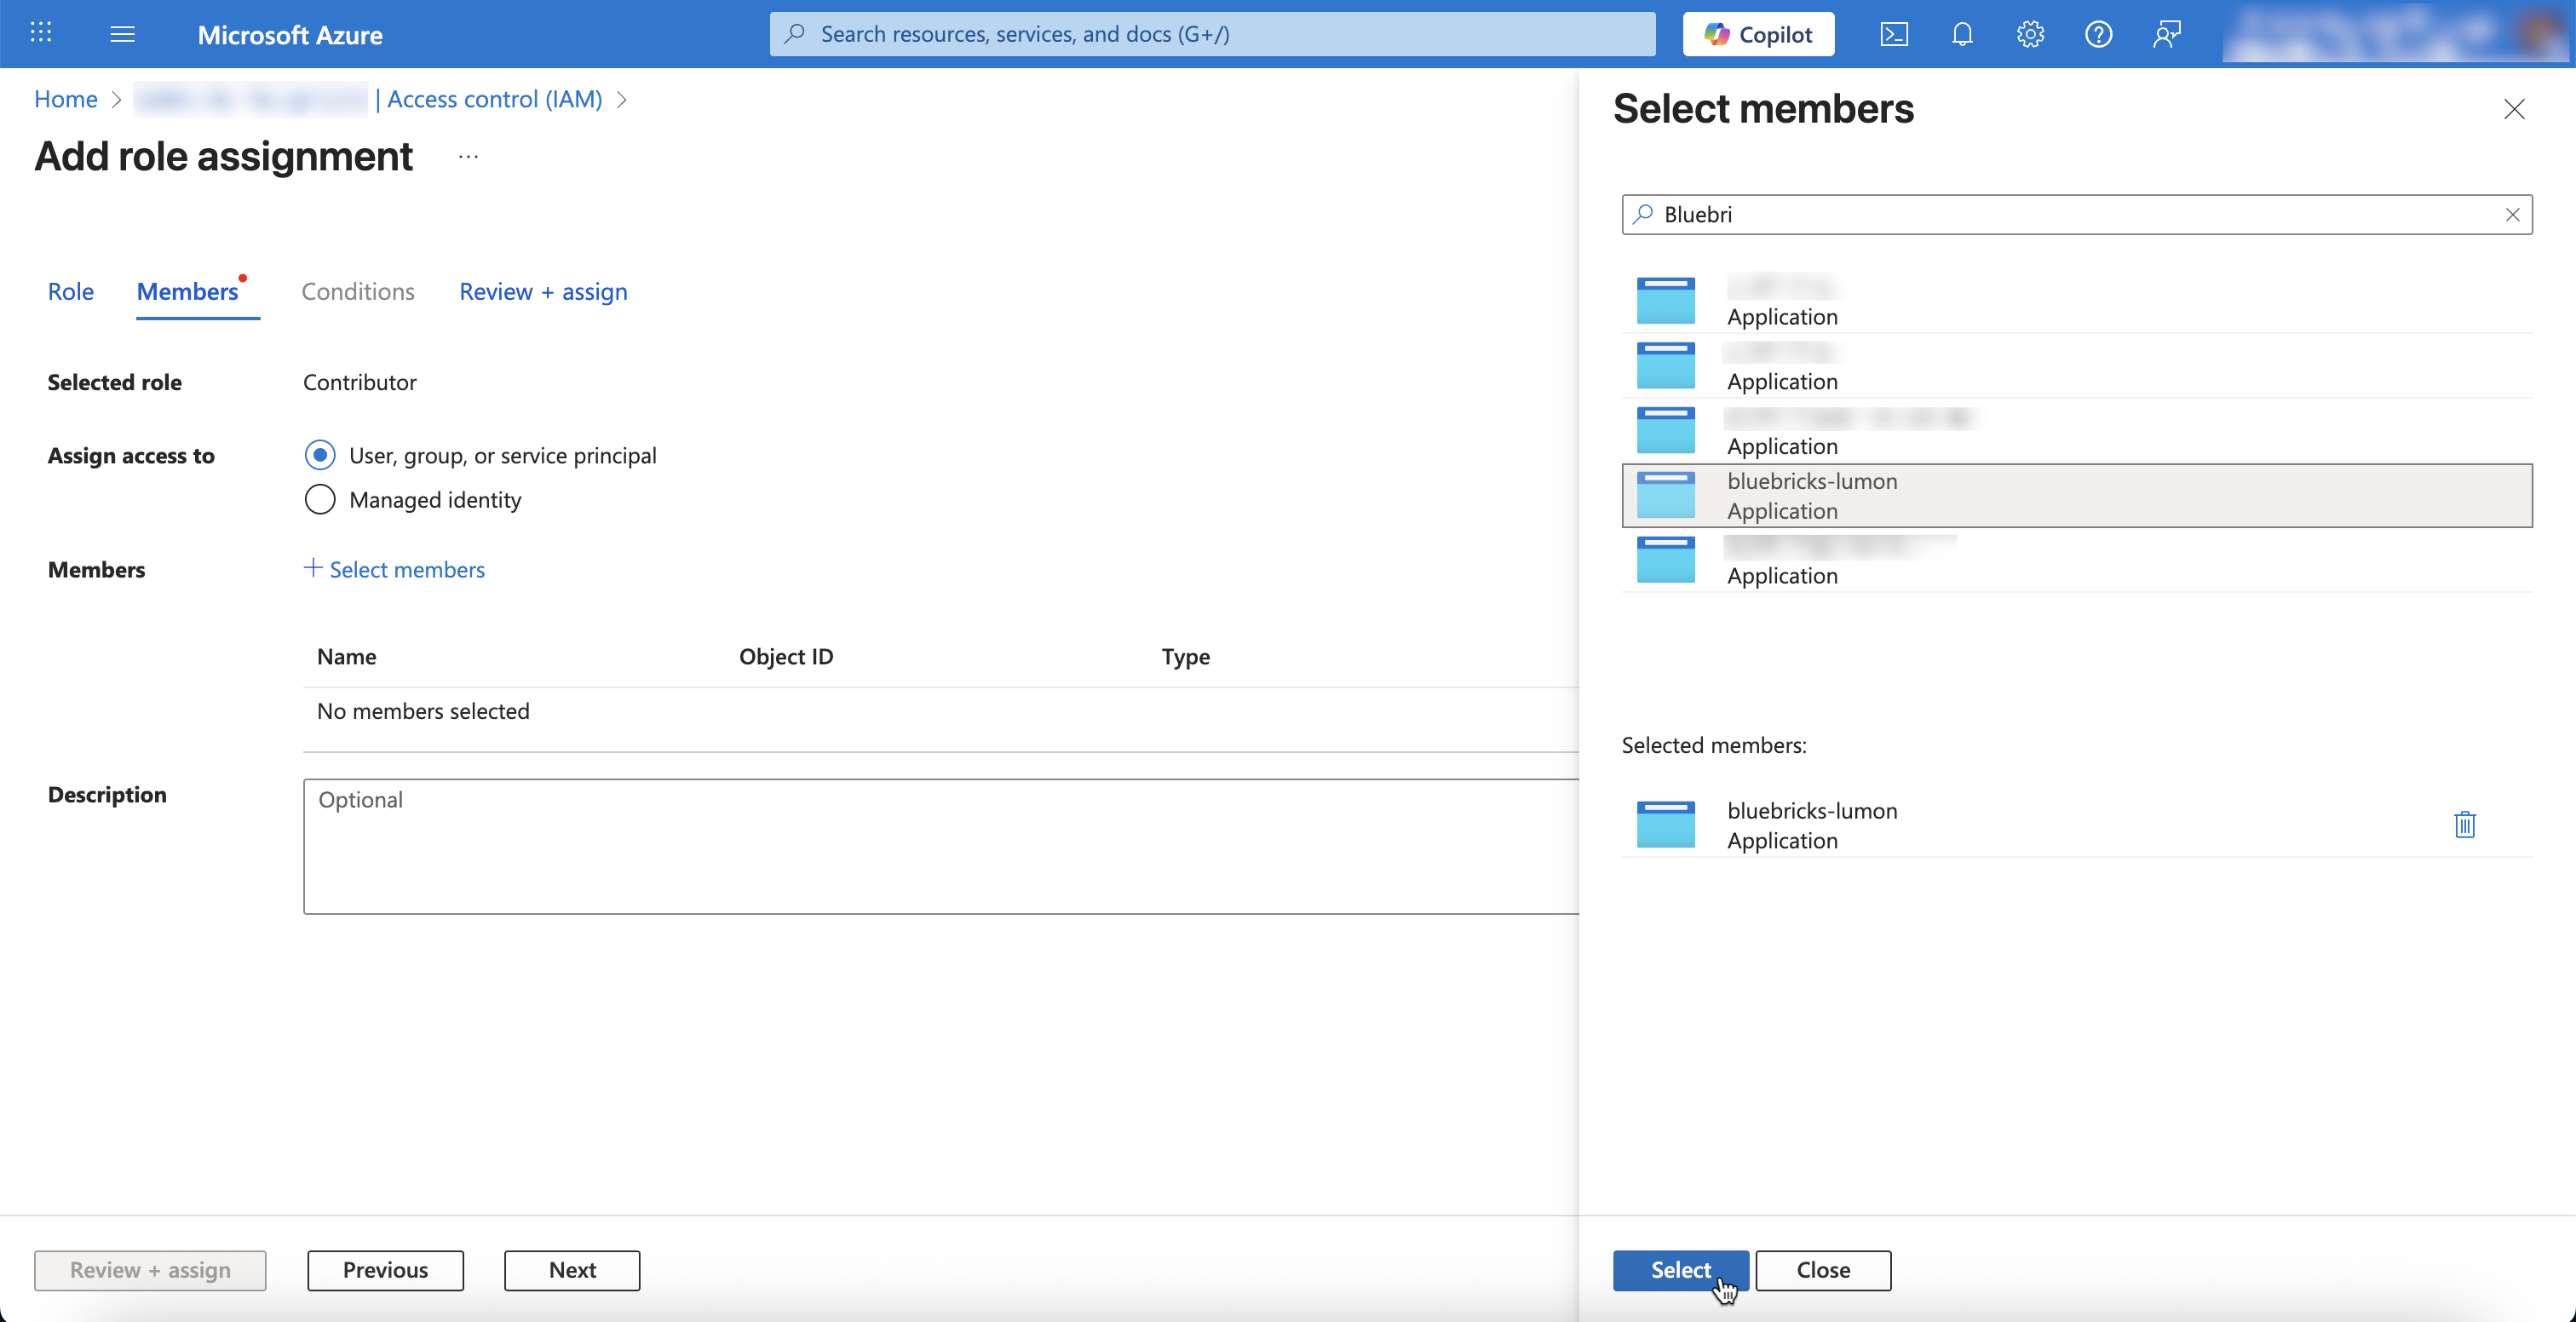
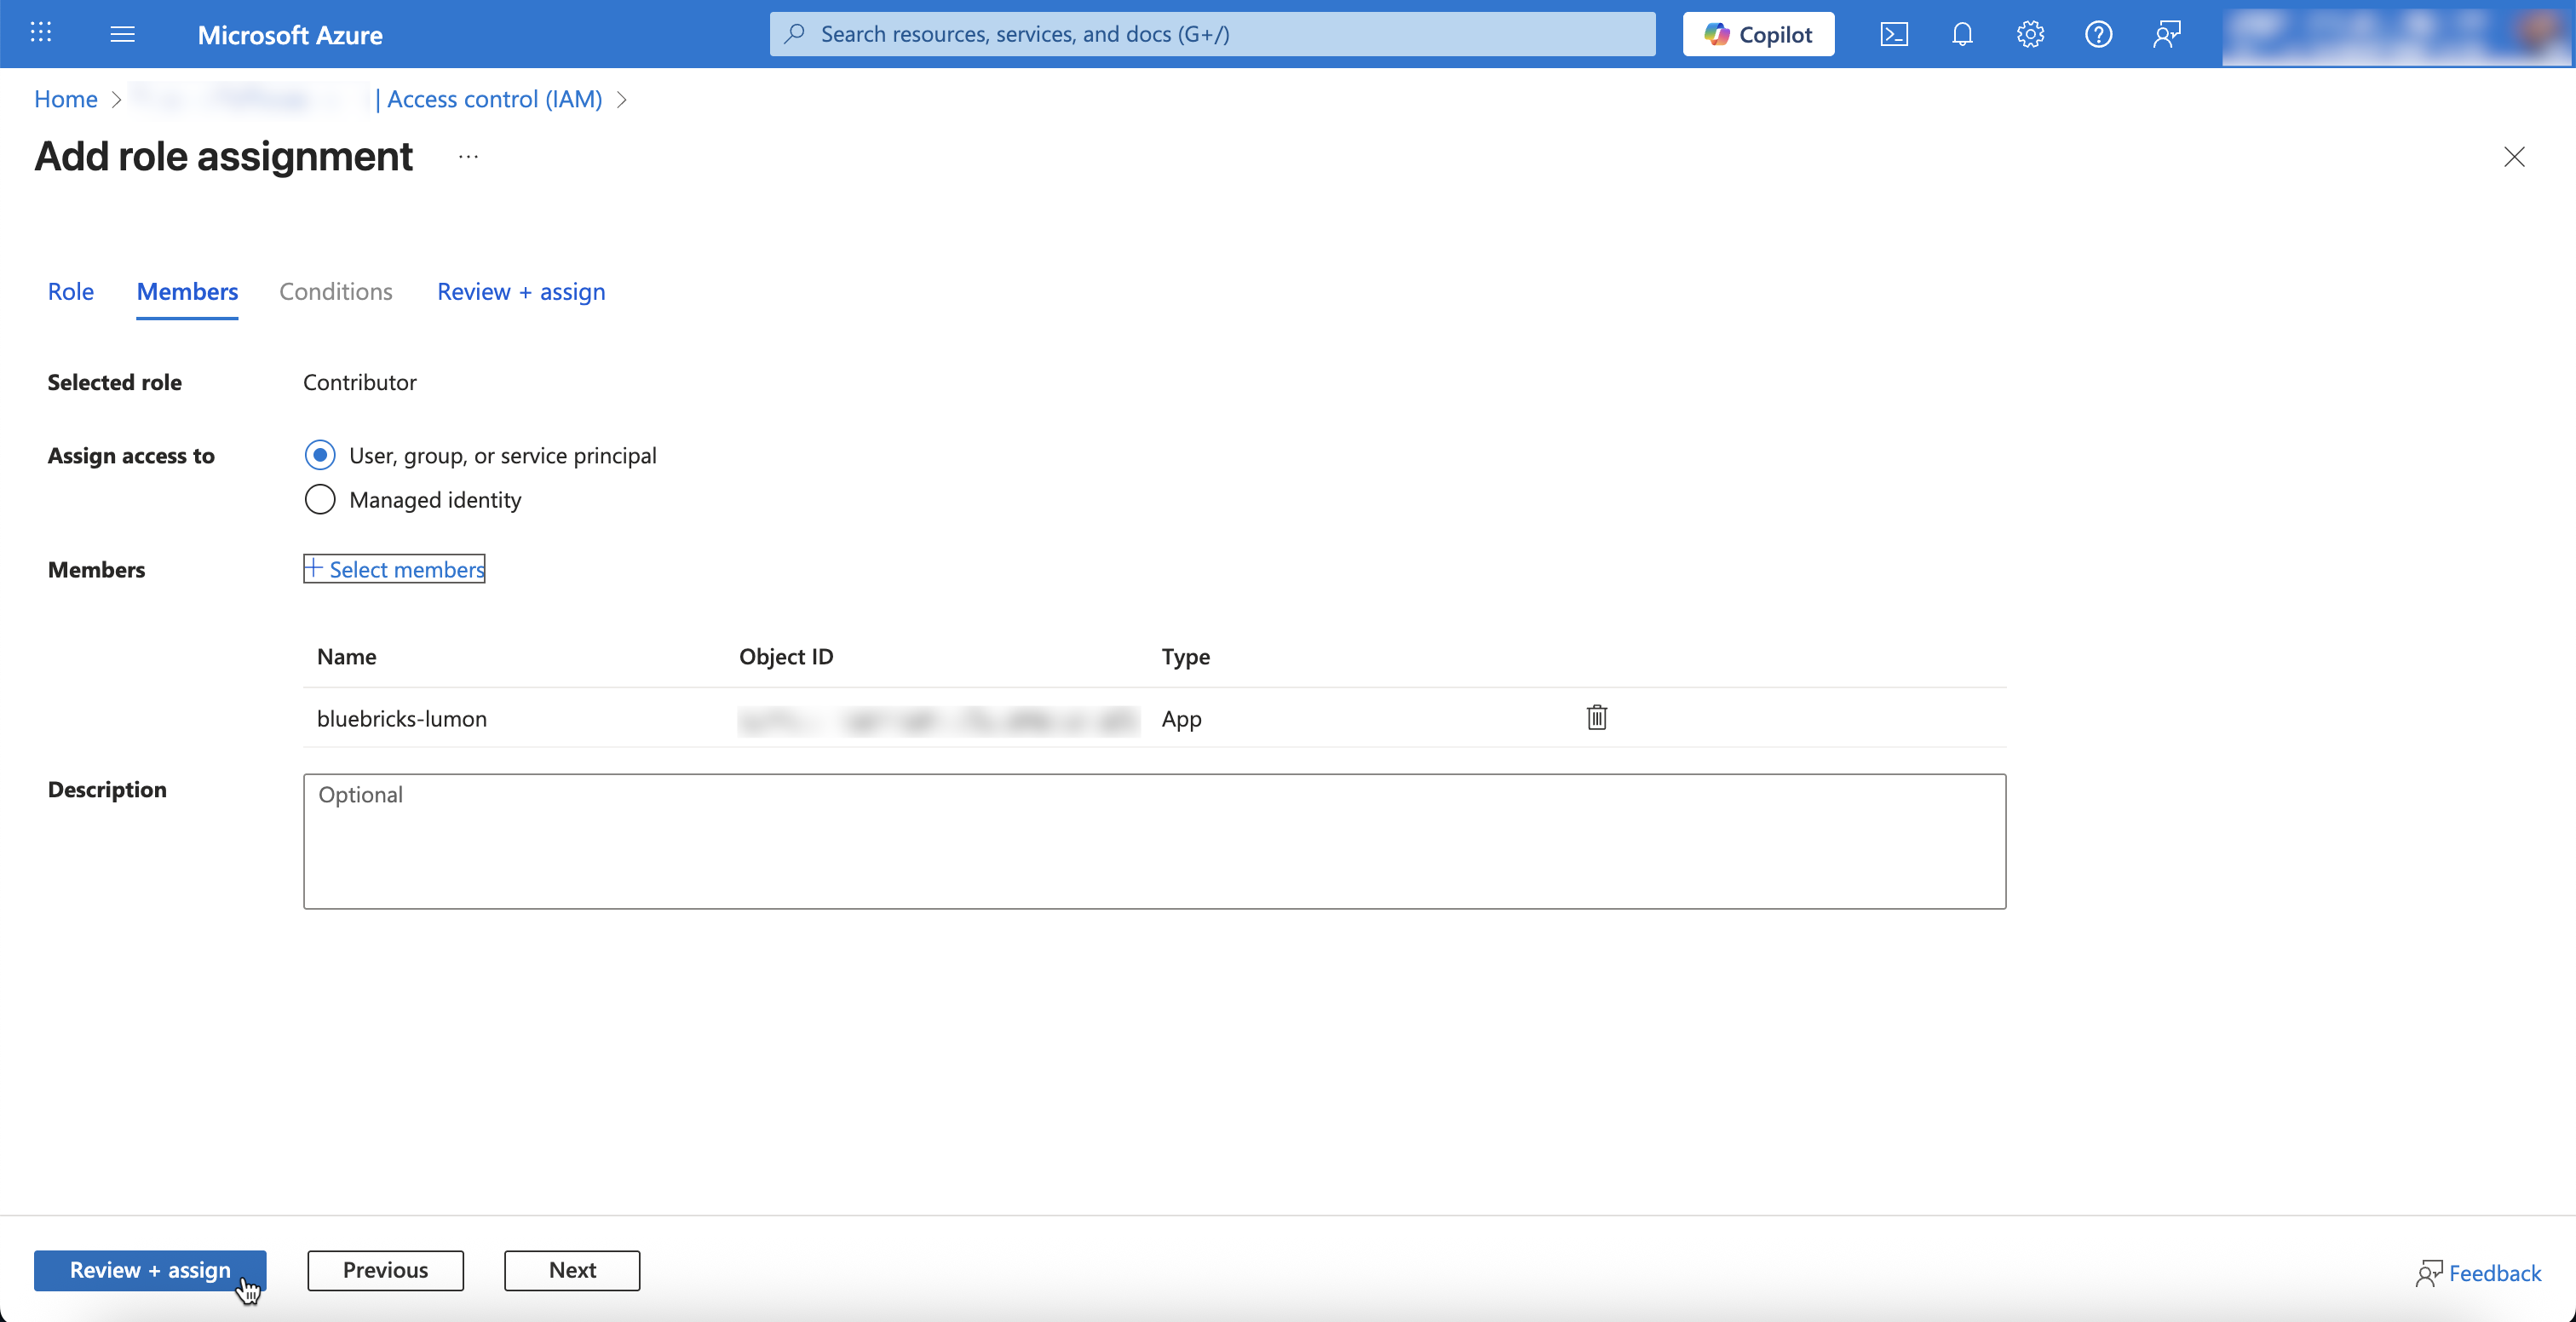
5. Go to Members and search and select the Name of the service principal created in Step 2.

   <figure><img src="https://454695563-files.gitbook.io/~/files/v0/b/gitbook-x-prod.appspot.com/o/spaces%2FL1aVoJ67VgVl8Uv83TuE%2Fuploads%2Fgit-blob-3ab774e22fd50ef7b95a387d910e54056eff8e4b%2FCleanShot%202025-10-19%20at%2017.34.01%402x.png?alt=media" alt=""><figcaption></figcaption></figure>
6. Press Review and Assign

   <figure><img src="https://454695563-files.gitbook.io/~/files/v0/b/gitbook-x-prod.appspot.com/o/spaces%2FL1aVoJ67VgVl8Uv83TuE%2Fuploads%2Fgit-blob-aa7dd8f2622dc0ab159ec7e32c11a08881b5b404%2FCleanShot%202025-10-19%20at%2017.34.59%402x.png?alt=media" alt=""><figcaption></figcaption></figure>

### Step 4: Save the Cloud Connection on Bluebricks

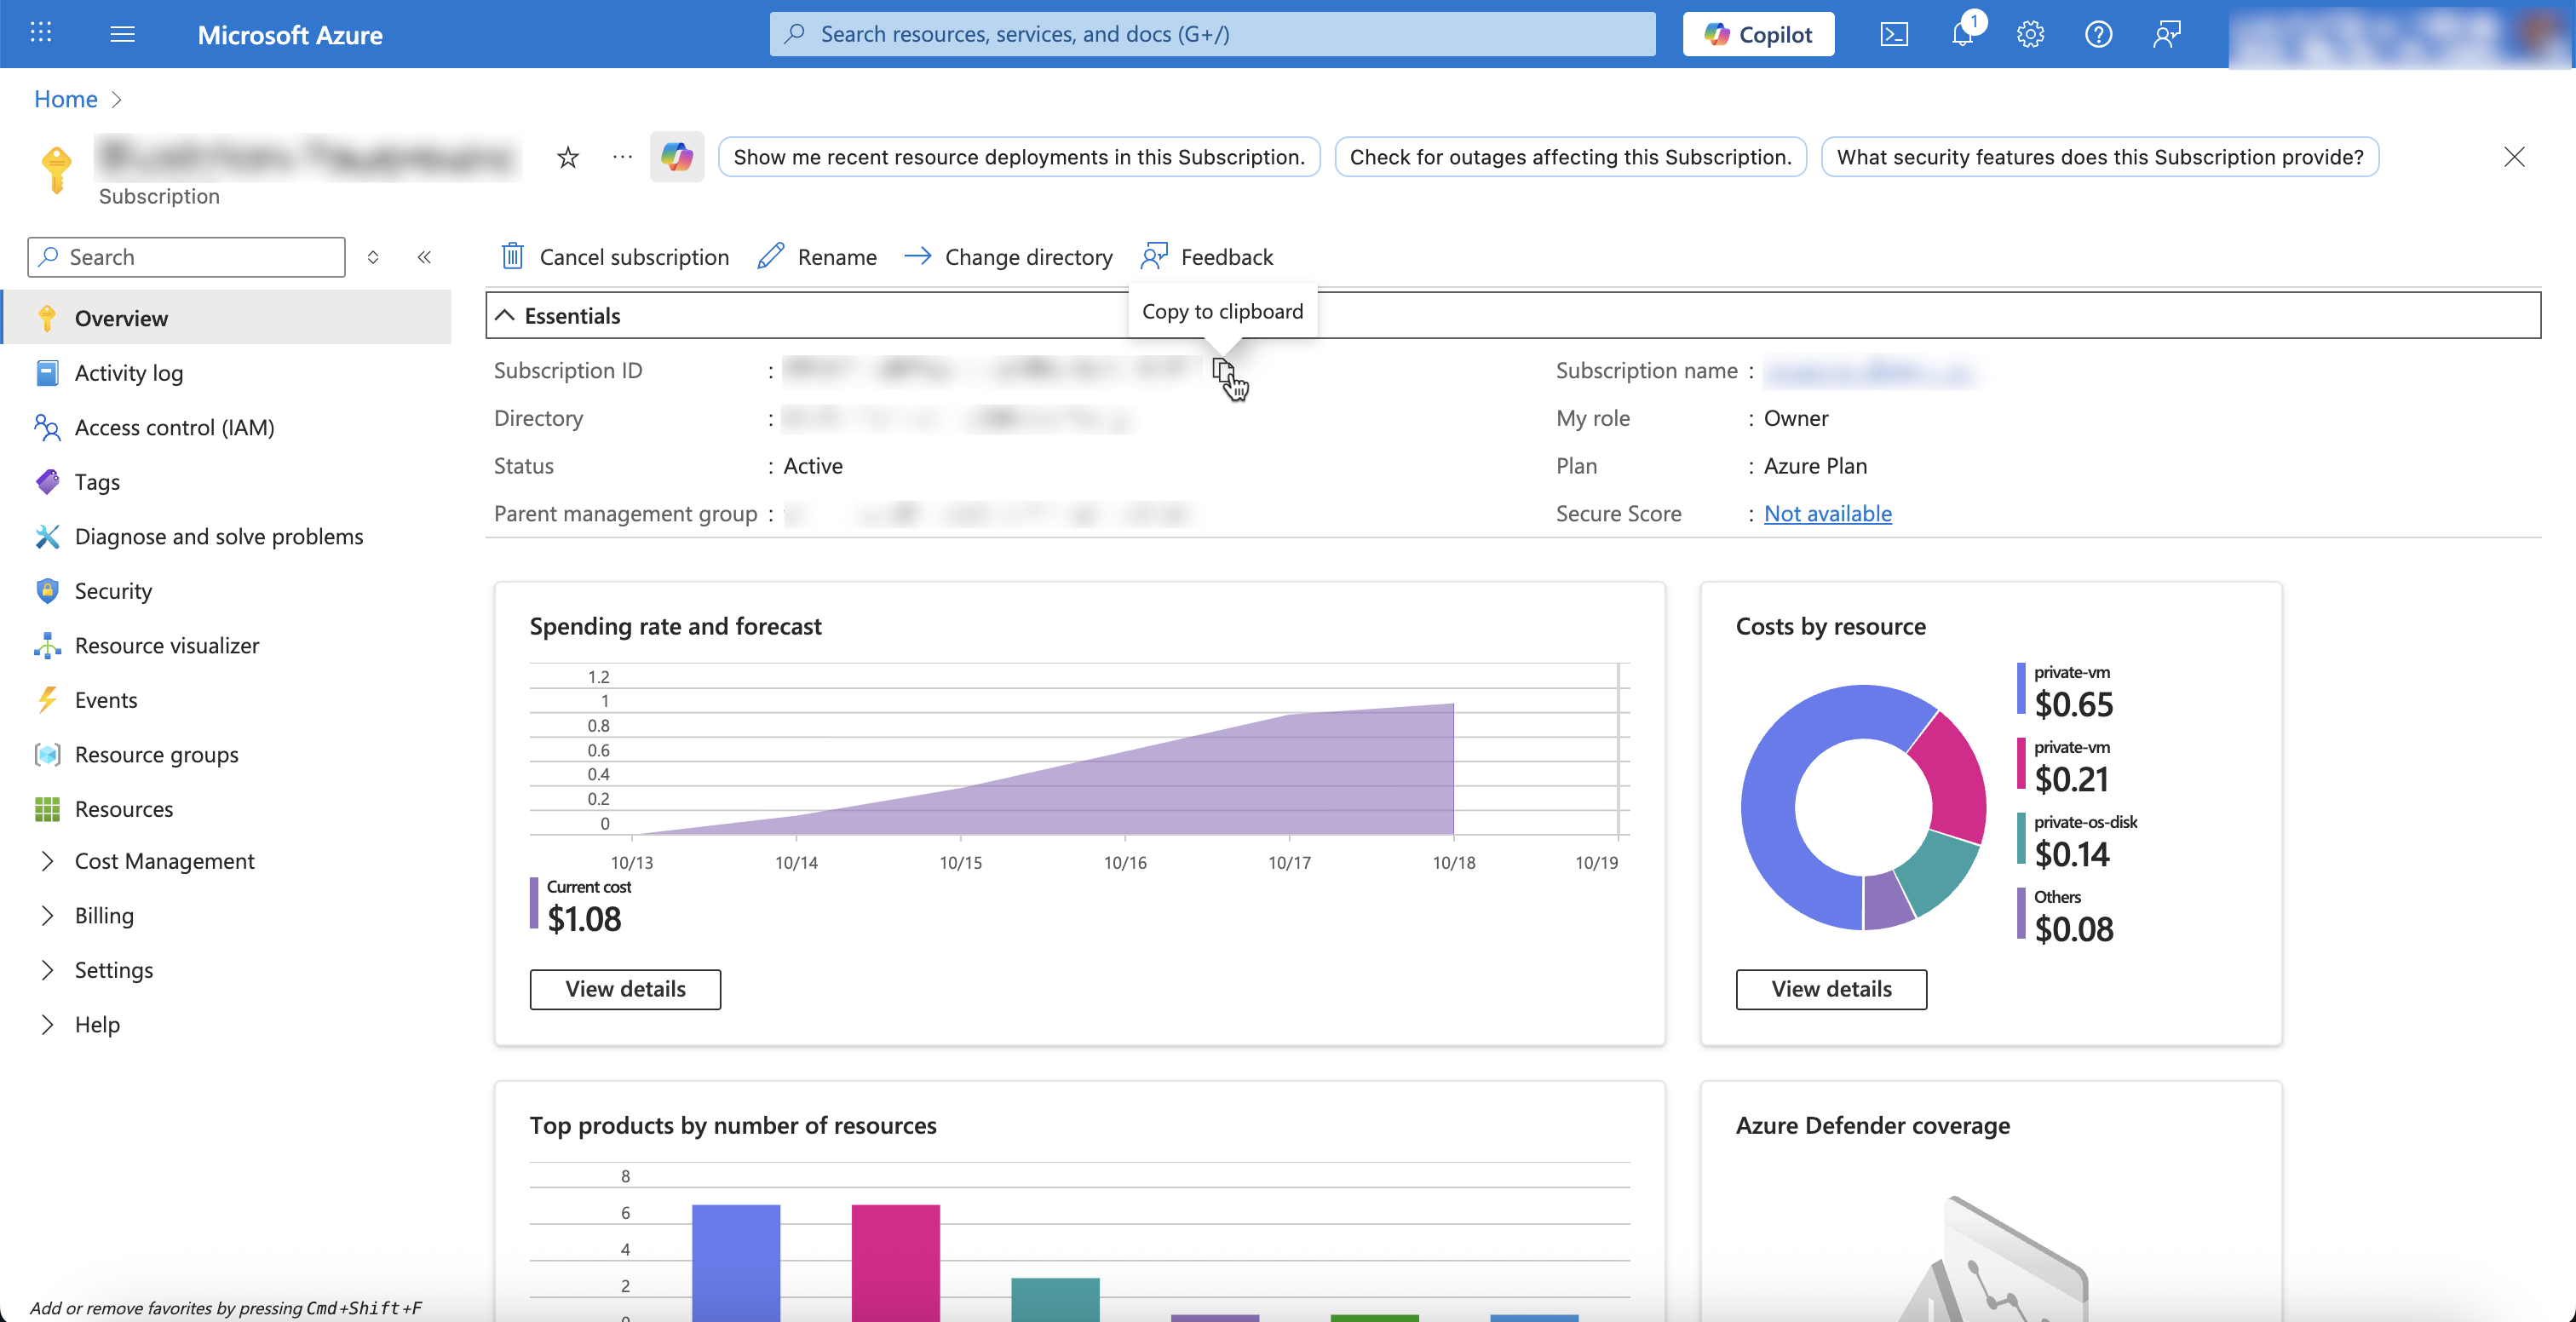
1. Navigate to the "Overview" page of the subscription and copy the "Subscription ID"

   <figure><img src="https://454695563-files.gitbook.io/~/files/v0/b/gitbook-x-prod.appspot.com/o/spaces%2FL1aVoJ67VgVl8Uv83TuE%2Fuploads%2Fgit-blob-03acb0cec4a47f979f2531952db768e9f4d54bfa%2FCleanShot%202025-10-19%20at%2017.36.51%402x.png?alt=media" alt=""><figcaption></figcaption></figure>
2. Go back to the Environment page on Bluebricks and copy the subscription ID
3. Press Save

   <figure><img src="https://454695563-files.gitbook.io/~/files/v0/b/gitbook-x-prod.appspot.com/o/spaces%2FL1aVoJ67VgVl8Uv83TuE%2Fuploads%2Fgit-blob-df934e7bdd987f02e79254dc69c1751da1f7df88%2FCleanShot%202025-10-19%20at%2017.38.40%402x.png?alt=media" alt=""><figcaption></figcaption></figure>

You Finished connecting your Azure subscription to Bluebricks and you now can create resources on Azure suing Bluebricks.
